What’s in this guide
- Prerequisites: What You'll Need
- How Long Does a Hot Tub Take to Heat Up?
- How to Heat a Hot Tub Faster: 6 Proven Methods
- Heating Hacks for Inflatable Hot Tubs
- Off-Grid and Cost-Free Hot Tub Heating Options
- Common Mistakes That Slow Down Your Heating
- Frequently Asked Questions
- Fastest Heating Starts With Heat Retention
“I’m very inpatient 🤪 — I have it filled waiting for it to get to 20 degree so” — r/hottub community member
If that sounds familiar, you’re not alone — and there are proven ways to cut that wait time significantly. Every hour your hot tub spends heating is an hour you’re not relaxing in it. Worse, a poorly optimised heat-up also wastes electricity, running your heater hard against heat you’re actively losing through the surface, the sides, and the air jets.
The good news: learning how to heat a hot tub faster doesn’t require expensive upgrades. Most of the methods in this guide cost nothing and take under 15 minutes to implement. In this guide, you’ll find clear heating time expectations, the 6 core steps of The Heat Trap Method, inflatable-specific hacks, and off-grid heating options — everything you need to stop watching the thermometer and start soaking sooner.
Prerequisites: What You’ll Need
Before diving into the 6 steps, make sure you have these basics in place:
- A working hot tub with a functional heater element — if your tub isn’t heating at all, first troubleshoot hot tub heating issues before applying these speed tips
- A well-fitting insulated cover — hard-shell covers are preferred over soft covers for maximum heat retention
- A floating thermal blanket (optional but highly recommended) — a thin insulating sheet that sits directly on the water surface beneath your cover, adding a second layer of heat retention
- A garden hose — ideally connectable to an indoor hot tap for smarter filling
- Basic filter cleaning tools — a garden hose for rinsing; a replacement filter cartridge if your current filter is over 12 months old
- 10–15 minutes to implement these steps before your next heat-up session
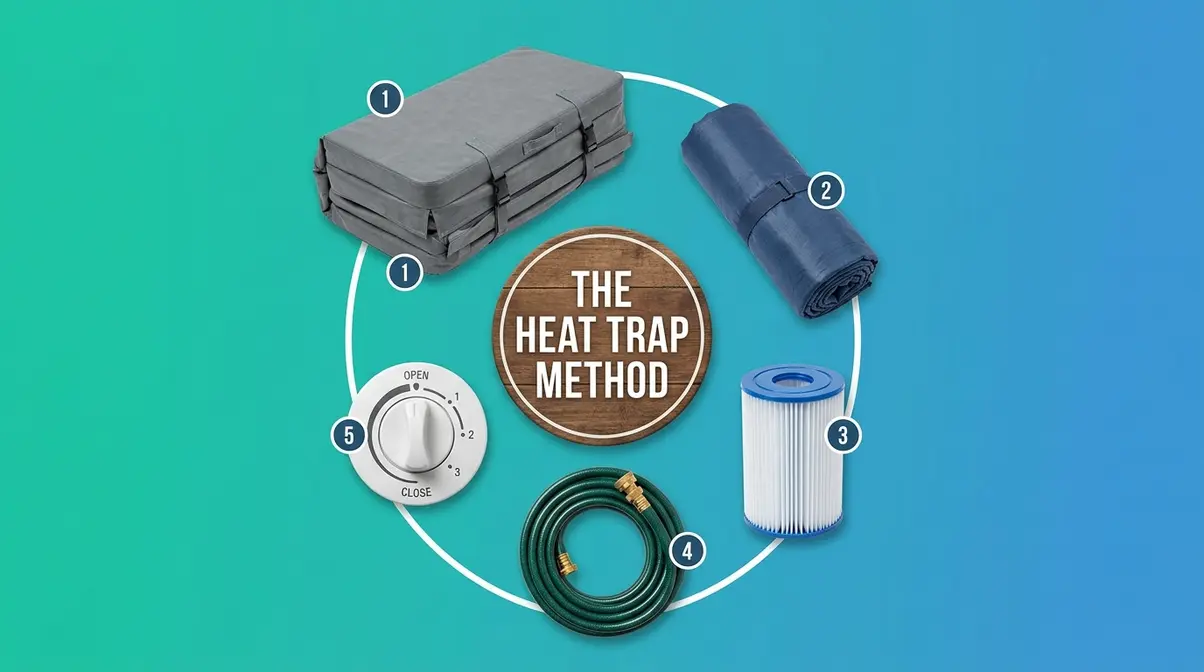
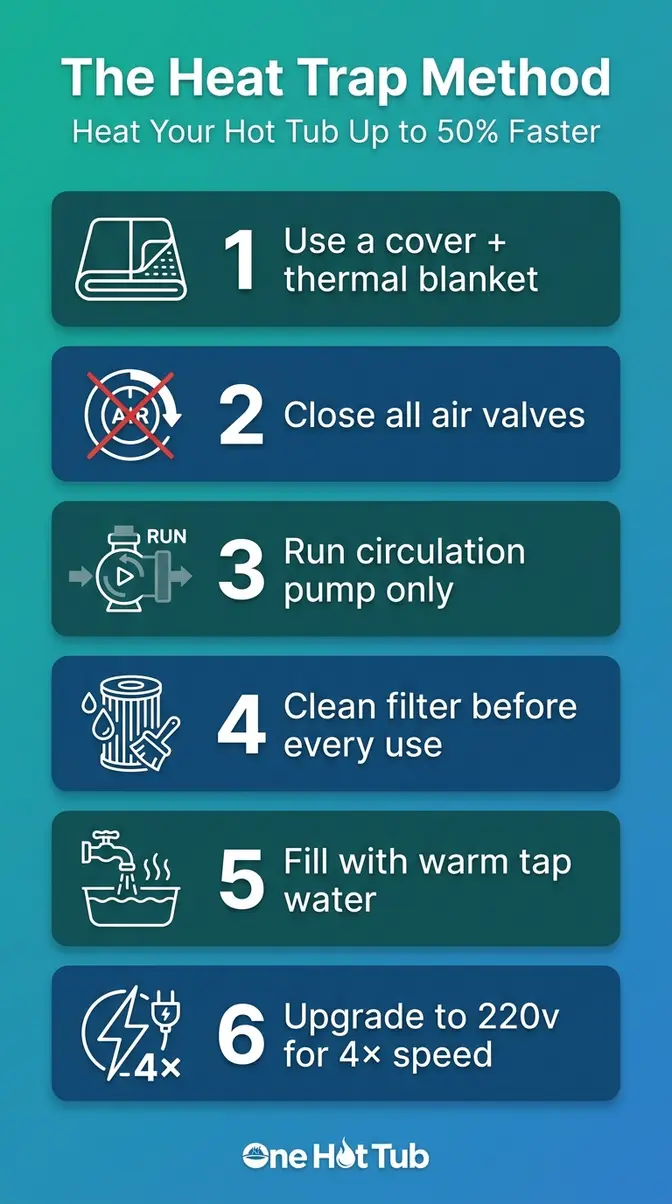
Learning how to heat a hot tub faster comes down to one core principle: The Heat Trap Method — block every source of heat loss while maximising your heater’s efficiency at the same time. Hot tubs typically heat at 3–6°F (1.5–3°C) per hour, but the right combination of steps can cut that time significantly.
- Always use your cover + thermal blanket — pool and spa covers can cut heating costs by 50–70% (U.S. Department of Energy, 2026)
- Close all air valves completely — open air injection valves introduce cold outside air and can meaningfully slow heating
- Use the circulation pump, not the massage jets — high-speed jets aerate the water and lower surface temperature, they do not heat it
- Clean your filter before every heat-up — a clogged filter restricts water flow to the heater element, adding hours to your wait
- Fill with warm water from an indoor tap to save 1–2 hours on a dead cold start
How Long Does a Hot Tub Take to Heat Up?
Most hot tubs heat at a rate of 3–6°F (approximately 1.5–3°C) per hour under normal conditions (Beninati Pools, 2026). That means a cold-start fill from 50°F (10°C) tap water to a target temperature of 104°F (40°C) could take anywhere from 8 to 18 hours — a range wide enough to be frustrating without context. The key is understanding which variables control that range, because most of them are within your control.
Average Heating Rate: What to Expect
A standard electric hot tub heater — the element that warms your water, typically rated between 1 kW and 6 kW depending on your model — is the primary driver of heating speed. According to WhatSpa? (2026), a well-maintained 220v spa with a 3–4 kW heater and a good cover can reach 100°F (38°C) from a cold start in 4–8 hours. A 110v plug-and-play model running a 1–1.5 kW heater may take 12–24 hours for the same result.
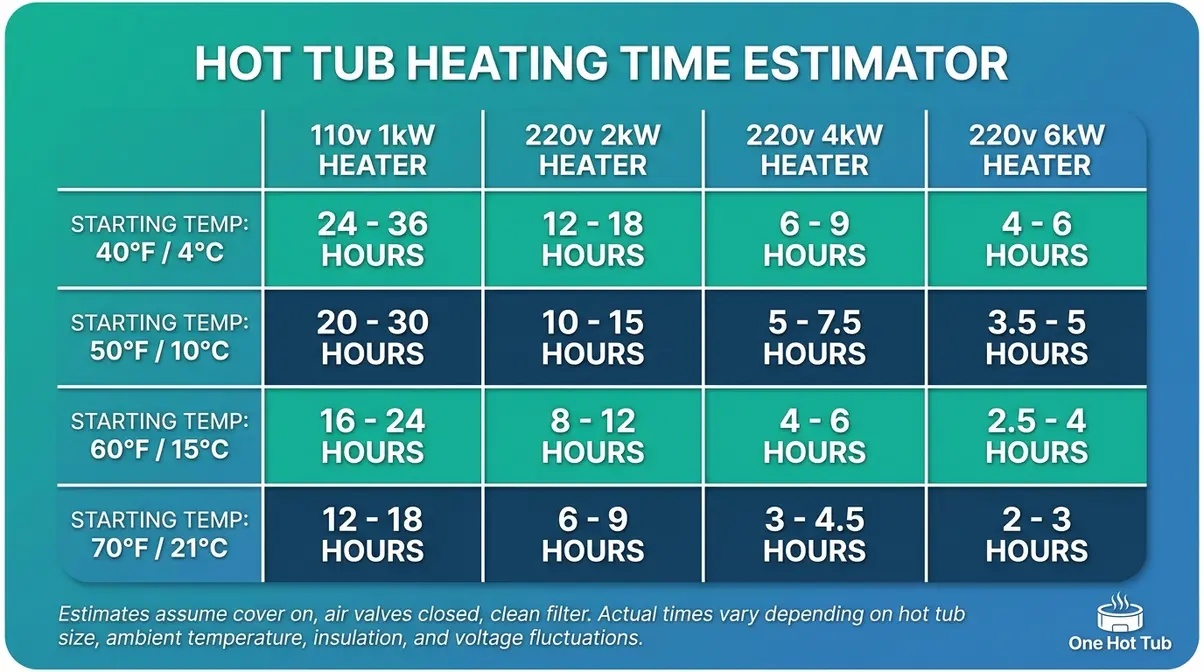
Use the table above as a starting reference. Your actual time will vary based on the five factors below.
5 Factors Controlling Heating Speed
Understanding these variables helps you identify which ones to tackle first. Our team at One Hot Tub evaluated the most commonly reported heating frustrations from the r/hottub community and cross-referenced them with manufacturer specifications — these five factors account for the majority of slow heat-up complaints:
| Factor | Impact on Heating Time | Your Control Level |
|---|---|---|
| Ambient air temperature | Cold air draws heat from the water surface and shell | Low (use cover + blanket to compensate) |
| Cover quality and fit | A damaged or ill-fitting cover is the single biggest heat leak | High (replace or repair) |
| Heater wattage | More kW = faster heating, directly proportional | Medium (upgrade possible) |
| Starting water temperature | Colder fill water = longer heat-up from the start | High (fill from warm tap) |
| Tub volume | Larger tubs hold more water and take longer | Low (fixed by your model) |
Ambient air temperature has an outsized effect that many owners underestimate. On a freezing winter night at 20°F (-7°C), your tub is actively losing heat through every surface — the cover, the shell, even the plumbing. Your heater isn’t just raising the temperature; it’s fighting to replace heat that’s escaping in real time. This is exactly why The Heat Trap Method focuses on sealing heat loss first, not just cranking up the heater.
Cover quality is the most controllable factor. A waterlogged, cracked, or poorly fitting cover can be responsible for up to 60% of total heat loss from a spa (U.S. Department of Energy, 2026). If your cover is more than five years old and feels noticeably heavier than it used to, the foam core has likely absorbed water and lost most of its insulating value.
Starting water temperature is the most immediately actionable variable on a dead cold start. Filling with 60°F (15°C) tap water instead of 45°F (7°C) cold hose water can shave 1–2 full hours off your initial heat-up time — a simple hack covered in Step 5.
110v vs 220v: How Much Faster Is 220v?
This is the question four out of five competitor articles fail to answer directly — so here it is plainly.
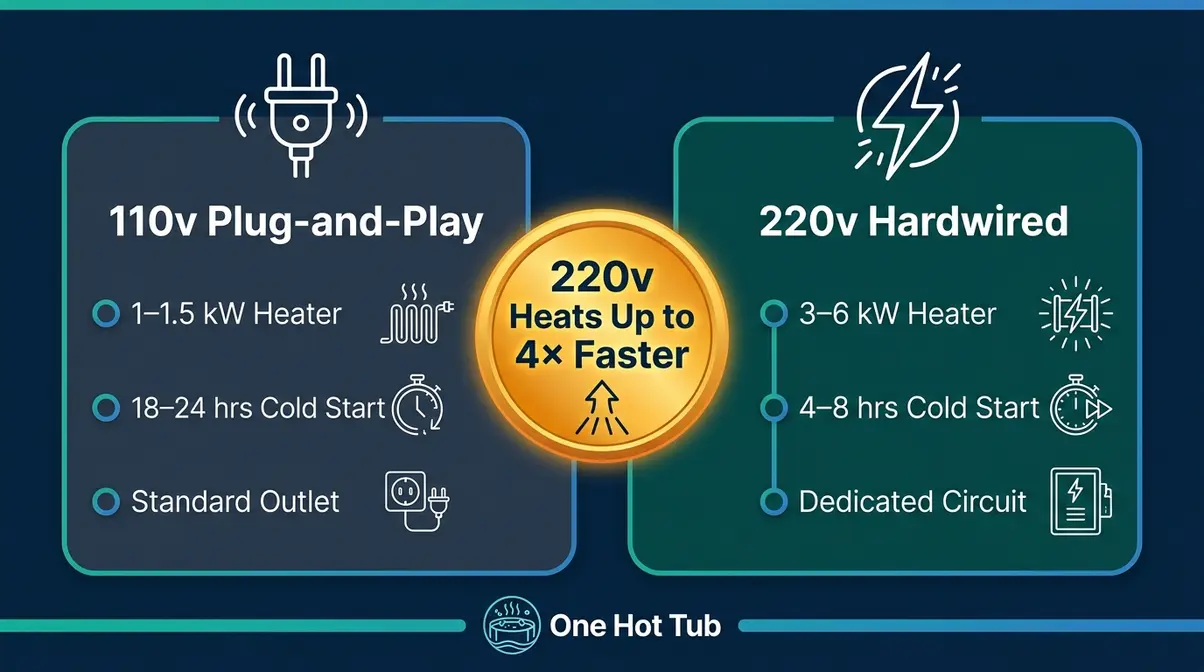
A 110v hot tub — also called a “plug-and-play” spa that runs on a standard household outlet — typically runs a 1–1.5 kW heater. A 220v hot tub — a hardwired spa that requires a dedicated electrical circuit and heats significantly faster — typically runs a 3–6 kW heater. That’s a 3–4× difference in raw heating power.
| Spec | 110v (Plug-and-Play) | 220v (Hardwired) |
|---|---|---|
| Typical heater wattage | 1–1.5 kW | 3–6 kW |
| Cold-start time (500 gal / 50°F) | 18–24 hours | 4–8 hours |
| Can run jets + heat simultaneously? | Usually not | Yes |
| Electrical requirement | Standard 15A outlet | Dedicated 240V circuit |
| Best for | Occasional use, portability | Regular use, faster heat-up |
The practical takeaway: if you own a 110v plug-and-play and consistently find the heating time frustrating, the single biggest upgrade you can make is switching to a 220v hardwired setup. The upfront cost of professional installation (typically $500–$1,500 for the electrical work) pays back in both speed and reduced running costs over time. Wellis (2026) notes that 220v spas with quality insulation and covers can maintain temperature between sessions with minimal reheating — making the per-session wait nearly negligible.
How to Heat a Hot Tub Faster: 6 Proven Methods
The Heat Trap Method works because it attacks the problem from both sides simultaneously: you seal every source of heat escape while maximising what your heater puts in. Apply all six steps together for the fastest possible heat-up time. Each step below explains not just what to do, but why it works.
Step 1: Use a Cover & Thermal Blanket
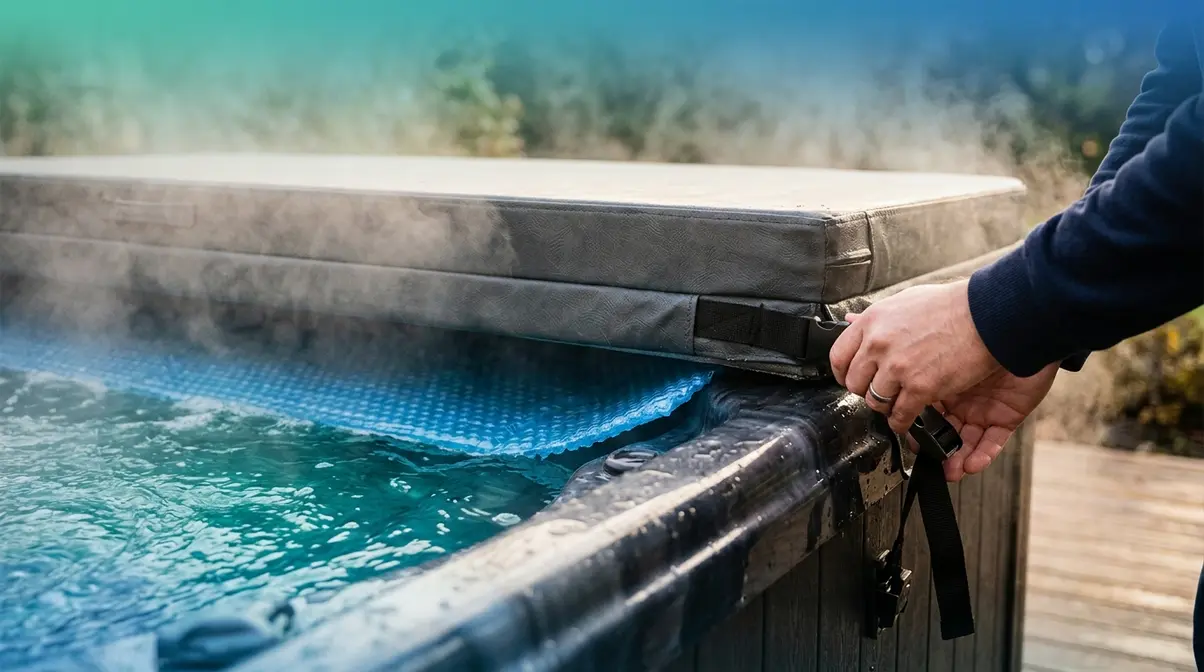
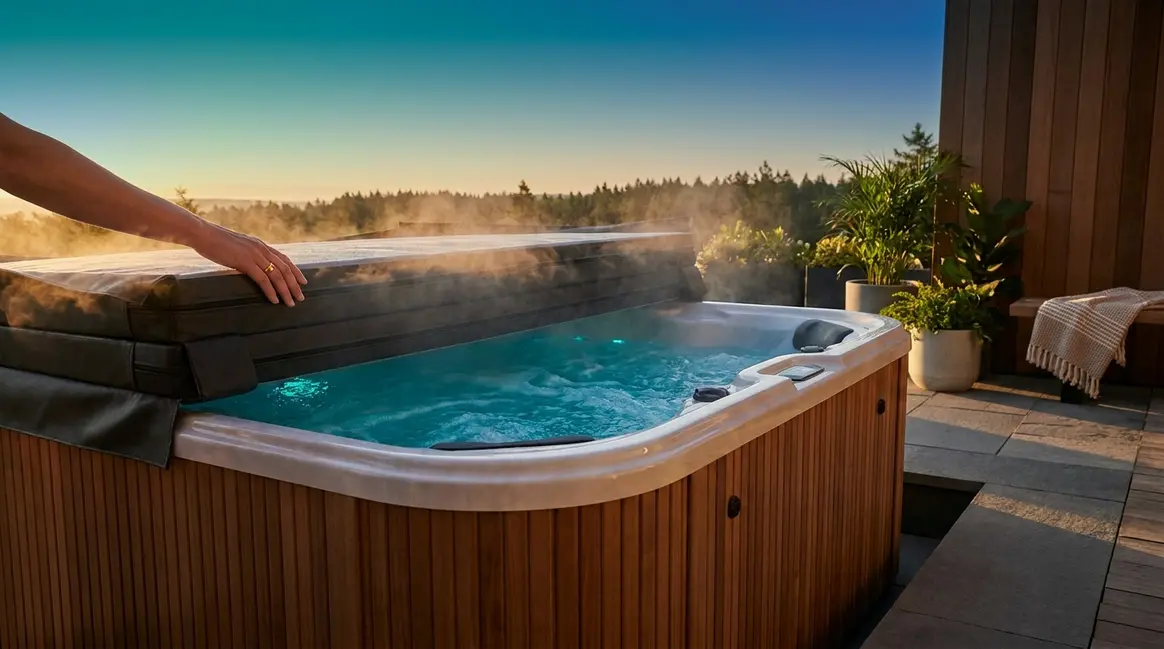
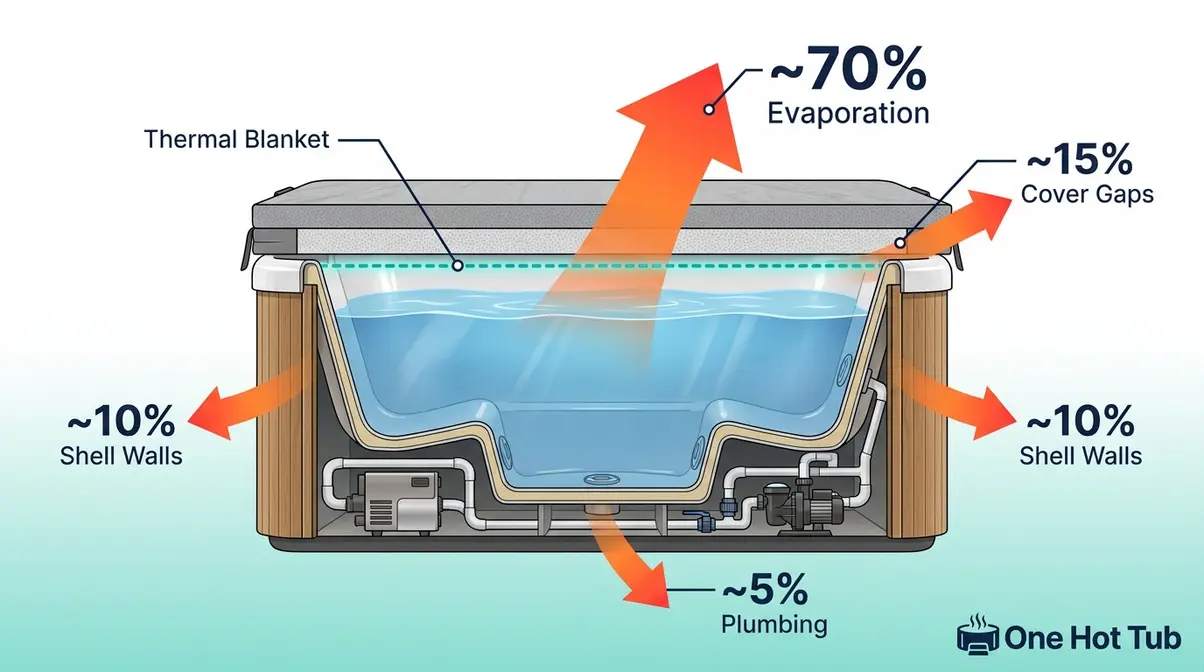
Your hot tub cover is the single most important piece of heating equipment you own — and most owners dramatically underestimate it. According to the U.S. Department of Energy, pool and spa covers can reduce heating costs by 50–70% by preventing evaporative heat loss. Evaporation is the dominant heat loss mechanism for any water surface, accounting for roughly 70% of total energy loss.
How to maximise your cover’s effectiveness:
- Inspect the cover before every heat-up session. Run your hands along the seams and edges — feel for gaps, cracks, or soft spots where the foam core has waterlogged.
- Ensure the cover sits flush on all four sides. Even a 1-inch gap on one edge allows significant heat and steam to escape continuously.
- Use the cover lock straps. Wind and thermal convection can lift an unlocked cover slightly, breaking the seal. Straps cost under $10 and make a measurable difference.
- Add a floating thermal blanket directly on the water surface before replacing the cover. This thin, bubble-wrap-style sheet creates a second insulating barrier between the water and the air gap inside the cover. It’s particularly effective for inflatable tubs with thin covers.
- Replace any cover with visible cracking, significant weight gain (waterlogging), or tears in the vinyl. A compromised cover actively works against you.
Why it works: The cover traps the warm, humid air layer directly above the water surface. That air layer acts as an additional insulating buffer — without it, every degree your heater adds is partially lost to the atmosphere. Adding a thermal blanket beneath the cover creates a second trapped air layer, compounding the effect.
For recommendations on replacement covers, see our guide to the best hot tub covers — including options for both hard-shell and inflatable tubs.
Step 2: Close Air Valves Before Heating
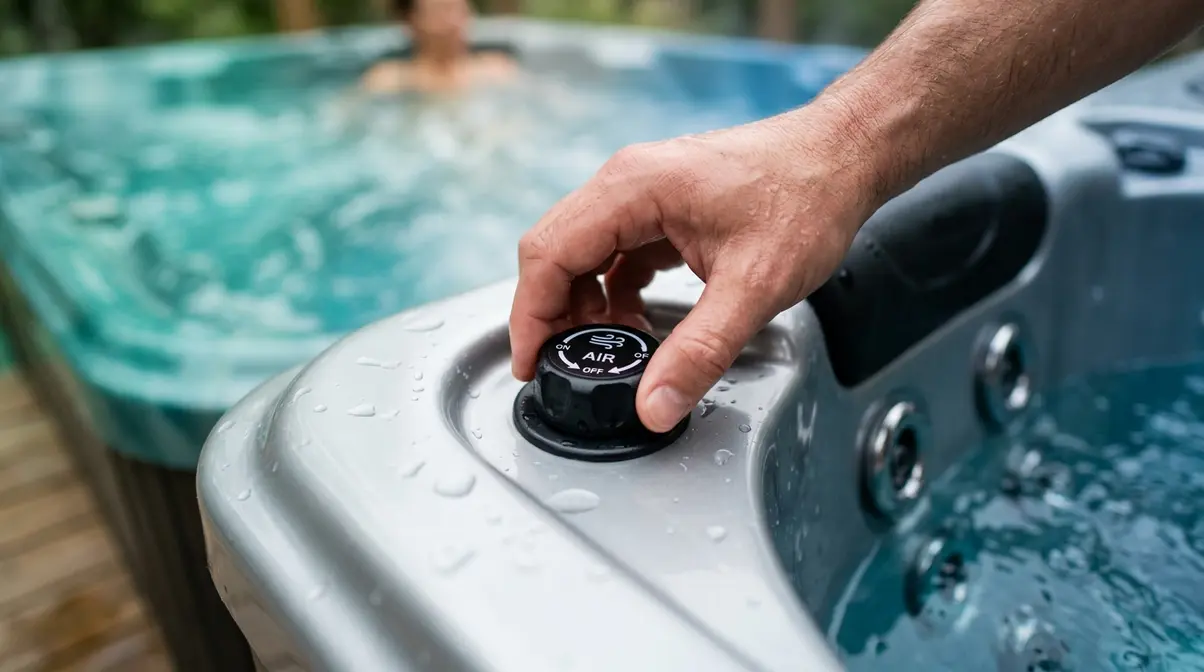
This is the most overlooked step in every competitor’s guide — and one of the fastest free wins available to you. Air injection valves — the knobs or dials on your tub’s shell that introduce outside air into the jet streams — are designed for massage use. When open during heating, they actively pull cold ambient air into your water and aerate the surface, accelerating evaporative cooling.
User consensus from the r/hottub community consistently identifies open air valves as a significant contributor to slow heating, particularly in winter when ambient air temperatures are well below the target water temperature (r/hottub discussion, Reddit).
How to close your air valves:
- Locate your air valves — they’re typically found around the rim of the tub, often labelled or marked with a small air symbol. Some tubs have 2; others have 6 or more.
- Turn each valve fully clockwise until it stops. “Fully closed” is the position that prevents outside air from entering the jet stream.
- Confirm by running your hand over the jet outlets with the pump on low — you should feel water pressure only, with minimal air bubbles.
- Keep them closed for the entire heating cycle. Only open them once the tub has reached your target temperature and you’re ready to use the jets for massage.
Why it works: Every cubic foot of cold outside air introduced through an open valve must be warmed by your heater before it exits the water. In winter, that’s a continuous drain on heating efficiency. Closing the valves means your heater is only working to raise water temperature — not compensating for a constant stream of cold air injection.
Step 3: Use Circulation Pump, Not Jets
Here’s the question the r/hottub community asks constantly: “Bubbles on or off while heating?” The answer is nuanced — and getting it wrong actively slows you down.
Your hot tub has two distinct pump modes. The circulation pump (also called the low-speed or filtration pump) moves water slowly through the heater element and filter. The massage jets (high-speed pump) are designed for hydrotherapy — they move water fast, introduce air, and create turbulence at the surface.
During heating, use the circulation pump only:
- Set your tub’s pump to its lowest speed setting (often labelled “circ,” “low,” or represented by a single-wave icon on the control panel).
- If your tub has a dedicated circulation pump that runs automatically, simply ensure it’s active — most modern tubs manage this automatically when the heater is running.
- Avoid switching to high-speed jets during the heating phase. The aeration and turbulence they create increases surface area exposure to air, accelerating evaporative heat loss.
- The common belief that “running the jets creates friction heat” is a persistent myth. While there is technically some minimal friction heat generated by the pump motor, it is negligible compared to the heat lost through increased aeration and turbulence. Your heater element is doing the work — the jets are getting in its way.
Why it works: The circulation pump keeps water moving past the heater element continuously without introducing the surface turbulence that accelerates heat loss. Think of it like stirring a pot of soup on a low flame — you want consistent circulation, not a rolling boil that steams off your heat.
Step 4: Clean Filter Before Every Use
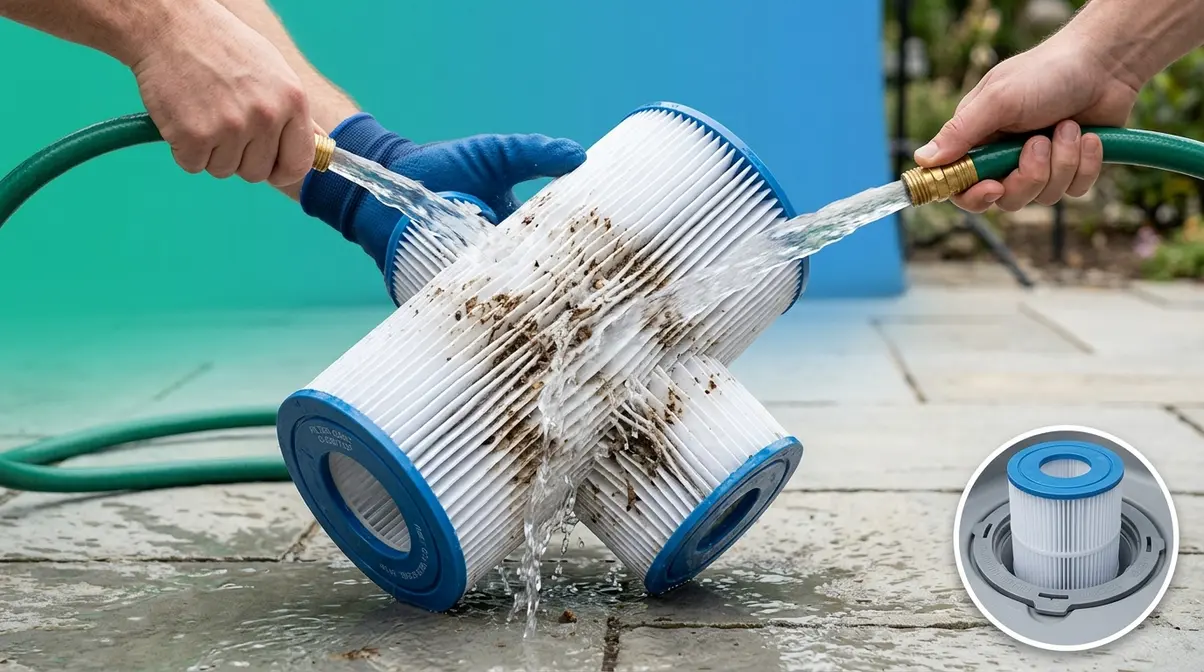
A dirty filter is one of the most common — and most fixable — causes of slow heating. Here’s why: your hot tub’s heater element only warms water that flows past it. The circulation pump draws water through the filter before sending it to the heater. When the filter is clogged with debris, oils, and mineral deposits, water flow to the heater is restricted — and a heater element with reduced flow heats less water per hour.
Common feedback from hot tub owners includes reports of heat-up times dropping by 1–2 hours after a thorough filter clean — particularly on tubs used frequently without regular filter maintenance.
How to clean your filter for maximum flow:
- Turn off the tub and locate the filter housing — typically a cylindrical cartridge inside a housing near the skimmer or in a dedicated filter compartment.
- Remove the filter cartridge by twisting it counterclockwise (most models) or lifting it straight out.
- Take the cartridge to a garden hose and rinse it thoroughly from top to bottom, working the hose nozzle between each pleat to dislodge trapped debris. Rinse until the water running off the filter runs clear.
- For a deeper clean, soak the cartridge in a filter cleaning solution (diluted filter cleaner or a white vinegar solution) for 2–4 hours, then rinse again.
- Inspect the cartridge for tears, collapsed pleats, or heavy mineral scaling. If the filter is over 12 months old or shows visible damage, replace it rather than cleaning it — a compromised filter passes debris to the heater.
- Reinstall the clean filter and restart the tub.
Why it works: A clean filter restores full water flow to the heater element, ensuring it operates at its rated kW output. A severely restricted filter can reduce effective heater output by 30–50%, adding hours to your heat-up time.
For a full walkthrough including chemical soak instructions, see our complete guide on how to clean a hot tub filter.
Step 5: Fill With Warm Tap Water
This step is specifically for dead cold starts — situations where you’re filling from scratch, refilling after a drain, or doing a first-time fill. It’s also the hack most owners overlook because it requires a small amount of planning.
The physics are simple: the closer your starting water temperature is to your target temperature, the less work your heater has to do. Filling with 60–70°F (15–21°C) warm tap water instead of 45–50°F (7–10°C) cold hose water can save 1–2 full hours of heating time on a typical 300–500 gallon tub.
How to fill with warm water safely:
- Attach a hose connector to your indoor hot tap (kitchen sink or utility room tap adaptors are widely available for under $15). Alternatively, use a submersible pump to transfer warm water from a bathtub.
- Set the tap to warm, not hot — aim for 60–70°F (15–21°C). Filling with boiling or very hot water risks thermal shock to your acrylic shell and gaskets, particularly on inflatable tubs.
- If your hose run is long, let it flush cold water first before directing it into the tub — a hose sitting in the sun or a cold garage can add temperature variance.
- Fill to the minimum water level line before turning on the pump or heater — running the heater dry, even briefly, can damage the element.
- Once filled, immediately apply your cover and thermal blanket to lock in the warmth from the start.
Why it works: Your heater’s kW rating is fixed — it adds the same number of degrees per hour regardless of starting temperature. Every degree of warmth you add through smart filling is a degree your heater doesn’t have to generate. On a cold winter day, this is the fastest “free” shortcut available.
For more detail on first-time fills and water chemistry setup, see our guide on how to fill a hot tub correctly.
Step 6: Upgrade to 220v or Add Heater
If you’ve applied Steps 1–5 and your heating time is still frustratingly long, the limiting factor is likely raw heating power — and this step addresses that directly.
Option A: Upgrade from 110v to 220v
As shown in the comparison table earlier, a 220v hardwired spa heats 3–4× faster than a 110v plug-and-play. The upgrade involves hiring a licensed electrician to install a dedicated 240V circuit and GFCI breaker at your tub location. Typical costs range from $500–$1,500 depending on panel distance and local labour rates. This is a one-time cost that also improves energy efficiency during maintenance heating between sessions.
Option B: Add a supplementary inline heater
For owners who can’t or don’t want to rewire, an external inline water heater (sometimes called a “booster heater”) can be connected to the tub’s plumbing to supplement the built-in element. These units add 1–3 kW of additional heating capacity. Note: always consult your hot tub manufacturer before adding any supplementary heating equipment — some warranties are voided by unauthorised modifications.
Option C: Temporary immersion heater (inflatable tubs only)
For inflatable hot tubs specifically, a portable immersion heater designed for spa use can be placed directly in the water to supplement the built-in heater during cold-start fills. See the inflatable section below for specific guidance.
Understanding the full picture of hot tub running costs and efficiency will help you calculate whether an upgrade makes financial sense for your usage pattern.
Heating Hacks for Inflatable Hot Tubs
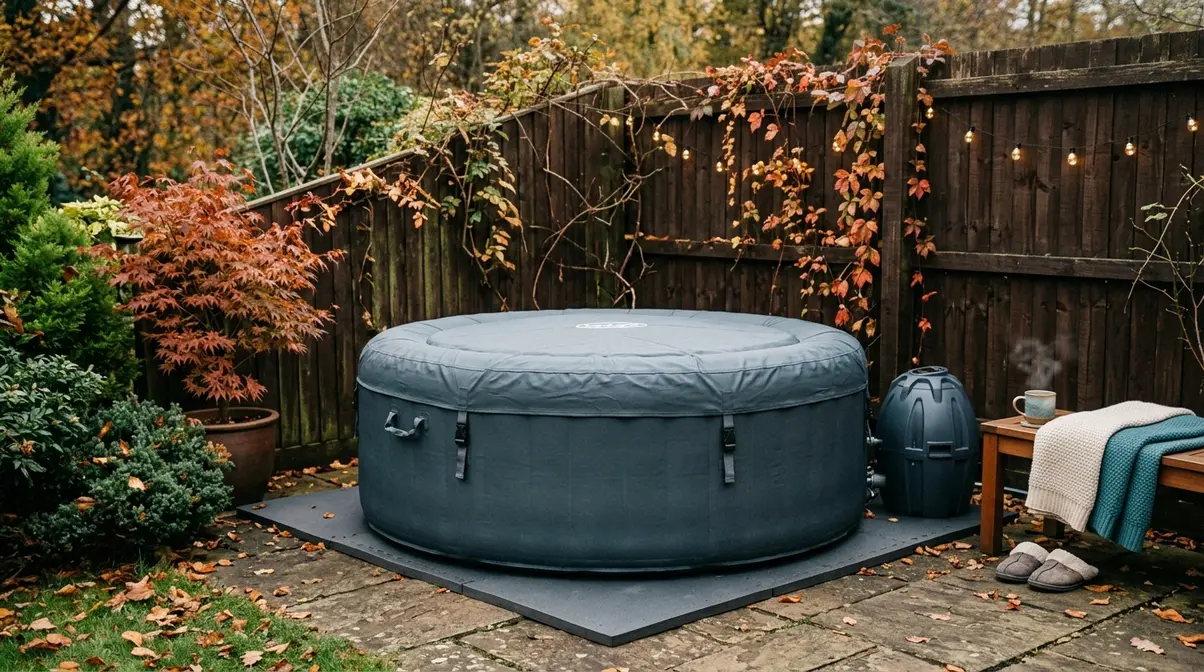
Inflatable hot tubs face a fundamentally different challenge than hard-shell spas — and generic heating advice often falls short for owners of models like the Lay-Z-Spa, Coleman SaluSpa, or Intex PureSpa. The Heat Trap Method still applies, but the execution looks different when your tub’s walls are made of reinforced PVC rather than acrylic and foam.
Why Inflatables Heat Slower
Three structural differences explain the gap. First, inflatable tub walls provide almost no meaningful insulation — PVC transfers heat to the surrounding air far more readily than the multi-layer foam and cabinet construction of a hard-shell spa. Second, most inflatable models run 110v heaters rated at 1–1.5 kW — the same power constraint discussed in the 110v vs 220v section. Third, inflatable tubs typically lack a dedicated low-speed circulation pump, meaning the heater runs in combination with the air/water pump rather than independently.
The result: a Lay-Z-Spa Miami (177-gallon capacity) can take 24–48 hours to reach 40°C (104°F) from a cold tap fill in winter, compared to 4–8 hours for a well-insulated 220v hard-shell spa. That’s not a malfunction — it’s physics.
5 Hacks to Heat Inflatables Faster
These hacks are specifically validated for inflatable models, based on common feedback from inflatable hot tub owners in the r/hottub and r/layzspa communities:
- Insulate the ground beneath the tub. Inflatable tubs lose significant heat through the floor into the cold ground. Place an insulating foam mat, a purpose-made spa ground cloth, or even a layer of cardboard beneath the tub before filling. This single step can reduce ground heat loss by a meaningful margin.
- Wrap the exterior walls. A purpose-made inflatable spa thermal wrap or a simple moving blanket secured around the outside walls adds the insulation the PVC walls lack. This is particularly effective in ambient temperatures below 50°F (10°C).
- Use the warm-water filling method. Because inflatable tubs have smaller water volumes (typically 150–250 gallons), the impact of warm-water filling is proportionally larger. Filling a 200-gallon tub from 65°F instead of 50°F saves approximately 1.5–2 hours of heating time.
- Set up in a sheltered location. Wind dramatically accelerates heat loss from both the cover and the tub walls. A garden wall, fence, or even a temporary windbreak reduces the ambient heat drain significantly. Moving the tub indoors (garage, conservatory) in winter is the most effective option if space permits.
- Run the heater overnight. Inflatable tubs are not designed for rapid heat-up — they’re designed for sustained heating. Starting the heater the night before you plan to use it, with the cover and thermal blanket in place, is the most reliable strategy. Set the target temperature, leave the cover on, and let the small heater work uninterrupted.
If you’re evaluating models, our guide to the best inflatable hot tubs compares heating performance across the major brands.
Using a Supplementary Immersion Heater?
Portable immersion heaters designed for spa use — typically rated at 1–2 kW — can be placed directly in your inflatable tub to supplement the built-in heater. In theory, doubling your heating power should roughly halve your heat-up time.
In practice, there are important caveats. Most inflatable hot tub manufacturers (including Bestway/Lay-Z-Spa and Intex) do not officially endorse the use of third-party immersion heaters, and using one may void your warranty. Additionally, any electrical device used in or near water must be rated for spa/pool use with appropriate GFCI (ground fault circuit interrupter) protection — never use a standard kettle element or domestic immersion heater in a hot tub.
If you choose to use a supplementary heater, purchase one specifically marketed for hot tub or spa use, check the GFCI rating, and always follow the manufacturer’s installation instructions. For most owners, the safer and more reliable approach is the overnight heating strategy combined with proper insulation.
Off-Grid and Cost-Free Hot Tub Heating Options
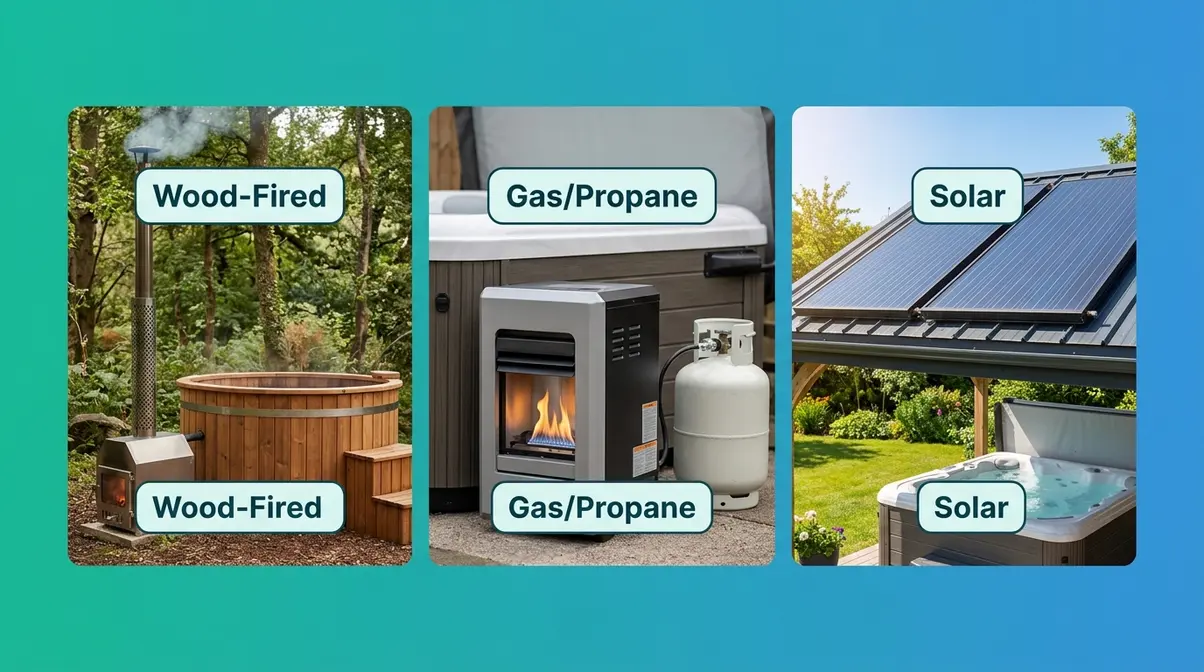
Not every hot tub runs on mains electricity — and even for those that do, the appeal of reducing running costs is real. This section covers the three main alternatives: wood-fired, gas/propane, and solar. Each comes with honest expectations about what “free” or “off-grid” actually means in practice.
Wood-Fired Heaters: Setup Expectations
A wood-fired hot tub heater — also called a fireside heater or stove heater — is a stainless steel or cast iron combustion chamber that sits either inside the tub (submerged stove design) or externally connected via inlet/outlet pipes. Cold water enters at the bottom of the heater, rises as it warms through convection, and exits at the top back into the tub. No electricity required.
Heating performance: A well-designed wood-fired heater with a good fire can raise water temperature at 3–5°F (1.5–3°C) per hour — comparable to a 110v electric heater, but without the running cost. A 300-gallon tub starting at 60°F (15°C) can reach 100°F (38°C) in approximately 8–10 hours with a sustained fire.
- Setup requirements:
- A tub designed or modified to accept a wood-fired heater (most purpose-built wooden hot tubs are designed for this)
- Dry, seasoned hardwood (softwood burns too fast and produces excess creosote)
- A safe, non-combustible installation area — the heater body reaches very high temperatures
- Regular ash removal and chimney/flue cleaning
Key limitation: Wood-fired heaters require active management — you can’t set a temperature and walk away. You’ll need to tend the fire and monitor water temperature manually.
Gas and Propane Heaters: Alternatives
Natural gas and propane heaters offer a compelling middle ground between the speed of 220v electric and the off-grid capability of wood-fired. A typical residential gas spa heater runs at 100,000–400,000 BTU — far exceeding what any electric element can deliver, and capable of heating a 400-gallon tub from cold in 2–4 hours.
Propane is the preferred option for off-grid setups — a 100-gallon propane tank provides many hours of heating capacity and can be refilled at most hardware or fuel suppliers. Natural gas requires a mains connection, making it less portable but cheaper per unit of heat.
Cost comparison:
| Heater Type | Typical Heat-Up Time (400 gal, cold start) | Approximate Running Cost |
|---|---|---|
| 110v Electric (1.5 kW) | 20–24 hours | $0.20–0.40/hour |
| 220v Electric (4 kW) | 6–8 hours | $0.50–0.90/hour |
| Gas/Propane (200K BTU) | 2–4 hours | $1.50–2.50/hour |
| Wood-fired | 8–12 hours | $0–$0.50/hour (wood cost) |
Gas heaters heat fastest but cost more per session. Electric heaters are cheaper to run but slower. Wood-fired is cheapest to run but requires the most effort.
Solar Heating: Can It Really Work?
Solar heating for hot tubs is viable — but its effectiveness is heavily weather and location dependent. A solar thermal collector system (roof-mounted panels that heat water via solar energy) can maintain a hot tub’s temperature between sessions in summer, reducing reheating costs substantially. In full sun at peak summer, a well-sized solar collector can contribute the equivalent of 1–2 kW of continuous heating.
What solar cannot do: It cannot rapidly heat a cold tub on a cloudy day or in winter. Solar heating is a supplementary maintenance-heating tool, not a primary heat-up solution. Owners who report success with solar typically use it to maintain temperature between uses (reducing the delta from, say, 95°F to 104°F rather than from 50°F to 104°F).
For a full breakdown of how solar and other strategies stack up financially, see our guide to reduce your hot tub running costs.
The Real Cost of “Free” Heating
Every “free” heating option involves a trade-off. Wood-fired heaters require purchasing and storing wood, significant setup time, and active fire management. Solar requires upfront panel installation costs (typically $500–$2,000 for a spa-appropriate system) before delivering any savings. Propane is cheaper than mains electricity in some regions but requires tank management and delivery logistics.
The honest summary: there is no truly free hot tub heating. What varies is where the cost falls — time, effort, upfront capital, or ongoing fuel spend. Choose the option that fits your usage pattern and off-grid requirements honestly.
Cheapest way to heat a hot tub?
The cheapest way to heat a hot tub is to maximise insulation and minimise reheating frequency. Maintaining temperature between sessions (rather than heating from cold each time) uses far less energy than repeated cold starts. A well-fitted cover, a thermal blanket, and a programmed heating schedule that pre-heats to temperature just before use can reduce running costs by 50–70% compared to an uncovered, unscheduled tub (U.S. Department of Energy, 2026). For initial heat-up cost, a 220v electric heater is more cost-efficient per degree than gas despite higher hourly wattage, because it heats faster and loses less energy to the environment during the heating cycle.
Use our hot tub electricity cost calculator to estimate your specific running costs.
Common Mistakes That Slow Down Your Heating
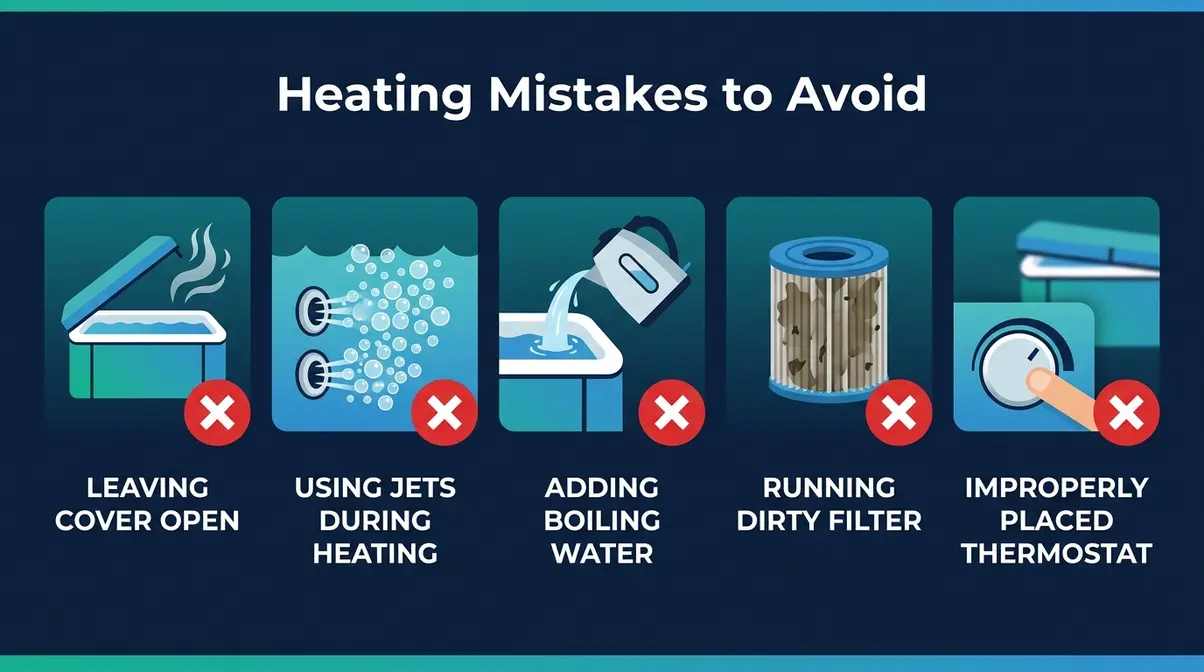
Even with the best intentions, certain habits consistently add hours to heat-up time. Our team at One Hot Tub identified these five mistakes as the most frequently reported causes of unexpectedly long heating times — both from community feedback and manufacturer guidance.
5 Heating Mistakes Hot Tub Owners Make
Mistake 1: Leaving the cover off “just for a minute.” The first 30 minutes of a heat-up are when the greatest temperature differential exists between the water and the air — meaning heat loss is fastest at the start. Removing the cover even briefly during this phase is disproportionately costly.
Mistake 2: Running the massage jets to “speed up” heating. As explained in Step 3, high-speed jets increase aeration and surface turbulence, accelerating evaporative heat loss. The friction heat from the pump motor is negligible in comparison. Keep jets off during heating.
Mistake 3: Adding boiling water to speed up the fill. Some impatient owners try pouring kettles or buckets of boiling water into the tub to boost starting temperature. Beyond the practical inefficiency of this approach (a kettle holds roughly 1.5 litres — your tub holds 1,000+), rapid temperature extremes can cause thermal shock to acrylic shells and damage gaskets and seals.
Mistake 4: Ignoring a dirty filter. A clogged filter doesn’t just slow heating — over time, it can cause the heater element to overheat and fail due to restricted water flow. Regular filter maintenance protects your heater, not just your heat-up time.
Mistake 5: Setting the thermostat and walking away without checking the cover seal. A thermostat set to 104°F doesn’t guarantee you’ll reach it quickly if the cover is damaged or misaligned. Always physically check the cover fit after setting your target temperature.
When to Call a Professional
Some heating problems go beyond DIY optimisation and require professional attention:
- No heat despite a running pump: This typically indicates a failed heater element, a tripped high-limit switch, or a flow sensor fault. A qualified hot tub technician can diagnose and replace these components safely.
- Legionella risk: If your hot tub has been left unused and unheated for extended periods (typically two weeks or more), there is a risk of Legionella bacteria proliferating in the warm, stagnant water. The UK Health and Safety Executive recommends maintaining hot tub water above 60°C (140°F) to eliminate Legionella risk, or fully draining and sanitising the tub before reuse after extended downtime. Do not attempt to manage a suspected Legionella situation without professional guidance.
- Electrical upgrades (110v to 220v): Always use a licensed, qualified electrician for any 240V wiring work. This is not a DIY task — incorrect installation creates serious electrocution and fire risks.
- Persistent cold spots: Cold spots in specific areas of the tub may indicate a blocked or failed jet, a plumbing leak, or circulation pump issues. These require professional diagnosis.
Staying ahead of these issues with a consistent hot tub maintenance schedule prevents most of the common faults that cause slow heating.
How to get water crystal clear?
Crystal clear water requires a balanced three-part approach: correct chemistry, regular filtration, and consistent shocking. First, test and balance pH (target 7.2–7.6), alkalinity (80–120 ppm), and sanitiser levels. Second, run your filtration cycle for at least 8 hours per day and clean the filter monthly. Third, shock the water with a non-chlorine or chlorine shock weekly to oxidise organic compounds that cause cloudiness. Cloudy water is almost always a chemistry or filtration issue — not a water quality problem that resolves on its own.
See our full guide on how to keep hot tub water clear for a step-by-step chemistry checklist.
Frequently Asked Questions
How long to heat a hot tub from cold?
Most hot tubs take 4–24 hours to heat from a cold start, depending on heater wattage, tub volume, and ambient temperature. A 220v hardwired spa (3–6 kW heater) typically reaches 104°F (40°C) from a 50°F cold fill in 4–8 hours. A 110v plug-and-play model with a 1–1.5 kW heater may take 18–24 hours for the same result. Starting with warm tap water and keeping the cover on throughout can reduce these times by 1–3 hours (Beninati Pools, 2026).
Does leaving the cover on help?
Yes — it makes the single biggest difference of any action you can take. Pool and spa covers prevent evaporative heat loss, which accounts for approximately 70% of total energy loss from a water surface (U.S. Department of Energy, 2026). A well-fitting insulated cover combined with a floating thermal blanket can reduce heating costs by 50–70% and meaningfully cut heat-up time. A damaged or waterlogged cover provides a fraction of this benefit — inspect yours regularly.
Should I run jets while heating?
No — keep the high-speed massage jets off during heating. Run only the low-speed circulation pump, which moves water past the heater element without introducing air turbulence. High-speed jets aerate the water and increase surface evaporation, which slows heating. The common belief that jets create useful friction heat is a myth — the marginal heat generated by pump friction is far outweighed by the heat lost through increased aeration. Once your tub reaches temperature, use the jets freely.
Why put tennis balls in a hot tub?
Tennis balls absorb oils, lotions, and organic residue from the water, helping to keep the water cleaner between filter cycles. The felt material acts as a passive filter for body oils and cosmetics that pass through the main filter cartridge. They don’t affect heating speed, but cleaner water reduces the chemical load and can extend filter life — which indirectly keeps water flow to the heater unrestricted. Use 2–4 balls, replacing them when they become saturated (typically every few weeks of regular use).
Do hot tubs help lymphatic drainage?
Research suggests warm water immersion may support lymphatic function, though it is not a clinical treatment for lymphatic conditions. The hydrostatic pressure of water against the body can assist fluid movement, and the warmth promotes vasodilation, which may support circulation. A 2021 review published in the International Journal of Environmental Research and Public Health found that hydrotherapy had positive effects on circulation-related outcomes. However, if you have a diagnosed lymphatic condition, consult your doctor before using a hot tub as a therapeutic tool — individual health circumstances vary significantly.
Signs your lymphatic system is draining?
Common reported signs include reduced puffiness or swelling, improved skin clarity, feeling less heavy in the limbs, and mild fatigue following lymphatic-stimulating activity (which is normal as the body processes cleared fluid). These are subjective indicators, not diagnostic markers. If you are experiencing significant swelling, persistent fatigue, or other symptoms you associate with lymphatic function, seek medical advice — these can indicate conditions requiring professional diagnosis and treatment rather than hot tub use.
Hot tubs during the two-week wait?
Medical guidance generally advises caution during the two-week wait (TWW) after IVF or fertility treatment. The primary concern is elevated core body temperature: soaking in water above 100°F (38°C) for extended periods can raise core temperature, which some fertility specialists recommend avoiding during the implantation window. Evidence is limited, but the precautionary principle applies. Consult your fertility clinic or reproductive endocrinologist directly — guidance varies by individual protocol, and this is not a question to answer based on general internet advice.
Do hot tubs reduce cortisol?
Research suggests that warm water immersion can reduce cortisol levels and promote relaxation. A study published in Complementary Therapies in Medicine (2019) found that regular hydrotherapy sessions were associated with reduced stress hormone levels and improved mood in participants. The warm water activates the parasympathetic nervous system, countering the stress response. However, results vary by individual, and hot tubs are not a clinical treatment for stress-related conditions. Those with cardiovascular conditions should consult a doctor before using a hot tub for stress management.
Why not put your head underwater?
Hot tub water contains sanitising chemicals and can harbour bacteria that are unsafe for ingestion or nasal contact. The primary risk is Pseudomonas aeruginosa and, in poorly maintained tubs, Legionella — both of which can cause ear infections, skin infections, or respiratory illness if water enters the ears, nose, or mouth. Additionally, hot tub water is not filtered or treated to the standards of drinking water. Keep your face and head above water, and always maintain proper sanitiser levels (typically 3–5 ppm free chlorine).
Is a hot tub good for arthritis?
Research suggests warm water hydrotherapy can reduce arthritis-related pain and stiffness. A review in Rheumatology International found that balneotherapy (warm water immersion) significantly reduced pain scores in osteoarthritis patients compared to control groups. The warmth promotes muscle relaxation and increases joint mobility, while the buoyancy reduces load-bearing stress on affected joints. Consult your rheumatologist before beginning a hot tub regimen for arthritis — water temperature and session duration recommendations vary depending on the type and severity of arthritis.
How to maintain water temp efficiently?
Set your thermostat 2–4°F (1–2°C) below your target soaking temperature and let the tub maintain that level continuously rather than cooling completely between uses. Modern hot tubs are designed for continuous operation — the energy cost of maintaining 100°F is significantly lower than reheating from 60°F every time you want to soak. Use a programmable timer to drop the maintenance temperature to 95°F (35°C) overnight or during long absences, then ramp back up 2–3 hours before your planned soak. This “set and maintain” approach is the most energy-efficient long-term strategy.
For detailed guidance on temperature management across seasons, see our hot tub temperature settings guide.
Fastest Heating Starts With Heat Retention
The Heat Trap Method works because it reframes the problem correctly: heating a hot tub faster isn’t about pushing more heat in — it’s about stopping heat from leaking out while your heater does its job efficiently. A 220v spa with a clean filter, closed air valves, a thermal blanket, and a well-fitted cover will consistently outperform a neglected tub with a more powerful heater. The physics are clear, and the steps are free.
Apply all six steps together — cover and thermal blanket, closed air valves, circulation pump only, clean filter, warm-water fill, and the right voltage for your usage — and most owners will see their heat-up time drop by 30–50% compared to an unoptimised setup.
Start today: check your cover for gaps and waterlogging, close every air valve on your tub, and plan your next fill using the warm-water method. These three actions alone take under 10 minutes and cost nothing. For a deeper dive into keeping your tub running efficiently year-round, explore our full hot tub maintenance guide at One Hot Tub.
If you’re still shopping for the right setup, our hot tub buyer’s guide covers everything you need to choose a model that heats efficiently from day one.

David King
Hot tub tester and writer at One Hot Tub.