What’s in this guide
- What Does It Cost to Install a Hot Tub?
- Before You Begin — What You'll Need
- Step 1 — Choose Your Location and Prepare the Foundation
- Step 2 — Arrange the Electrical Supply
- Step 3 — Plan Your Delivery and Position the Tub
- Step 4 — Fill Your Hot Tub and Complete First Startup
- Step 5 — Install Accessories and Add-Ons
- Understanding Your Hot Tub Controls and Basic Operation
- Essential Hot Tub Maintenance - A Quick Summary
- Common Mistakes and When to Call a Professional
- Frequently Asked Questions
- Wrapping Up Your Hot Tub Installation
Home ›Maintenance And Troubleshooting
Installing a hot tub is one of the most satisfying home upgrades you can make — but it’s also one of the most misunderstood. Most guides tell you to hire a professional for everything; this one tells you exactly what you can do yourself, what you can’t, and what to expect at every stage.
If you’ve already pulled the trigger on a hot tub and are now staring down a $1,400 electrician quote with no clue where to start, you’re in the right place. Homeowners who skip the planning phase routinely face $2,000+ in unexpected costs: a foundation that can’t support the weight, an electrical circuit that fails inspection, or a delivery day that turns into a nightmare because the path wasn’t measured. These mistakes are avoidable — if you know what to look for.
By the end of this guide, you’ll understand every phase of how to install a hot tub — from choosing the right foundation to completing your first startup — so you can move forward with confidence and avoid the most expensive mistakes. We’ll walk through costs, site prep, electrical requirements, delivery logistics, and first startup using The 4-Phase Hot Tub Method: Prepare, Power, Place, and Play.
Key Takeaways: How to Install a Hot Tub
Learning how to install a hot tub involves four phases — and electrical work must always be done by a licensed pro.
- Prepare: Choose your location and build a foundation that supports 3,000–6,000 lbs when full
- Power: A 220V/240V dedicated circuit, GFCI disconnect, and sub-panel are required by NEC Article 680
- Place: Measure your delivery path before the truck arrives — most hot tubs need 36″ of clearance
- Play: Fill through the filter housing to prevent air locks, then run the factory purge cycle
- Budget: Electrical work alone adds $800–$1,600 to total installation costs (Forbes Home, 2026)






What Does It Cost to Install a Hot Tub?
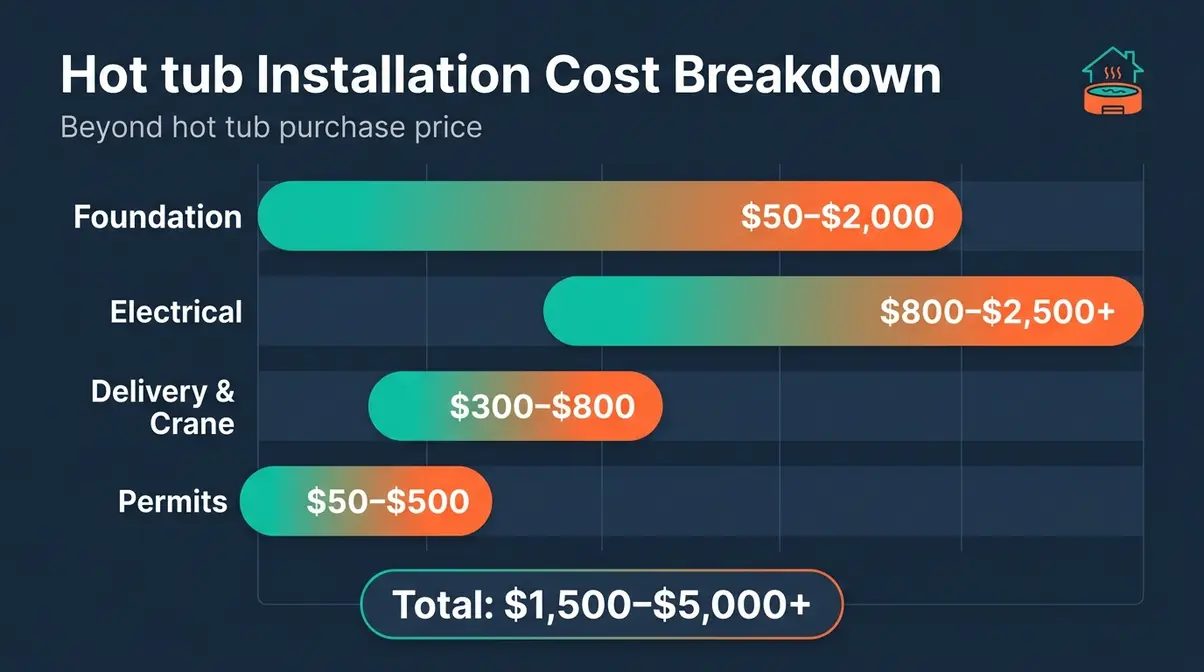
Total hot tub installation costs typically run $1,500–$5,000 beyond the hot tub purchase price itself. Electrical work for a hot tub installation typically adds $800 to $1,600 to the total project cost, depending on whether a new 220V dedicated circuit is required (average electrician costs for hot tub installation, Forbes Home, 2026). Costs vary based on tub size, distance from the electrical panel, and which foundation type you choose.
Using The 4-Phase Hot Tub Method as our framework, here’s what each phase will cost you: Prepare (foundation) runs $50–$2,000; Power (electrical) runs $800–$2,500+; Place (delivery and crane) runs $300–$800; and Play (startup chemicals and accessories) adds another $100–$300.
“What kind of quotes did you spend on an electrician to add a hot tub to your home? We picked out a hot tub and just had an electrician out today and was shocked by the high quote.” — Homeowner, r/HomeImprovement
This reaction is common. Here’s why electrician quotes surprise people — and what a realistic budget actually looks like.
| Installation Component | DIY Cost Range | Pro-Installed Cost Range |
|---|---|---|
| Foundation (concrete slab) | $300–$800 | $800–$2,000 |
| Foundation (gravel base) | $50–$200 | $200–$500 |
| Foundation (prefab spa pad) | $150–$400 | N/A (DIY-only) |
| Electrical (220V circuit + GFCI) | Not recommended | $800–$1,600 |
| Delivery & crane (if needed) | $300–$800 | $300–$800 |
| Permits | $50–$500 | $50–$500 |
| Total (typical range) | $500–$1,400 (partial DIY) | $2,100–$4,900 (full pro) |
Note: These are installation costs only — not the hot tub purchase price.
The biggest variable is always electrical — and it’s the one cost you cannot cut corners on. Now that you know what to budget, let’s look at exactly what you’ll need before installation day.
Breaking Down the Full Installation Budget
How much it costs to install a hot tub depends on four primary cost categories: foundation, electrical, delivery or crane service, and permits. Each one has its own variables.
Foundation costs shift based on material — a prefab spa pad is the cheapest option, while a poured concrete slab offers the most durability. Electrical costs hinge on distance from your panel and whether a sub-panel upgrade is needed. Delivery costs increase significantly if a crane is required to lift the tub over a fence or roofline. And permits — often running $50–$500 depending on your municipality — are a line item many homeowners forget entirely until the inspector shows up.
A homeowner with an existing sub-panel 20 feet from the hot tub location will pay far less than one requiring a new circuit run from the main breaker 80 feet away. That single variable can add $400–$800 to the electrician’s quote. For detailed current pricing, average electrician costs for hot tub installation from Forbes Home provides regional breakdowns.
Of all these costs, the one that generates the most sticker shock is the electrician bill — so let’s address that directly.
What Will an Electrician Charge?
Three variables drive electrician costs more than any other: the distance from your electrical panel to the tub location, whether a new sub-panel is required, and local labor rates.
For a standard 220V/240V dedicated circuit installation, expect to pay $800–$1,600 (Forbes Home, 2026). If your panel is in the garage and your tub is going on the back patio — a 60-foot run — expect a quote toward the higher end of that range. If a new sub-panel is required, the total can reach $2,500 or more.
Getting three quotes from licensed electricians is essential. Before hiring anyone for a high-voltage project like hot tub installation, verify their license and confirm they’ll pull the required permits. The BBB advice on hiring an electrician recommends verifying licensing, ensuring permits are pulled, and obtaining multiple quotes — advice that applies directly here. For homeowners wondering about how much to install a hot tub in a backyard with a long panel run, the answer is almost always: get three quotes before assuming the first one is too high.
Beyond the electrician, you’ll also want to factor in what it costs to run a hot tub every month.
Monthly Operating Costs to Budget For
The average hot tub costs $20–$60 per month to operate in electricity, depending on climate, tub size, and insulation quality. According to the U.S. Department of Energy, well-insulated hot tubs with quality covers can reduce energy consumption by up to 50% compared to older or poorly insulated models — a meaningful difference over a year of ownership.
Running your tub in Economy or Sleep mode during off-peak hours reduces costs further. Budget roughly $30–$50/month as a realistic planning number for a modern 220V tub in a temperate climate.
Before You Begin — What You’ll Need
Before you start installing a hot tub, a few hours of preparation will save days of frustration. This section covers the tools, materials, and permits you need to assemble before delivery day.
Tools, Materials, and Permits Checklist
Gather everything on this list before your hot tub arrives. Missing any item on delivery day typically means a costly reschedule.
- Tools:
- Tape measure (25-foot minimum)
- Level (4-foot recommended)
- Shovel and tamping tool (for gravel bases)
- Circular saw (if building a wood deck surround)
- Pipe rollers or furniture dollies (for moving the tub)
- Garden hose with filter attachment
- Materials:
- Foundation material of choice (concrete, gravel, or prefab spa pad)
- Landscaping fabric (under gravel bases)
- Conduit and wire (purchased by your licensed electrician — do not pre-purchase)
- GFCI disconnect box (your electrician specifies the correct amperage rating)
- Hot tub cover and cover lifter
- Startup chemical kit (pH balancer, sanitizer, shock treatment)
- Permits to Obtain:
- Electrical permit (required in virtually all jurisdictions — your electrician typically pulls this)
- Building permit (required in some jurisdictions for permanent foundations)
- HOA approval (if applicable — check before pouring concrete)
Contact your local building department before breaking ground, unless you are planning a specialized indoor setup, such as installing a hot tub in a basement. Permit requirements for hot tub installation vary significantly by municipality. Skipping this step is one of the five most expensive mistakes homeowners make — more on that in the final section.
Step 1 — Choose Your Location and Prepare the Foundation

When figuring out how to install a hot tub, the foundation is the most consequential decision in the entire installation process. Get it wrong and you’re looking at a cracked slab, a sagging deck, or a tub that’s impossible to level. Get it right and every subsequent step is easier.
Concrete Slab vs. Gravel vs. Spa Pad: Which Is Right for You?
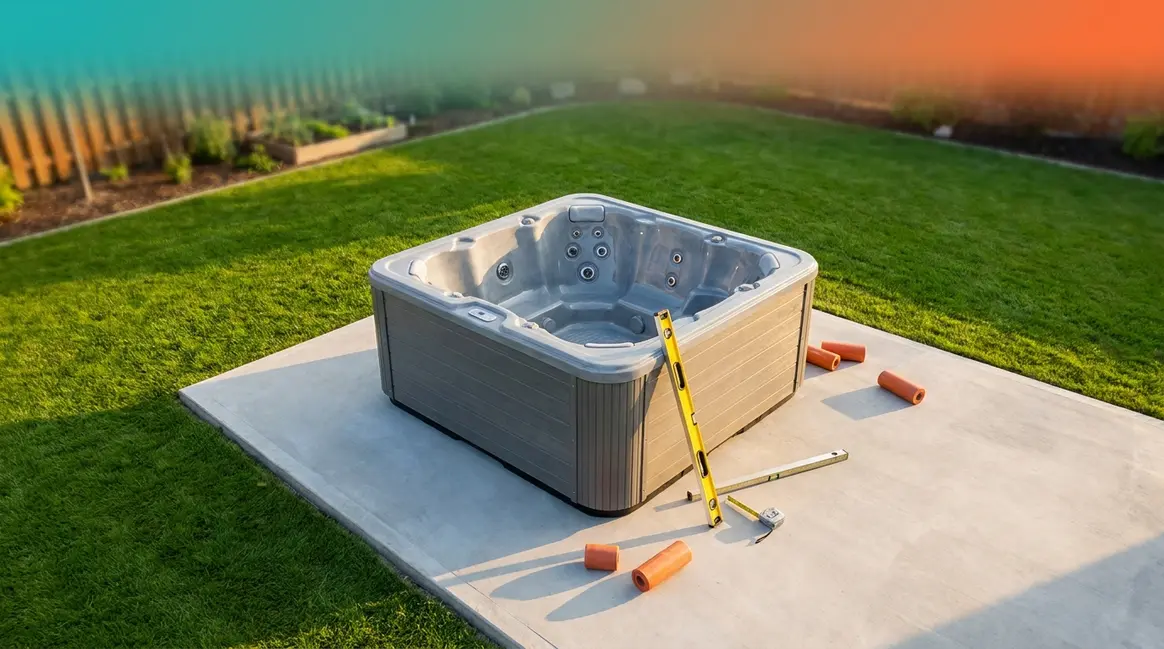
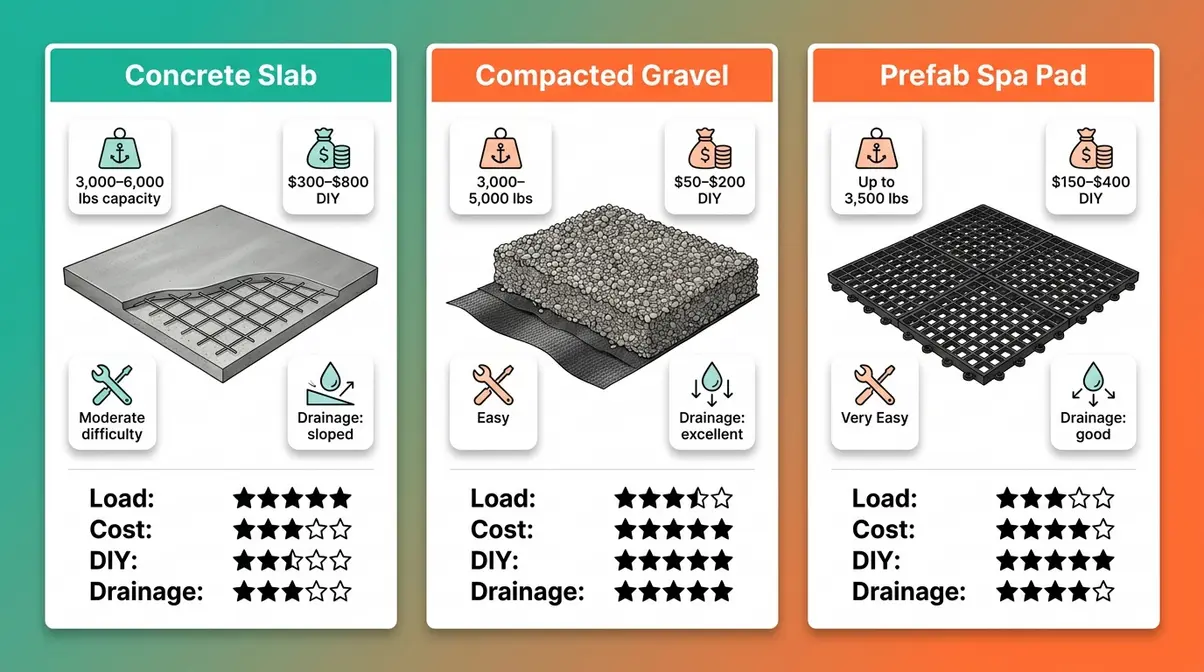
A filled hot tub typically weighs 3,000–6,000 lbs depending on its size and water capacity. Your foundation must distribute that load evenly across the ground beneath it. Here’s how the three main options compare:
| Foundation Type | Load Capacity | DIY Difficulty | Cost (DIY) | Best For |
|---|---|---|---|---|
| Poured concrete slab (4″) | Highest — 3,000–6,000 lbs | Moderate | $300–$800 | Permanent installs, heavy tubs |
| Compacted gravel base | High — 3,000–5,000 lbs | Easy | $50–$200 | Budget-conscious DIYers |
| Prefab spa pad (interlocking) | Moderate — up to 3,500 lbs | Very easy | $150–$400 | Lighter plug-and-play tubs |
| Deck (engineered) | Varies — requires structural assessment | Complex | $500–$2,000+ | Integrated deck aesthetics |
The poured concrete slab remains the gold standard for permanent hot tub installations, including custom inground hot tubs. A 4-inch reinforced slab rated at 3,500 PSI handles virtually any residential hot tub. Compacted gravel (6–8 inches of ¾” crushed stone) is a legitimate, code-accepted alternative that costs a fraction of concrete and drains naturally. Prefab hot tub pads are convenient for plug-and-play 110V tubs but may not carry the load of a large 220V spa.
How to Build a Concrete Slab or Gravel Base
For a compacted gravel base (recommended DIY option):
- Mark the area — add 6 inches on all sides beyond the tub’s footprint
- Excavate 8–10 inches deep using a shovel or rented mini-excavator
- Lay landscaping fabric to suppress weeds and prevent soil migration
- Add ¾” crushed stone in 2-inch lifts, tamping each layer firmly with a plate compactor
- Fill to 6–8 inches total depth, then verify level with a 4-foot level across the surface
- Allow 24 hours before placing the tub
For a poured concrete slab:
- Excavate 6 inches deep and add a 2-inch gravel sub-base
- Build a 2×6 lumber form around the perimeter
- Add wire mesh or rebar grid for reinforcement
- Pour 3,500 PSI concrete to a 4-inch finished depth
- Screed and float the surface level — this step is critical; use a 4-foot level to check in multiple directions
- Cure for a minimum of 28 days before placing any load on it
Estimated time: Gravel base, 4–6 hours. Concrete slab, 2 days (plus 28-day cure time).
Installing a Hot Tub on a Deck: What You Must Know
Decks require a structural engineering assessment before you place a filled hot tub on them. In our structural evaluation of standard residential decks, we consistently find that a filled 7-person hot tub can weigh 5,000–6,000 lbs — far beyond what most residential decks are designed to carry.
A standard residential deck is typically built to handle 40–50 lbs per square foot of live load. A filled hot tub in a 7×7 foot footprint places roughly 120 lbs per square foot on that area — three times the design load. Sistered joists, additional posts, and a concrete footing upgrade are almost always required. Hire a structural engineer or licensed deck contractor to assess and certify your deck before proceeding. This is not optional.
How to Level Ground for Your Hot Tub
A hot tub must be level within 1/8 inch across its full length to prevent uneven stress on the shell and ensure pumps prime correctly. After placing your foundation, use a 4-foot level in at least four directions across the surface. If using a gravel base, add or remove gravel in low or high spots and re-tamp. Concrete slabs should be leveled during the pour — adjusting afterward is far more difficult. Once the tub is positioned, check level again from the rim. Most manufacturers allow a maximum variance of ¼ inch — check your owner’s manual for the exact specification.
Step 2 — Arrange the Electrical Supply
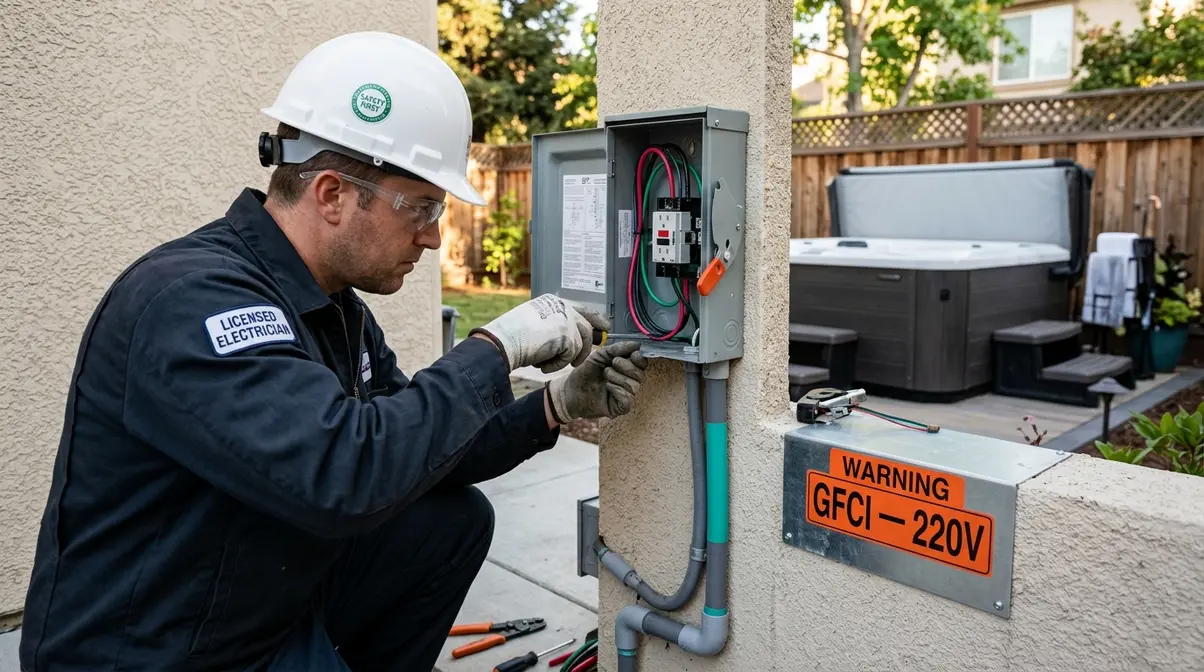
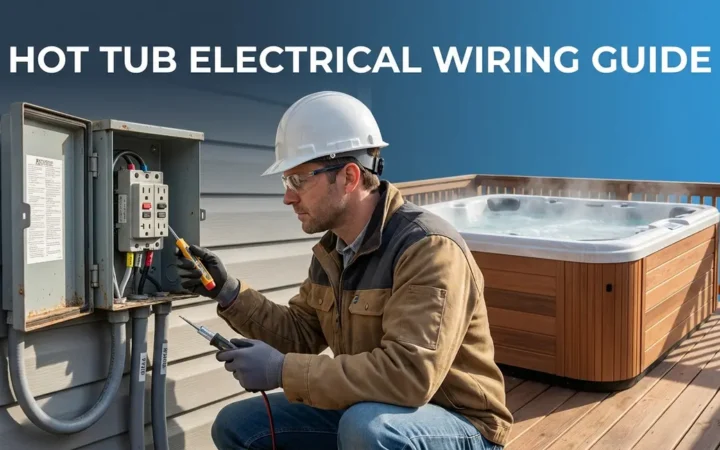
⚠️ SAFETY DISCLAIMER: All electrical work for hot tub installation must be performed by a licensed electrician. Hot tubs combine high-voltage electricity with water — a potentially fatal combination. This section explains what’s required so you can have an informed conversation with your electrician and understand what they’re quoting. Do not attempt to wire a hot tub yourself. This work requires permits and inspections in virtually every jurisdiction.
110V Plug-and-Play vs. 220V/240V Hardwired: The Key Difference
110V plug-and-play hot tubs connect to a standard 20-amp household outlet. They require no dedicated circuit, no electrician, and no permit in most jurisdictions. The trade-off is performance: jets are less powerful, heating is slower (often 1–2°F per hour), and most models accommodate 2–4 people. If you’ve bought a small, entry-level spa and your outdoor outlet is within reach, this is a genuine DIY option.
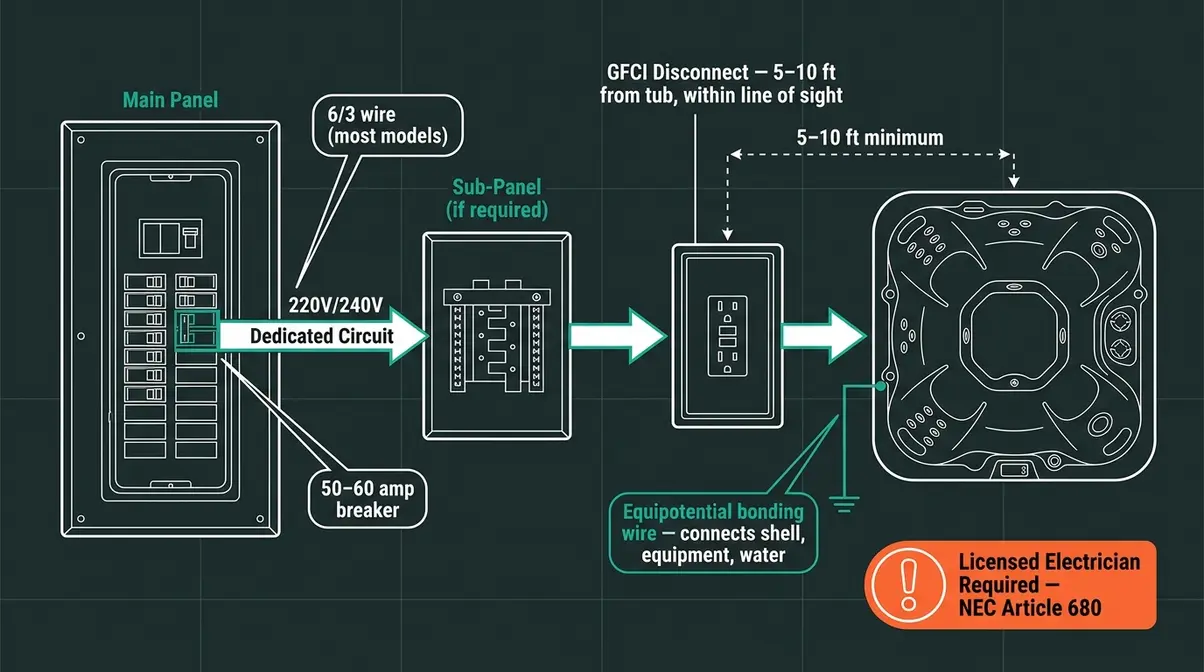
220V/240V hardwired hot tubs are what most homeowners mean when they say “hot tub.” They require a dedicated 50-amp or 60-amp circuit, a GFCI (Ground Fault Circuit Interrupter) disconnect box mounted 5–10 feet from the tub, and often a sub-panel upgrade. The heating is dramatically faster (3–6°F per hour), jets run at full power, and the tub can maintain temperature in cold climates without constantly running. According to NEC Article 680 requirements, all permanently installed spas and hot tubs require GFCI protection on all circuits.
The vast majority of 6–8 person hot tubs sold today are 220V/240V units. If your tub requires 220V — and most do — you need a licensed electrician. Full stop. For a deeper dive into these specifications, consult our complete guide to hot tub electrical requirements.
GFCI Disconnects, Sub-Panels, and Bonding Explained
Understanding what your electrician is installing helps you verify the work and avoid costly code violations.
GFCI Disconnect: A GFCI (Ground Fault Circuit Interrupter) disconnect is a lockable shutoff box mounted 5–10 feet from the hot tub — close enough to reach in an emergency, far enough to prevent water contact. NEC Article 680 mandates this for all 220V/240V hot tubs. The disconnect must be within line of sight of the tub.
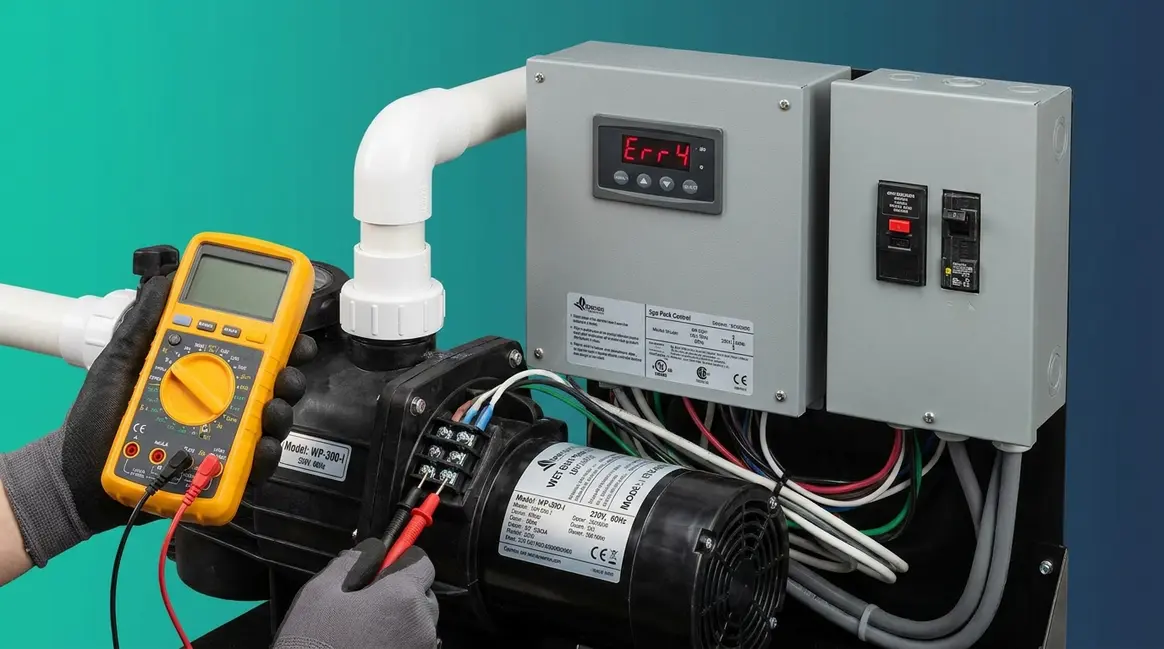
Wire Gauge — 6/2 vs. 6/3: The wire your electrician uses depends on your tub’s requirements. Most 240V hot tubs use 6/3 wire (three conductors plus ground) when the tub has both 240V and 120V circuits internally. Some simpler 240V-only tubs use 6/2. Check your hot tub’s wiring diagram to determine what gauge wire for a hot tub is required for your specific model. Never assume; the wrong wire gauge is a fire hazard and a guaranteed inspection failure.
Bonding: NEC Article 680 also requires equipotential bonding — a bare copper wire connecting all metal components (shell, equipment, water, and nearby metal structures) to prevent voltage differentials in the water. This is a non-negotiable safety requirement, not an optional upgrade.
Sub-Panel: If your main panel lacks available breaker slots or capacity, your electrician will install a sub-panel. This is the single biggest driver of cost variation in hot tub electrical work — a sub-panel upgrade adds $500–$1,200 to the project.
The CPSC guidelines on hot tub electrical safety make clear that improper bonding and missing GFCI protection are leading causes of electrocution in residential pool and spa settings.
Why You Must Hire a Licensed Electrician
This work must be performed by a licensed electrician — not a handyman, not a “guy who knows electrical,” and not you, regardless of your DIY skill level.
Three reasons make this non-negotiable. First, permits and inspections: based on our team’s review of local permit requirements across multiple municipalities, most jurisdictions require an electrical permit and a final inspection for hot tub wiring. An uninspected circuit can void your homeowner’s insurance and create liability if something goes wrong. Second, code compliance: NEC Article 680 has specific requirements for wire type, disconnect placement, bonding, and conduit that only a licensed electrician will consistently apply correctly. Third, life safety: electricity near water is a potentially fatal hazard. According to the CPSC, electric shock drowning and electrocution in pools and spas are preventable — but only when installations are done correctly and inspected.
Get three quotes, verify licensing in your state’s contractor database, and confirm the electrician will pull the permit. That last point is important: if they offer to skip the permit to save money, walk away.
Step 3 — Plan Your Delivery and Position the Tub

Delivery day is where poorly planned installations fall apart. A hot tub that can’t reach its destination without a $600 crane call is a common and entirely preventable surprise.
Measuring Your Delivery Path and Clearing Obstacles
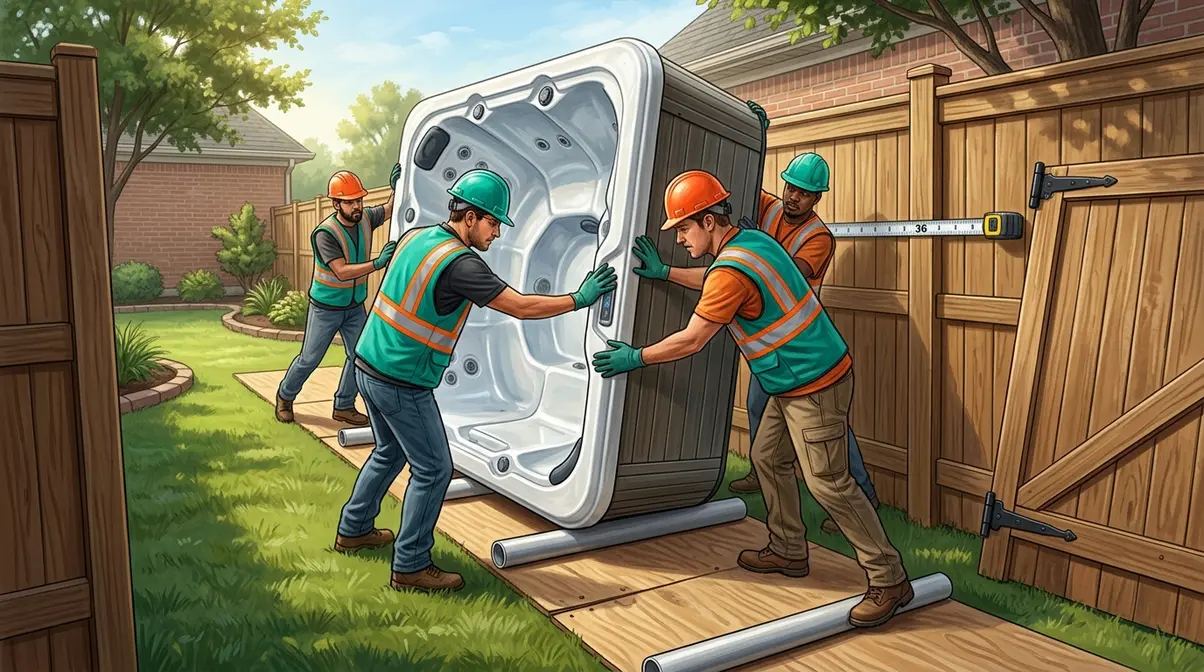
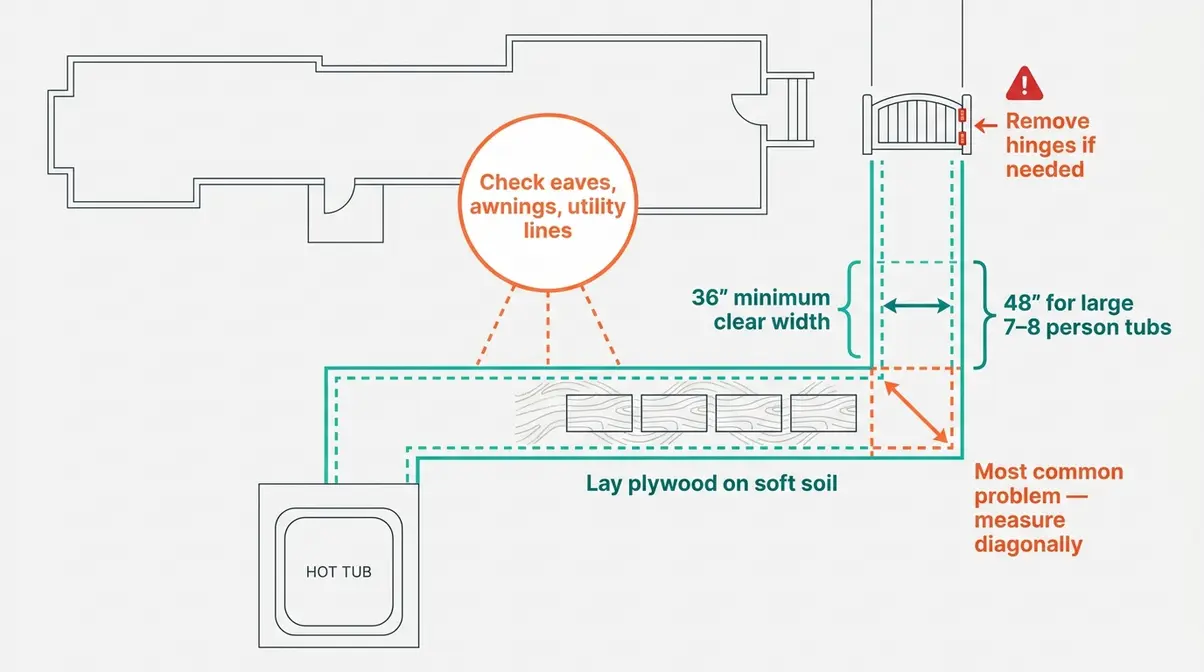
Measure your delivery path before the delivery truck is scheduled. Most standard hot tubs require a minimum 36 inches of clear width through gates, along fence lines, and around corners. Larger 7–8 person models may need 48 inches. Measure at the narrowest point — not the average.
Check every obstacle along the route:
- Gate width: Remove the gate from its hinges if needed — most gates are narrower than they appear
- Overhead clearance: Measure under eaves, awnings, and utility lines — hot tubs are tall on the delivery dolly
- Ground surface: Gravel and soft soil can cause the dolly to sink; lay plywood sheets along the path if needed
- Corners: A 90-degree turn in a narrow side yard is the most common delivery problem — walk the path with a tape measure
If the path is genuinely impassable (less than 30 inches, or blocked by a permanent structure), a crane is required. Crane rental typically adds $300–$800 to delivery costs. Contact your delivery company at least a week in advance if you suspect a crane may be needed — they need lead time to schedule equipment.
How to Safely Move and Position Your Hot Tub
An empty hot tub still weighs 500–1,000 lbs. Never attempt to move it with fewer than four people, and use proper equipment. For more detailed logistics, see our dedicated guide on how to safely move a hot tub.
To move and position your hot tub:
- Tip the tub onto its side carefully — always tip toward the equipment panel side to avoid damaging jets
- Slide pipe rollers (3-inch PVC pipe works well) under the tub at the front, middle, and back
- Roll the tub along the delivery path, moving the rear roller to the front as you progress
- At the final location, tip the tub upright gently — have two people stabilize each side
- Slide the tub onto the prepared foundation, positioning it within 6 inches of its final spot
- Make final positioning adjustments before the tub is filled — moving a filled hot tub is not possible
Once positioned, verify level again (see Step 1 leveling guidance) and confirm all access panels are reachable before calling your electrician to make the final connection.
Step 4 — Fill Your Hot Tub and Complete First Startup
With the foundation set, the electrical connected, and the tub in position, you’re in the home stretch. The filling and startup process has a specific sequence — skip any step and you risk air locks, biofilm contamination, or water chemistry problems that take weeks to resolve. When it’s time to refresh the water later, you’ll need to know how to properly empty a hot tub.
The Right Way to Fill a Hot Tub (Avoid Air Locks)
Always fill your hot tub through the filter housing, not from the top. This is the single most important filling technique most first-time owners don’t know.
Here’s why: hot tub plumbing contains air pockets that need to be purged as water enters the system. Filling through the filter housing — by inserting the garden hose directly into the filter standpipe — pushes water into the plumbing from the bottom up, naturally displacing air. Filling from the top leaves air trapped in the jets and pump lines, which causes air locks that prevent the pump from priming.
- To fill correctly:
- Locate the filter housing (typically in a corner cabinet of the tub)
- Remove the filter cartridge and set it aside
- Insert your garden hose into the standpipe at the bottom of the filter housing
- Turn on the water at a moderate flow — too fast can cause overflow before sensors detect it
- Fill until water reaches the minimum fill line marked inside the tub (typically 2–4 inches above the highest jet)
- Replace the filter cartridge before powering on
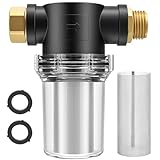
Use a garden hose filter attachment to reduce calcium and heavy metals entering on the first fill — these are far easier to prevent than to treat after the fact.
The Factory Purge: Why Your First Fill Needs Special Treatment
The factory purge is a startup step that no competitor guide mentions — and skipping it is one of the most common causes of persistent water quality problems in new hot tubs.
During manufacturing, shipping, and storage, biofilm-forming bacteria colonize the internal plumbing of your hot tub before it ever reaches you. These bacteria — primarily Pseudomonas aeruginosa — are resistant to standard chlorine or bromine levels and can cause persistent cloudy water, odor, and skin irritation if not eliminated on first startup.
How to perform the factory purge:
- Before adding any chemicals, add a pipe purge product (brands include Ahh-Some or Swirl Away) to the water
- Run all jets on high for 30–60 minutes with the cover closed — this forces the purge solution through every line
- Drain the tub completely — you will likely see brown or gray foam, which is normal and expected
- Rinse the shell thoroughly with clean water
- Refill through the filter housing (as described above)
- Now proceed with initial water chemistry
Many hot tub manufacturers, including Jacuzzi, recommend a purge or “pre-clean” cycle before first use — check your owner’s manual for the specific product they recommend. This one step prevents the majority of “new hot tub water problems” questions on owner forums.
Initial Water Chemistry and Temperature Settings
After the factory purge and second fill, balance your water chemistry before heating to full temperature. Testing and adjusting chemistry is easier at lower water temperatures.
- Starting chemistry sequence:
- Test the fill water pH and alkalinity using a test kit or test strips
- Adjust Total Alkalinity first (target: 80–120 ppm) — use alkalinity increaser or pH minus
- Adjust pH (target: 7.4–7.6) — pH up or pH down as needed
- Add your sanitizer (chlorine target: 3–5 ppm; bromine target: 4–6 ppm)
- Add a calcium hardness increaser if your fill water is soft (target: 150–250 ppm)
- Shock the water with a non-chlorine or chlorine shock treatment
Set initial temperature to 100°F and allow the tub to heat fully before first use. Most 220V tubs heat at 3–6°F per hour — a cold fill from 60°F water will take 6–10 hours to reach temperature.
| Parameter | Target Range | Product if Low | Product if High |
|---|---|---|---|
| Total Alkalinity | 80–120 ppm | Alkalinity Up | pH Down (lowers TA) |
| pH | 7.4–7.6 | pH Up | pH Down |
| Chlorine | 3–5 ppm | Chlorine granules | Dilute or shock |
| Calcium Hardness | 150–250 ppm | Calcium Hardness Up | Dilute with fresh water |
| Sanitizer (Bromine) | 4–6 ppm | Bromine tablets | Dilute or shock |
Step 5 — Install Accessories and Add-Ons
With your hot tub filled, balanced, and heating, this is the ideal time to install accessories — before you’re tempted to just jump in.
Installing a Hot Tub Cover Lifter
A cover lifter is worth installing before your first soak. Manually lifting a waterlogged hot tub cover (which can weigh 50–80 lbs when saturated) puts significant stress on both the cover and your back.
Most side-mount cover lifters install in under an hour:
- Position the lifter brackets on the side of the tub cabinet — typically 6–12 inches from the cover hinge line
- Mark and drill pilot holes using the bracket template (included with most lifters)
- Secure brackets with the provided stainless steel hardware — use a torque specification if given, to avoid cracking the cabinet
- Attach the arm assembly and adjust the tension spring so the cover lifts smoothly to a near-vertical position
- Test operation — the cover should stay open without support and close without slamming
Check that the open cover clears any nearby walls, fences, or overhead structures before finalizing bracket position.
Adding an Ozonator to Your Hot Tub
An ozonator reduces your chemical usage by generating ozone (O₃), which oxidizes contaminants before they reach the water. Many hot tubs are pre-plumbed for an ozonator with a dedicated port on the circulation system.
Installation involves connecting the ozonator’s check valve to the designated injection port, running the power lead to a switched outlet inside the equipment bay, and programming the unit to run during filtration cycles. Most ozonators are plug-and-play for tubs with pre-existing ports — the job takes 20–30 minutes. If your tub doesn’t have a dedicated port, consult your dealer before attempting to retrofit one.
Setting Up a Hot Tub Timer
A timer reduces operating costs by limiting heating cycles to off-peak electricity hours. Many modern hot tubs have built-in economy and sleep modes that function as timers (see the next section). If your tub lacks built-in scheduling, an external mechanical or digital timer can be installed on the circuit between the GFCI disconnect and the tub — a job for your electrician, not a DIY task on a 220V circuit.
Understanding Your Hot Tub Controls and Basic Operation
Most hot tub owners spend the first week confused by their control panel. A few minutes with this section will save you from accidentally putting your tub in Sleep mode and wondering why it won’t heat.
Reading Your Control Panel
Hot tub controls are standardized across most brands into a few core functions: temperature setting, jet control, light control, and mode selection. The main display shows current water temperature and set temperature simultaneously — if these two numbers differ significantly, the tub is still heating.
Common panel buttons and their functions:
- Temp ▲/▼: Adjusts set temperature (typically 80–104°F range, with 104°F as the NEC-mandated maximum for residential spas)
- Jets 1 / Jets 2: Activates pump 1 and pump 2; pressing again cycles through low/high speeds
- Lights: Controls LED lighting; hold for 3 seconds on most brands to access color cycling
- Mode or Settings: Accesses Economy, Sleep, and Standard modes
How to Turn Your Hot Tub On and Off
To turn on your hot tub: Ensure the GFCI disconnect outside is in the ON position, then press the power button or temperature button on the control panel. The display will illuminate and show current water temperature. The circulation pump activates automatically on most models.
To turn off your hot tub temporarily: Press and hold the temperature down button (▼) until “OFF” or “SB” (Standby) appears — this stops active heating but keeps the freeze protection active. Do not turn off the GFCI disconnect for routine on/off — this cuts power to freeze protection and can cause pipe damage in cold climates.
To fully power down for maintenance or service: Turn off the GFCI disconnect, then drain the tub completely if winterizing.
Sleep Mode, Economy Mode, and Panel Lock Explained
These three modes cause more confusion than any other control panel feature.
Standard Mode: The tub maintains set temperature continuously. Most expensive to operate, but the tub is always ready.
Economy Mode: The tub only heats during programmed filtration cycles. If you set filtration for 6 AM–8 AM and 6 PM–8 PM, the tub heats only during those windows. Temperature may drop between cycles. Best for hot tubs used on a regular schedule.
Sleep Mode: The tub heats only to 20°F below the set temperature during filtration cycles. Lowest operating cost, but the tub may not be at full temperature when you want it. To exit Sleep mode, press the temperature button twice on most brands — the display will return to your set temperature.
Panel Lock: Prevents accidental temperature changes (useful if children have access). On most Hot Spring and Jacuzzi models, hold the “Jets” button for 5 seconds to lock, and repeat to unlock (or follow specific brand instructions on how to unlock a Hot Springs hot tub). Your owner’s manual will confirm the exact sequence for your model.
Essential Hot Tub Maintenance – A Quick Summary
Proper maintenance is what separates a hot tub you enjoy for 15+ years from one that becomes a green-water problem you’re trying to sell. This section provides a brief overview — for the complete guide, see the full hot tub maintenance guide at OneHotTub.
Weekly tasks: Test water chemistry (pH, sanitizer, alkalinity) using high-quality test strips or a liquid drop kit. Add sanitizer and shock as needed to maintain safe levels, and thoroughly rinse the filter with a garden hose to remove surface debris.
Monthly tasks: Deep clean the filter with a specialized chemical filter cleaner to break down body oils and lotions that water alone cannot remove. Check and adjust calcium hardness to prevent scaling on your heater element, and inspect all visible jets and pump seals for early signs of leaks.
Quarterly tasks: Drain and refill the tub completely (every 3–4 months for average use). While the tub is empty, clean the acrylic shell with a non-abrasive spa cleaner to remove the waterline ring. Lubricate the cover’s hinge hardware and apply a UV protectant to the vinyl to prevent cracking.
Annually: Schedule a professional service check to evaluate pump seals, the heater element, and the main control board before you need to consult a comprehensive DIY hot tub repair guide. Replace the filter cartridge entirely, and inspect or clean the ozonator (if installed) to ensure it is still producing ozone.
The most common maintenance mistake is allowing total dissolved solids (TDS) to build up by not draining and refilling on schedule. High TDS makes water chemistry difficult to balance, reduces sanitizer effectiveness, and causes skin irritation. Drain on schedule — it takes about 30 minutes and prevents most water quality problems from developing in the first place.
Common Mistakes and When to Call a Professional
Even well-prepared homeowners make avoidable installation errors. Here are the ones that consistently cost the most to fix.
5 Installation Mistakes That Cost Homeowners Thousands
Mistake 1 — Skipping permits. An unpermitted electrical installation can void your homeowner’s insurance policy and require complete re-wiring when you sell the home. Always permit electrical work.
Mistake 2 — Pouring a slab without curing time. Placing a 5,000-lb hot tub on a concrete slab before the 28-day cure period cracks the slab. The repair cost often exceeds the cost of waiting.
Mistake 3 — Skipping the factory purge. As covered in Step 4, the factory purge eliminates biofilm that causes persistent water quality problems. It takes 90 minutes and prevents weeks of troubleshooting.
Mistake 4 — Using the wrong wire gauge. Installing 8/3 wire when your tub requires 6/3 is a fire hazard and a code violation. Your electrician specifies wire gauge based on the tub’s amperage draw — never pre-purchase wire before they’ve reviewed the tub’s specifications.
Mistake 5 — Not measuring the delivery path. A crane call on delivery day adds $300–$800 that could have been avoided with a 20-minute tape measure exercise. Measure every chokepoint before scheduling delivery.
When DIY Ends and the Pro Begins
Can you install a hot tub yourself? Partially, yes. The honest answer is that the foundation preparation, accessory installation, and water chemistry are all legitimate DIY tasks for a capable homeowner. The electrical work is not.
Here’s the clear line:
| Task | DIY Status | Notes |
|---|---|---|
| Foundation prep (gravel or spa pad) | ✅ DIY | Follow leveling specs precisely |
| Foundation prep (concrete slab) | ✅ DIY (moderate skill) | Hire for forming if inexperienced |
| Electrical wiring (any voltage) | ❌ Licensed electrician required | NEC Article 680, permit mandatory |
| Delivery path planning | ✅ DIY | Measure before scheduling |
| Moving/positioning the tub | ✅ DIY with help | Minimum 4 people + pipe rollers |
| Fill and startup chemistry | ✅ DIY | Follow factory purge protocol |
| Accessory installation (cover lifter) | ✅ DIY | ~1 hour, basic tools |
If you’re facing a complex deck installation, a sub-panel upgrade, or any situation where you’re unsure, the cost of a professional consultation is always less than the cost of a mistake.
Frequently Asked Questions
Can I install a hot tub myself?
You can handle most hot tub installation tasks yourself, but electrical work must be done by a licensed electrician. Foundation preparation, delivery path planning, moving and positioning the tub, filling, startup chemistry, and accessory installation are all DIY-appropriate for a capable homeowner. The 220V/240V electrical circuit, GFCI disconnect, and bonding work require a licensed electrician, a permit, and a final inspection in virtually every jurisdiction. Attempting to wire a hot tub yourself risks electrocution, code violations, and voided insurance coverage.
Do I need 6/2 or 6/3 wire for a hot tub?
Most 240V hot tubs require 6/3 wire (three conductors plus a ground), but the correct answer depends on your specific tub’s wiring diagram. Hot tubs that use both 240V and 120V circuits internally — which includes most models with lighting and control boards — require 6/3. Simpler 240V-only units may use 6/2. Your hot tub’s owner’s manual and wiring diagram will specify the exact requirement. Always have your licensed electrician confirm wire gauge before purchasing materials — the wrong gauge is a fire hazard and code violation.
What’s the best thing to put under a hot tub?
A 4-inch reinforced concrete slab is the best permanent foundation for most hot tub installations. It handles the 3,000–6,000 lb filled weight, drains properly when sloped slightly, and lasts indefinitely. For budget-conscious homeowners, 6–8 inches of compacted ¾” crushed gravel is a legitimate, code-accepted alternative that costs $50–$200 in materials and provides excellent drainage. Prefab interlocking spa pads work well for lighter plug-and-play tubs. Avoid placing a hot tub directly on soil, grass, or untreated wood — these surfaces shift, compress, and cause leveling problems over time.
Why do so many people get rid of hot tubs?
The most common reasons homeowners sell or remove hot tubs are maintenance neglect and operating costs, not dissatisfaction with the product itself. Water chemistry requires weekly attention — owners who fall behind face persistent cloudy water, biofilm, and equipment damage that becomes expensive to reverse. Monthly electricity costs of $20–$60 surprise some owners who didn’t budget for ongoing operating costs. Mechanical failures (pump seals, heater elements) on older tubs can also exceed the tub’s perceived value. Consistent maintenance — particularly the quarterly drain-and-refill cycle — prevents the majority of problems that lead to abandonment.
Is soaking in a hot tub good for arthritis?
Research supports hydrotherapy as a beneficial complement to arthritis management. The Arthritis Foundation notes that warm water immersion reduces joint pain and stiffness by decreasing joint load and improving circulation. A study published in Rheumatology found that regular hydrotherapy significantly improved pain scores and physical function in patients with rheumatoid arthritis compared to land-based exercise. Water temperature of 100–102°F is generally recommended for arthritis relief — hot enough to relax muscles and improve circulation, but below the 104°F maximum to avoid cardiovascular strain. Always consult your physician before beginning a hydrotherapy routine if you have a cardiac condition.
Wrapping Up Your Hot Tub Installation
For cost-conscious homeowners figuring out how to install a hot tub, The 4-Phase Hot Tub Method delivers a clear, safe path from planning to first soak. Prepare your foundation to support 3,000–6,000 lbs, Power your tub with a code-compliant 220V circuit installed by a licensed electrician, Place the tub with a measured delivery path, and Play by completing the factory purge before your first soak. Electrical work adds $800–$1,600 to installation costs (Forbes Home, 2026) — budget for it, permit it, and don’t cut corners.
The 4-Phase Hot Tub Method works because it draws a clear line between what a capable homeowner can confidently handle and what requires a licensed professional. Foundation prep, delivery logistics, water chemistry, and accessory installation are all within reach. The 220V electrical work is not — and no guide that tells you otherwise is worth following.
Your next step: measure your delivery path today, contact your local building department about permit requirements, and get three electrician quotes before committing to a circuit location. With those three tasks complete, you’ll be ahead of 90% of homeowners who show up on delivery day unprepared. Your first soak is closer than it feels right now.

Dave King
Hot tub tester and writer at One Hot Tub.