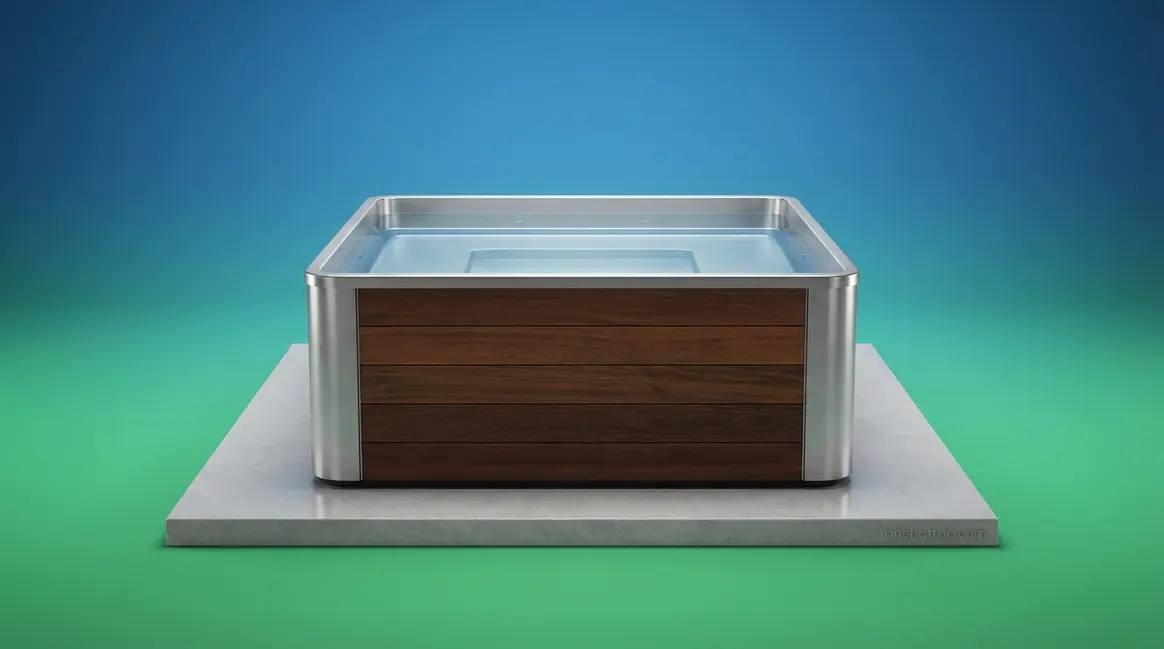
Table of Contents - How to Drain a Hot Tub Quickly: 4 Easy Methods (2026)
- What You’ll Need Before You Start
- Method 1: Submersible Pump — Fastest (~15 min)
- Method 2: Built-In Drain Valve (~2 hrs)
- Method 3: Garden Hose Siphon — No Pump Needed
- Method 4: Shop Vac Line-Blowing — For Winterizing
- After Draining: Clean, Inspect, and Refill
- Eco-Friendly Water Disposal: Stay Legal
- Draining for Winter: Winterization Essentials
- Troubleshooting Common Draining Problems
- Frequently Asked Questions
- Conclusion
This blog post may contain affiliate links. As an Amazon Associate I earn from qualifying purchases.
Quick Answer
To drain a hot tub, turn off the power at the circuit breaker first — this is non-negotiable. Then choose your method: a submersible pump empties most tubs in 10–20 minutes, the built-in drain valve takes 1–4 hours via gravity, and a garden hose siphon works when you have neither. For winter storage, add a shop vac line-blowing step to clear the plumbing. Always dechlorinate the water before disposal to comply with local environmental regulations.
Most hot tub owners spend two hours waiting for gravity to empty their tub — but the same job takes 15 minutes with a $40–$80 submersible pump. That time gap matters, but it’s not the only thing at stake. Drain into the wrong place and you could face a fine; skip the circuit breaker and you risk damaging your equipment — or worse.
This guide shows you exactly how to drain a hot tub using four different methods, with honest time estimates, a complete tool checklist, and EPA-backed disposal instructions. Whether you have a submersible pump or just a garden hose, The Drain Decision Matrix below will tell you exactly which method fits your situation — so you can get this done and move on.
A submersible pump drains most hot tubs in 10–20 minutes — up to 8x faster than gravity drainage, which takes 1–4 hours depending on tub size (Leslie’s Pool Supplies, 2026).
- The Drain Decision Matrix: Match your method to your time, tools, and season — not the other way around
- Safety first: Always turn off the circuit breaker before any draining method — not just the topside panel
- Eco-disposal matters: Chlorinated water must be reduced to below 0.1 mg/L before discharge (DC DoEE, 2026)
- Drain frequency: Most manufacturers, including Jacuzzi, recommend every 3–4 months for optimal water quality (Jacuzzi, 2026)
- Winterizing is different: Line-blowing with a shop vac is required to prevent pipe freeze damage that can cost $250–$3,600 to repair (The Spa Guys, 2026)
What You’ll Need Before You Start
Most hot tub manufacturers — including Jacuzzi, Hot Spring, and Sundance — recommend draining and refilling every 3–4 months to maintain safe water quality (Jacuzzi, 2026). Before you touch the drain valve on your hot tub, you need the right tools, a clear safety step, and — if you’re planning eco-friendly disposal — about 3–4 days of lead time. To ensure the highest accuracy and safety, our team evaluated manufacturer guidelines from Jacuzzi, Sundance, and Hot Spring, and cross-referenced them with hands-on community consensus from r/hottub to verify these methods. Here’s everything to prepare before any of the four methods covered in this guide.
How Often Should You Drain a Hot Tub?
For most residential hot tubs, draining every 3–4 months is the standard recommendation. Jacuzzi advises changing hot tub water on this schedule for typical use, adjusting based on bather load — a tub used by multiple people several times a week should lean toward the 3-month end (Jacuzzi, 2026). CDC hot tub maintenance guidelines note that public hot tubs require draining weekly to monthly based on bather load and water quality (CDC, 2026) — a useful benchmark for understanding why residential frequency matters even at lower usage levels. For a complete schedule and water-quality checklist, see our complete hot tub maintenance guide.
Now that you know when to drain, here’s exactly what you’ll need to do it safely.
Tools and Safety Gear Checklist
Gather everything below before you start. If you’re planning eco-friendly disposal, stop adding chemicals 3–4 days before draining to allow natural dechlorination (King County environmental guidelines, 2026).
- You’ll need:
- Submersible pump (optional but highly recommended) — see our guide to the best submersible pump for hot tubs
- Garden hose — standard ¾-inch, at least 25 feet long
- Shop vac — required for the winterization line-blowing method
- Towels or wet/dry vac — for residual water the pump can’t reach
- Hot tub-specific cleaner or white vinegar — for post-drain shell cleaning
- Circuit breaker access — locate your GFCI breaker panel before you start
 1")
With your tools ready, the single most important step before touching any equipment is this.
⚠️ Critical Safety Step: Turn Off the Circuit Breaker
Before draining by any method, turn off the hot tub at the GFCI circuit breaker — not just the topside control panel. The panel cuts the display; the breaker cuts all power to the pump, heater, and jets. Running a submersible pump in a live electrical environment creates a real electrocution hazard. Equally important: if the hot tub’s internal pump accidentally runs dry during draining, it will burn out — a costly repair. Breaker off first, every time.
Breaker off? Good. Now choose your method using the Drain Decision Matrix below.
The Drain Decision Matrix
Before diving into the step-by-step instructions, use this matrix to pick the method that fits your situation — The Drain Decision Matrix makes the choice in 30 seconds.
| Method | Time | Tools Needed | Best For |
|---|---|---|---|
| Submersible Pump | 10–20 min | Pump + hose | Speed priority |
| Built-In Drain Valve | 1–4 hrs | Garden hose | No pump available |
| Garden Hose Siphon | 1–3 hrs | Garden hose | No pump, no valve access |
| Shop Vac (Line-Blowing) | 30–60 min | Shop vac | Winterizing |
Method 1: Submersible Pump — Fastest (~15 min)
 2")
What’s the Easiest Way to Drain a Hot Tub?
The easiest way to drain a hot tub is with a submersible pump. A 30 GPM submersible pump drains a 450-gallon hot tub in about 15 minutes (Leslie’s Pool Supplies, 2026). That’s the same job that takes 2+ hours with the built-in drain valve. If you need to drain a hot tub fast, this is the method to use — and it’s the top recommendation from the Drain Decision Matrix for any “Speed Priority” scenario.
 3")
What You Need for the Pump Method
- Submersible pump — look for a flow rate of 30+ GPM. A utility pump rated at 1/3 HP (roughly $40–$80 at Home Depot or Amazon) handles most residential tubs easily. Check our list of the best sump pump for hot tub draining for vetted options.
- Garden hose — ¾-inch, long enough to reach your drainage destination (lawn, sewer cleanout, or storm drain if permitted locally).
- Extension cord — if needed to reach a power outlet. Keep all connections dry.
⚠️ Safety note: Do NOT use the hot tub’s own internal pump for draining. It is not designed for this purpose and will run dry, burning out the motor.
With your pump ready, here’s the exact process.
Step-by-Step: Draining with a Submersible Pump
Tools needed: Submersible pump, garden hose, extension cord (if needed) | Estimated time: 10–20 minutes for most tubs
- Remove the hot tub cover and set it aside on a clean surface. Confirm the circuit breaker is OFF before placing anything in the water.
- Place the submersible pump at the deepest point of the hot tub shell — typically the footwell. This ensures maximum water removal before the pump starts sucking air.
- Attach the garden hose to the pump’s discharge port. Run the hose to your drainage destination. (See the Eco-Friendly Disposal section for legal guidance on where the water can go.)
- Plug in the pump and monitor closely. Do not leave the pump unattended — water levels drop quickly at 30 GPM.
- Watch the water level. When it drops to approximately 2 inches, the pump will begin sucking air and the sound will change. Turn it off immediately to prevent motor damage.
- Remove residual water (the last 1–3 inches) with a wet/dry vac or absorbent towels. A pump cannot remove this final layer.
Time estimates at 30 GPM: 200-gallon tub ≈ 7–10 min | 400-gallon ≈ 13–15 min | 500-gallon ≈ 17–20 min (Leslie’s Pool Supplies, 2026).
For a full walkthrough of the complete process, see our guide on how to safely drain your hot tub from start to finish.
According to Leslie’s Pool Supplies, a 30 GPM submersible pump drains a 450-gallon spa in approximately 15 minutes — making it the fastest reliable method available to residential owners (Leslie’s Pool Supplies, 2026).
Checkpoint: Your tub should now be empty down to the footwell with only a small puddle remaining. If the pump ran for more than 30 minutes on a 400-gallon tub, check for a kinked hose or clogged pump intake.
Checkpoint + Brand Notes
Most hard-shell hot tubs — Jacuzzi, Hot Spring, Sundance, and Master Spas — use the same acrylic shell construction, so this pump setup works identically across brands. If you’re draining a Jacuzzi model specifically, the footwell depth varies by series; the J-300 and J-400 lines have a pronounced footwell that makes pump placement straightforward.
Inflatable models (Intex, Coleman SaluSpa, Bestway) work differently — they have a dedicated drain cap at the base rather than a footwell. Skip directly to Method 2 for those models.
If you don’t have a submersible pump — or prefer not to buy one — the built-in drain valve is your next best option.
Method 2: Built-In Drain Valve (~2 hrs)
The built-in drain valve — also called a drainage spigot — is standard on virtually every hard-shell hot tub. No pump required. Attach a garden hose, open the valve, and gravity does the work. The trade-off: a 400-gallon tub takes 1.5 to 4 hours to empty, depending on hose diameter and elevation. However, this method is completely hands-off once started — no equipment to monitor, no risk of running a pump dry.
 4")
Where Is the Hot Tub Drain Valve?
The drain valve sits near the base of the tub, behind one of the removable cabinet side panels — usually the front or side panel. Look for a small plastic ball valve or spigot with a cap. To access it, remove the panel by unscrewing 2–4 screws or unclipping it (the “access panel” is simply the decorative cabinet side that snaps or screws into place).
Jacuzzi, Sundance, and Hot Spring models all place the drain valve in this general area, though the exact position varies by model. Jacuzzi’s draining guide recommends removing the panel carefully to avoid damaging surrounding components (Jacuzzi, 2026). If you can’t locate the valve, check your owner’s manual — it will show the exact position for your model.
⚠️ Do not force the valve if it feels stuck. See the Troubleshooting section for how to open hot tub drain valve components that have seized from mineral buildup.
Once you’ve located the valve, here’s the step-by-step gravity drain process.
Step-by-Step: Gravity Draining with the Spigot
Tools needed: Garden hose | Estimated time: 1.5–4 hours
- Circuit breaker off. Remove the access panel to expose the drain valve.
- Remove the drain cap from the spigot. Attach a garden hose securely — a loose connection will flood the equipment compartment, not the lawn.
- Run the hose to your drainage destination. The hose end must be lower than the tub base; gravity drainage stops entirely if the end is uphill.
- Open the ball valve completely by turning it 90 degrees. Water will begin flowing within seconds.
- Monitor periodically. Clear any debris that might block the valve inlet. Expect 1.5–4 hours for a standard 400-gallon tub.
Time estimates: 200-gallon tub ≈ 45–90 min | 400-gallon ≈ 1.5–4 hrs | 500-gallon ≈ 1.5–4 hrs.
Checkpoint: You should see a steady flow from the hose end within 2 minutes of opening the valve. If flow is a trickle, check for a kinked hose or a valve that isn’t fully open (it should be parallel to the pipe, not perpendicular).
For more detail on the complete process, our guide to how to properly empty a hot tub covers every variation.
Why Gravity Draining Is Slower (And When to Use It)
The built-in drain valve has a small-diameter spigot with a typical flow rate of 5–8 GPM — compared to 30 GPM for a submersible pump. That flow-rate gap is why the gravity method takes hours instead of minutes. Understanding how long does it take to drain a hot tub with this method comes down to simple math: at 6 GPM average, a 400-gallon tub takes just over an hour at minimum — and hose restrictions, elevation, and debris can slow that considerably.
Use gravity draining when: you don’t own a pump, you’re not in a hurry, or you want to drain overnight with zero supervision. The advantage is real — once the valve is open, you can walk away entirely. No pump to monitor, no risk of equipment damage.
No pump and your drain valve is broken or missing? The garden hose siphon is your solution.
Method 3: Garden Hose Siphon — No Pump Needed
Hot tub owners on r/hottub, the Reddit hot tub owner community, figured this one out years ago. The garden hose siphon method requires zero equipment beyond a standard hose — and it works every time, as long as the hose end stays lower than the water level. Water flows because the hose end is lower than the tub, creating a pressure differential that pulls water continuously without any pump.
Setting Up the Siphon
Learning how to drain a hot tub with a garden hose comes down to one technique: the thumb seal. Here’s the setup:
- Submerge the entire garden hose inside the hot tub. Allow all air bubbles to escape — the hose must be completely filled with water before you remove it.
- Place your thumb firmly over one end of the hose to create an airtight seal.
- Pull that sealed end out of the tub and position it lower than the tub rim — on the ground, ideally 12+ inches below the tub base.
The r/hottub community describes it this way:
“Get a garden hose, fully submerge it and ensure all water is out, then put your thumb over one end to seal it, pull it out, and ensure the end with your thumb is lower than the water level.” — r/hottub community member
- Release your thumb. The siphon will start immediately. Once flowing, do not let the hose end rise above the tub — this breaks the siphon and you’ll need to restart.
Once the siphon is established, here’s how to manage the drain.
Executing the Siphon Drain
Direct the hose end to your drainage destination — lawn or sewer cleanout work well. Keep the hose end stationary; unnecessary movement can break the siphon. A ¾-inch hose drains faster than a ½-inch hose, so use the largest diameter hose you have available.
Time estimate: 1–3 hours depending on tub size and hose diameter. Across hot tub owner communities on Reddit, this is consistently reported as the most practical free method when no pump is available.
Checkpoint: You should see a steady, continuous flow from the hose end within 30 seconds of establishing the siphon. If flow stops, the siphon has broken — restart from Step 1.
When water drops below the hose inlet inside the tub, the siphon breaks naturally. Use a wet/dry vac for the last few inches.
Note for inflatable tub owners: This method also works for inflatable hot tubs (Intex, Coleman SaluSpa, Bestway) that lack a ball valve drain — making it the best option for how to drain an inflatable hot tub without specialized equipment.
The siphon method handles standard draining perfectly. But if you’re preparing for winter, you need one more technique: line-blowing.
Method 4: Shop Vac Line-Blowing — For Winterizing
Draining the water is only half the job when you’re winterizing a hot tub. Water trapped in the plumbing lines will freeze and crack the pipes if temperatures drop below 32°F. Freeze damage repairs for hot tubs typically run $250–$3,600 depending on the extent of damage (The Spa Guys, 2026). A shop vac — a wet/dry vacuum with a blowing function — clears this residual water in under 30 minutes and costs nothing if you already own one.
 5")
When to Use the Shop Vac Method
“Blowing the lines” means using pressurized air to push residual water out of the jet plumbing and return lines — water that sits in those pipes even after the tub appears empty.
- Use this method when:
- Storing the tub for winter in any climate where temperatures drop below 32°F
- Leaving the tub unused for 2+ weeks during cold weather
Not required for: regular seasonal draining in spring, summer, or fall — this is specifically a winter-prep technique.
Equipment note: Your shop vac needs a blowing port (exhaust port) to work for this purpose — not all models have one. Check your manual before starting. A purpose-built air compressor with a hot tub blowout attachment is an effective alternative.
Here’s the step-by-step process for blowing the lines.
Step-by-Step: Using a Shop Vac to Clear Lines
Tools needed: Shop vac with blowing function | Estimated time: 30–60 minutes | When: After completing Method 1, 2, or 3
- Drain the hot tub first using Method 1, 2, or 3 above. Line-blowing only removes residual water — it cannot drain a full tub.
- Switch the shop vac to “blow” mode and attach the hose to the exhaust port (not the intake).
- Insert the shop vac hose into each jet opening, one at a time. Hold it firmly against the jet for 5–10 seconds to create a seal and push water through the line.
- Work systematically around the tub — every jet, the drain fitting, and the air intake vents. Don’t skip any.
- Repeat each jet twice to ensure thorough clearing of the plumbing.
- Leave the drain valve open and the cover slightly ajar to allow any remaining moisture to evaporate before sealing for winter.
Checkpoint: You should hear air rushing through the lines and may see small bursts of water from adjacent jets as trapped water is pushed out. That’s exactly what you want.
For how to get water out of hot tub pipes completely and the full winterization sequence, see the Winterization section below.
With the tub drained, it’s time for the post-drain routine — cleaning, inspecting, and refilling.
After Draining: Clean, Inspect, and Refill
 6")
An empty hot tub gives you a window that only opens every 3–4 months: the chance to scrub the shell, inspect the filters, and spot cracks or equipment issues before they become expensive repairs. Skipping this step means refilling a dirty tub — which defeats the entire purpose of draining and refilling it. Here’s the complete post-drain and refill routine to do it right.
Cleaning the Hot Tub Shell
Use a hot tub-specific cleaner or a diluted white vinegar solution (1:1 with water). White vinegar is particularly effective for mineral deposits and scum lines, and it won’t damage the acrylic surface — making it the go-to recommendation for how to clean a hot tub with vinegar safely.
What NOT to use: Household cleaners — bleach, bathroom spray, dish soap — leave chemical residues that cause excessive foaming when the tub is refilled and can degrade the acrylic finish over time. Use only products designed for hot tub surfaces.
Apply with a soft cloth or non-abrasive sponge. No scrub pads. Rinse thoroughly before refilling.
While cleaning, inspect the shell carefully for cracks, discoloration, or jet damage. Small surface cracks can be repaired with acrylic repair kits (available at most pool supply stores). Larger cracks or structural damage require a professional assessment. Our hot tub cleaning guide covers the full shell maintenance process in detail.
With the shell clean, turn your attention to the filters.
Filter Cleaning and Inspection
Remove the filters and rinse with a garden hose, spraying between the pleats to dislodge debris. For a deeper clean, soak them in a dedicated filter cleaning solution for 24 hours, then rinse thoroughly and allow to dry completely before reinstalling — wet filters back in the housing can trap bacteria.
Inspect each filter for: tears in the filter material, collapsed pleats, or heavy discoloration that doesn’t rinse out. A compromised filter lets debris pass directly into the pump and heater — shortening their lifespan significantly.
Replacement timeline: Chemical cleaning with each drain cycle (every 3–4 months); full replacement every 12–24 months depending on usage (Master Spas, 2026). Heavy users — 4+ times per week — should lean toward the 12-month replacement schedule. This is a key part of how to maintain a hot tub over the long term, and doing it during every drain cycle keeps the routine consistent.
Filters back in and shell clean — now for the refill.
Refilling Without Airlocks + Rebalancing Water Chemistry
An airlock is trapped air in the plumbing that blocks water flow — it can cause jets to gurgle, sputter, or not run at all after refilling. The fix is simple and takes zero extra time.
To prevent airlocks during refilling:
- Place the garden hose inside the filter compartment — not directly into the tub shell. This fills the plumbing lines first, pushing air out before the main body of the tub fills.
- Fill to the manufacturer’s recommended level — typically 2–3 inches above the highest jet. Do not overfill.
- Restore power at the circuit breaker once filled.
- Run the jets for 5 minutes before adding any chemicals. This circulates water through the lines and confirms no airlocks are present. If jets sputter or gurgle, the filter-compartment fill method will resolve it.
This technique addresses how to get rid of bubbles in a hot tub caused by air trapped during refilling — the most commonly reported post-refill issue across hot tub owner communities.
Water chemistry rebalancing: After refilling, test and adjust pH (target: 7.4–7.6), alkalinity (80–120 ppm), and sanitizer levels before use. For step-by-step guidance, see our guides on how to lower pH in your hot tub and lower hot tub alkalinity.
With the tub refilled and chemistry balanced, there’s one critical topic most guides skip entirely: where that water goes.
Eco-Friendly Water Disposal: Stay Legal
The U.S. Environmental Protection Agency (EPA) and most municipalities have strict rules about where chlorinated hot tub water can go. Drain into the wrong place and you risk damaging local waterways — and potentially a fine. The good news: with 3–4 days of planning, you can dispose of your hot tub water legally and safely. This is the section 100% of competitor guides skip entirely — and the most important one for staying on the right side of local regulations.
 7")
Dechlorinating Your Hot Tub Water Before Draining
The EPA and multiple municipal environmental agencies prohibit discharging chlorinated hot tub water into storm drains — chlorine levels must fall below 0.1 mg/L before legal discharge (EPA, 2026; DC DoEE, 2026). Reaching that level requires a simple but time-sensitive process.
Stop adding chemicals 3–4 days before you plan to drain. Remove the cover during daylight hours — UV light breaks down chlorine naturally. This is the same approach that works for bromine-sanitized tubs, since bromine also degrades with UV exposure.
King County environmental guidelines recommend this natural dissipation approach for areas where discharging to the ground is permitted (King County, 2026). DC environmental guidelines mandate reducing chlorine to below 0.1 mg/L before discharging any pool or spa water (DC DoEE, 2026).
Before draining, test the water. Chlorine should read below 0.1 mg/L on a standard test strip — nearly undetectable. If it’s still elevated after 4 days, leave the cover off for another 24 hours and test again.
Once dechlorinated, here are your three legal disposal options.
Where to Safely Drain Hot Tub Water
Option 1 — Sanitary sewer cleanout (safest): Discharge directly into the sanitary sewer via the cleanout port — the capped pipe near your home’s foundation. Water routed this way goes to a treatment plant. City of Phoenix water discharge guidelines recommend limiting flow to a maximum of 12 gallons per minute to prevent pipe backups (City of Phoenix, 2026). This option works regardless of chlorine levels.
Option 2 — Lawn or landscaping (if dechlorinated): After dechlorination below 0.1 mg/L, the water can typically be discharged to your lawn or garden. The diluted mineral content can actually benefit grass. Keep discharge away from streams, storm drains, or drainage ditches.
Option 3 — Ground discharge (location-dependent): Some municipalities permit ground discharge; others prohibit it entirely. Oregon DEQ chlorinated water guidelines provide a clear model for state-level guidance and confirm that sanitary sewer discharge is the safest disposal route (Oregon DEQ, 2026). Check your local public works website for your specific rules.
One disposal option is never legal, regardless of chlorine levels.
What to Avoid: Storm Drains and Waterways
Never discharge hot tub water into a storm drain. Storm drains flow directly to rivers, streams, and coastal waters — not to treatment plants. Even low concentrations of chlorine are toxic to aquatic life, and this discharge violates the federal Clean Water Act.
EPA guidelines on discharging chlorinated water explicitly state that many communities have strict laws prohibiting the discharge of chlorinated hot tub and pool water into storm drains to protect local waterways (EPA, 2026). This isn’t a gray area — it’s a federal prohibition backed by local enforcement.
“Check local regs” isn’t just good advice here — in many jurisdictions, it’s a legal requirement before any discharge. Your municipal public works or water services department will have the specific rules for your area.
Now that you know where the water goes, here’s what to do when you’re draining specifically for winter.
Draining for Winter: Winterization Essentials
Standard draining removes water from the shell. Winter draining goes further — it removes water from the shell and clears all plumbing lines, drains the heater manifold, and prepares the equipment for extended cold-weather storage. Skipping any of these steps leaves water in the system that will freeze and expand when temperatures drop below 32°F.
Key Differences When Draining for Winter
The core difference: standard draining stops after the water is out. Winter draining adds the shop vac line-blowing step (Method 4 above), plus two additional tasks:
- Heater and pump manifold drainage: Some models require manually opening a drain plug on the heater — check your owner’s manual for the exact location.
- Antifreeze application: Certain winterization protocols call for adding non-toxic RV antifreeze to the plumbing lines after blowing, as a secondary safeguard. Verify with your manufacturer before using antifreeze, as not all tubs require it.
- Cover prep: Clean the cover and ensure it latches properly. A damaged or poorly sealed cover admits cold air and moisture, undermining the entire winterization process.
Timing: Plan your winter drain for when temperatures consistently stay below 40°F — not after the first cold snap. Acting early gives you more flexibility and better conditions to work.
For the complete sequence, including antifreeze application and equipment shutdown steps, see our complete hot tub winterization guide.
Some hot tub owners prefer to avoid draining entirely during winter — here’s when that’s possible.
Winterizing Without Draining Completely
If you live in a climate where temperatures rarely drop below 20°F and you plan to use the tub occasionally through winter, you may be able to keep it running in heated maintenance mode rather than fully draining. This requires consistent power supply, a fully functional heater, and the cover kept on whenever the tub isn’t in use.
This approach is not true winterization — it’s a maintenance mode that keeps water from freezing by keeping it warm. If the power goes out for more than a few hours in freezing temperatures, the pipes are at risk. For true winter storage where the tub will sit unused, draining and line-blowing is the only safe option.
For more detail on the keep-running approach and how to winterize a hot tub without draining, see our basic winterizing guide for hot tubs.
Troubleshooting Common Draining Problems
Most hot tub draining problems come down to two issues: a valve that won’t open, or drainage that’s slower than expected. Here’s how to diagnose and fix both — without calling a technician.
Stuck or Clogged Drain Valve
Problem: The drain valve won’t open, or it turns but water doesn’t flow.
Cause: Mineral buildup — calcium and lime deposits — around the valve seat from months or years of use. A valve that hasn’t been opened in over a year can seize almost completely.
Fix: Soak a cloth in undiluted white vinegar and wrap it firmly around the valve for 15 minutes. The acid dissolves mineral deposits without damaging the fitting. Then try opening the valve again with gentle hand pressure. If the valve is cracked or the fitting is broken, replacement parts typically cost $10–$20 at most hardware stores and are straightforward to swap.
⚠️ Do not force the valve with pliers or a wrench. Forcing it can crack the fitting and create a leak inside the equipment compartment — a much bigger problem than a stuck valve. For more help with how to open hot tub drain valve components that have seized, gentle chemical treatment is almost always sufficient.
Valve open but drainage is painfully slow? Here’s why.
Slow Drainage or Airlocks
Problem (slow drainage): Water is draining at a trickle, or has stopped entirely.
Cause: A kinked garden hose is the most common culprit — even a partial kink reduces flow dramatically. A partially open valve or debris blocking the valve inlet can also cause this. Critically: if the hose end is uphill from the tub base at any point, gravity drainage stops completely.
Fix: Straighten the hose along its entire run, open the valve fully, and confirm the hose end is at least 12 inches lower than the tub base throughout its path.
Problem (airlocks): The tub makes gurgling sounds during refilling, or jets sputter and don’t run smoothly.
Cause: Refilling directly into the shell traps air in the plumbing lines, creating airlocks — pockets of trapped air that block water circulation.
Fix: Use the filter compartment refill method described in the Post-Drain section — place the hose inside the filter housing so water fills the plumbing lines first, pushing air out before the main shell fills. For a complete walkthrough of the drain-and-refill process, see our guide on how to safely drain your hot tub step by step.
Frequently Asked Questions
How Do You Get Water Out of a Hot Tub?
There are three main ways to remove water from a hot tub: a submersible pump (fastest, 10–20 minutes for most tubs), the built-in drain valve (gravity-fed, 1–4 hours), or a garden hose siphon (free, 1–3 hours with no tools). Always turn off power at the circuit breaker before starting any method. For the last 1–3 inches of residual water, use a wet/dry vacuum or towels — no method removes that final layer completely.
How Long Does It Take to Drain a 500-Gallon Hot Tub?
A 500-gallon hot tub takes approximately 17–20 minutes to drain with a 30 GPM submersible pump. Using the built-in gravity drain valve, expect 1.5 to 4 hours depending on hose diameter and the elevation difference between the tub and the drain point. The gravity method is slower because the valve’s typical flow rate is only 5–8 gallons per minute. A pump is the clear time-saver for larger tubs where the difference is most dramatic.
How Long Does It Take to Drain a 400-Gallon Hot Tub?
A 400-gallon hot tub drains in approximately 13–15 minutes with a 30 GPM submersible pump (Leslie’s Pool Supplies, 2026). Gravity drainage via the built-in drain valve takes 1.5 to 4 hours. The wide range for gravity drainage depends on hose diameter — a ¾-inch hose drains noticeably faster than a ½-inch hose — and how far the hose must run to reach the drain point. If time is a factor, a pump pays for itself immediately.
Why Put Tennis Balls in a Hot Tub?
Tennis balls are placed in a hot tub to absorb oils, lotions, and cosmetics that accumulate on the water’s surface. The fuzzy felt fibers soak up these contaminants, reducing the greasy scum line that forms at the waterline between drains. Toss 2–3 balls in after a soaking session. They don’t replace proper chemical treatment or regular draining, but they do reduce how often you need to scrub the shell — a practical low-cost maintenance trick.
Do All Hot Tubs Have a Drain Valve?
Virtually all hard-shell hot tubs come with a built-in drain valve, typically located behind the cabinet access panel near the base. Inflatable hot tubs — such as Intex, Coleman SaluSpa, and Bestway models — use a different design, usually a drain cap at the bottom of the tub rather than a ball valve. If your drain valve is missing or broken, a submersible pump or garden hose siphon will work as a complete replacement — no drain valve access needed.
How Long Does It Take to Drain a 200-Gallon Hot Tub?
A 200-gallon hot tub drains in approximately 7–10 minutes with a 30 GPM submersible pump. Using the built-in gravity drain, expect 45 minutes to 1.5 hours. Smaller inflatable tubs in this size range often drain faster than expected because their drain openings are proportionally larger relative to their water volume. Always turn off power at the circuit breaker before starting, regardless of tub size or which method you’re using.
Conclusion
For most hot tub owners, draining is a once-every-3–4-months task that takes as little as 15 minutes with the right tools. A 30 GPM submersible pump is the fastest option; the built-in drain valve works without any extra equipment; and the garden hose siphon is the free fallback when neither is available (Leslie’s Pool Supplies, 2026). The one non-negotiable across every method: circuit breaker off before you start, and water dechlorinated to below 0.1 mg/L before you discharge it anywhere (EPA, 2026).
The Drain Decision Matrix comes down to one practical question: how much time do you have? If 15 minutes, use a pump. If a few hours and no tools, open the drain valve. If it’s October and freezing, drain first — then add the shop vac line-blowing step to protect your plumbing from $250–$3,600 in freeze damage. Match method to situation, not the other way around.
Now that the tub is drained and refilled, the next step is getting the water chemistry balanced. Our complete hot tub maintenance guide walks through the exact chemical sequence — pH, alkalinity, sanitizer — so your water is safe, clear, and ready to use within 24 hours.