Table of Contents - How to Drain a Hot Tub: The Complete Expert Guide for 2026
- When and Why You Must Drain Your Hot Tub
- Preparing to Drain Your Hot Tub: Tools and Safety
- Step-by-Step Guide: How to Drain a Hot Tub Using Two Proven Methods
- Post-Drain Protocol: Cleaning and Final Steps
- Where to Drain Hot Tub Water: Legal and Environmental Guide
- Refilling and Relaunching Your Hot Tub
- Advanced Troubleshooting and Considerations
- Conclusion: The Foundation of a Perfect Hot Tub Experience
- Frequently Asked Questions
- How often should I drain my hot tub?
- What is the absolute fastest way to drain a hot tub?
- Is it OK to drain hot tub water onto my grass?
- Do I really need to turn off the power to drain my hot tub?
- How do I get the last few inches of water out of the bottom?
- My hot tub doesn’t seem to have a drain plug. What do I do?
- Is it bad to leave a hot tub empty for a long time?
- How long does it take to drain a hot tub with a garden hose?
This blog post may contain affiliate links. As an Amazon Associate I earn from qualifying purchases.
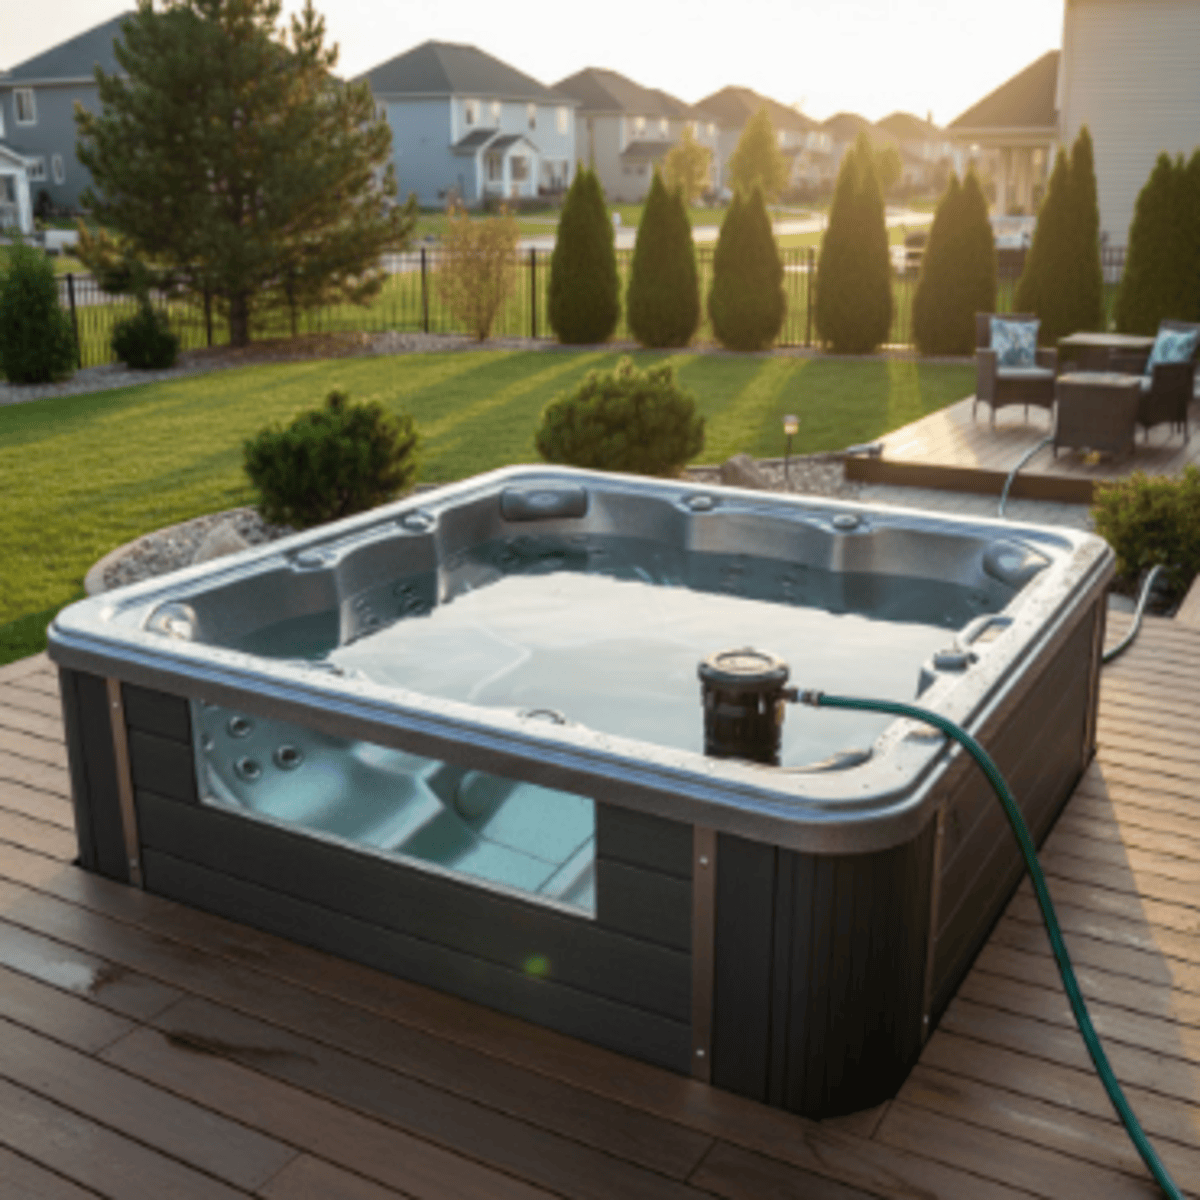
How to Drain a Hot Tub
Sinking into your hot tub after a long day is one of life’s simple pleasures, but that crystal-clear, inviting water doesn’t maintain itself. Draining your hot tub is the foundation of proper maintenance, directly impacting water safety, equipment longevity, and your overall soaking experience. This comprehensive guide walks you through every step of the draining process, from knowing when it’s time for a change to safely disposing of the old water and getting your spa back in perfect condition. Whether you choose the gravity method or invest in a submersible pump, you’ll learn the professional techniques that ensure a thorough, safe drain every time.

- Soothing Airjet Massage System: The Coleman SaluSpa Hawaii hot tub features 140 bubble jets that create a warm and relaxing spa experience for up to 6 people, right from the comfort of your home.
- Energy-Efficient Design: Insulated walls and cover are up to 40% more energy-efficient in keeping your hot tub warmer, compared to similar hot tubs. NOTE: APSP-14 and Title 20 compliant. This model meets all energy efficiency conditions required for sale in the following states: CA, HI, OR, RI, MA, NJ, ME, NY, NV, MD, WA, D.C.
- Durable Construction: MaxHold fabric internal beams provide superior air pressure retention, stability and lightweight portability. Surrounded by a 3-layer Tritech outer layer, this hot tub is proven to be puncture- and damage-resistant. Freeze Shield automatic heating function protects pump and liner from damage due to cold weather.
- Control at Your Fingertips: Compatible with the Bestway Connect app that allows you to control the temperature, timer, filter and massage system from the palm of your hand. The Power-Saving Timer allows you to control the temperature of the water up to 40 days in advance.
- Convenient Features: Equipped with a pump that quickly inflates the hot tub and an easy-to-reach digital control panel to heat water up to 104˚F (40˚C). ChemConnect dispenser maintains clean, clear water by evenly dispersing the proper amount of chlorine.

- Soothing Airjet Massage System: The Coleman SaluSpa Miami hot tub features 120 bubble jets that create a warm and relaxing spa experience for up to 4 people, right from the comfort of your home.
- Energy-Efficient Design: Insulated walls and cover are up to 40% more energy-efficient in keeping your hot tub warmer, compared to similar hot tubs. NOTE: APSP-14 and Title 20 compliant. This model meets all energy efficiency conditions required for sale in the following states: CA, HI, OR, RI, MA, NJ, ME, NY, NV, MD, WA, D.C.
- Durable Construction: MaxHold fabric internal beams provide superior air pressure retention, stability and lightweight portability. Surrounded by a 3-layer Tritech outer layer, this hot tub is proven to be puncture- and damage-resistant. Freeze Shield automatic heating function protects pump and liner from damage due to cold weather.
- Stays Up All Year Long: Freeze Shield protects the pump and liner from damage due to cold weather. The Power-Saving Timer allows you to control the temperature of the water up to 40 days in advance.
- Convenient Features: Equipped with a pump that quickly inflates the hot tub and an easy-to-reach digital control panel to heat water up to 104˚F (40˚C). ChemConnect dispenser maintains clean, clear water by evenly dispersing the proper amount of chlorine.

- ENERGY-EFFICIENT CONSTRUCTION: EnergySense insulated walls and cover are up to 40% more energy-efficient than similar hot tubs; MaxHold fabric internal beams provide superior air pressure retention, stability and lightweight portability; Tritech 3-layer external material offers superior durability and puncture resistance
- CONTROL WITH YOUR SMARTPHONE: Compatible with the Bestway Connect app that allows you to control the temperature, timer, filter and AirJet massage system; Includes a multi-function pump, which also inflates the hot tub, controls the heat setting (up to 40ºC/104ºF), and runs the filtration system
- STAYS UP ALL YEAR LONG: Freeze Shield protects the pump and liner from damage due to cold weather; The Power-Saving Timer allows you to control the temperature of the water up to 40 days in advance
- PERFECT FOR 7 PEOPLE: 85 in. x 28 in. (2.16 m x 71 cm) hot tub is the perfect size for up to 7 adults, with a water capacity of 314 gal. (1,190 L)
- EVERYTHING YOU NEED: Set includes 1 hot tub, 1 cover, 1 pump, 1 filter cartridge (IV), 1 ChemConnect chemical dispenser, 1 repair patch

- FIBER-TECH BEAM CONSTRUCTION – Innovative Fiber-Tech Technology offers superior structural stability while maintaining a comfortable surface for a luxurious and refreshing spa experience
- HARD WATER TREATMENT SYSTEM – Built-in Hard Water Treatment System makes water gentler on skin, clothes and the entire spa system
- HEATED AIR BUBBLE TECHNOLOGY – The Positive Temperature Coefficient (PTC) heater is designed to maximize heat transfer to the water, while ensuring the highest level of safety, performance, and longevity
- ENERGY EFFICIENT SPA COVER – High density thermal-resistant foam provides extra insulation and minimizes heat loss; this cover enhances the Spa performance while improving the energy efficiency by as much as 50%
- SPECS – Designed to fit up to 4 people; outer dimensions: 77″ x 28″ and inner dimensions: 57″ x 28″; water capacity of 210 gallons; water temperature range: 68-104 degrees Fahrenheit

- Square Hawaii hot tub provides a soothing massage experience with 140 bubbling warm jets for up to 4 to 6 people and reaches up to 104 degrees F for ultimate relaxation
- EnergySense cover is 40 percent more energy efficient; APSP-14 and Title 20 compliant. This model meets all energy efficiency conditions required for sale in the following states: CA, OR, RI, MA, NJ, ME, NY, NV, MD, WA, D.C.
- DuraPlus 3-layer material is 33% more resistant to punctures and 56% more resistant to stretching with Freeze Shield heating to ensure components will not freeze
- Equipped with a pump that inflates the spa and more for a convenient spa that includes a cover, spa pump, chemical floater, 2 filter cartridges (VI), 1 repair patch, and a 6-foot-long cord
- Portable hot tub measures 71” x 71” x 28” (L x W x H); Water capacity at 80% capacity is 222 gal; This spa cannot be used in temperatures less than 39 degrees Fahrenheit
When and Why You Must Drain Your Hot Tub
Understanding why regular draining matters goes far beyond simply replacing dirty water. Your hot tub’s internal ecosystem gradually accumulates dissolved solids, depleted chemicals, and organic contaminants that no amount of filtration or chemical treatment can fully eliminate. This buildup compromises water quality, reduces sanitizer effectiveness, and creates an environment where bacteria and algae can thrive despite your best maintenance efforts.
The Three to Four Month Rule: Industry Standard for Hot Tub Draining
Most hot tub manufacturers and water care professionals recommend draining and refilling your spa every three to four months under normal usage conditions. This timeline isn’t arbitrary but based on the gradual accumulation of total dissolved solids that eventually overwhelm your water chemistry balance. A household with two people using the tub three times per week can typically follow the standard quarterly schedule, while heavier usage demands more frequent changes.
The calculation becomes more complex with multiple users or daily soaking sessions. A family of four using their hot tub daily may need to drain every six to eight weeks to maintain optimal water quality. Commercial spas or heavily used residential tubs sometimes require monthly draining to keep up with the bather load and contamination rate.
Signs Your Hot Tub Water is Screaming for a Change

Your hot tub communicates its needs through several unmistakable signals that indicate the water has reached the end of its useful life. Recognizing these warning signs helps you drain proactively rather than waiting for a full water quality crisis.
Cloudy or foamy water that refuses to clear despite shocking and filtration often signals that dissolved solids have saturated the water beyond recovery. The cloudiness results from suspended particles that your filter can no longer capture effectively.
A persistent musty odor or overpowering chemical smell indicates chloramine buildup, the byproduct of chlorine binding with nitrogen compounds from sweat, oils, and other organic matter. This smell is often mistaken for “too much chlorine” when it actually means your sanitizer is spent and ineffective.
Difficulty balancing water chemistry becomes a frustrating cycle when your pH and alkalinity readings swing wildly despite careful adjustments. High total dissolved solids interfere with chemical reactions, making stable water chemistry nearly impossible to achieve.
Reaching high TDS levels represents the tipping point where your water simply cannot support proper sanitization anymore. Total dissolved solids include everything dissolved in your water from minerals in your fill water, added chemicals, body oils, cosmetics, and environmental debris. Most water care experts recommend draining when TDS measures 1500 parts per million above your starting baseline, as sanitizers lose significant effectiveness beyond this threshold.
Health and Safety: The Hidden Dangers of Old Water
Beyond aesthetics and equipment concerns, old hot tub water poses genuine health risks that shouldn’t be taken lightly. The Centers for Disease Control and Prevention tracks recreational water illnesses linked to inadequately maintained spas, with hot tubs presenting unique challenges due to their warm temperatures and heavy bather loads in relatively small water volumes.
Pseudomonas folliculitis, commonly called “hot tub rash,” develops when the bacteria Pseudomonas aeruginosa colonizes inadequately sanitized water. This itchy, bumpy rash typically appears within 48 hours of exposure and concentrates on areas covered by swimwear where wet fabric trapped contaminated water against the skin.
Legionella bacteria thrive in warm water systems and can cause serious respiratory illness when aerosolized water droplets are inhaled. While proper sanitization prevents Legionella growth, old water with depleted sanitizer levels and biofilm buildup in plumbing creates ideal conditions for bacterial proliferation.
Skin and eye irritation from chloramines affects even healthy individuals, causing red, itchy skin and burning eyes that many hot tub owners wrongly attribute to excessive chlorine. Fresh water with properly balanced chemistry eliminates these issues and provides a comfortable, safe soaking environment.
Preparing for Seasonal Changes: Draining for Winter or Summer
Strategic timing of your drain and refill cycle can align with seasonal transitions for maximum benefit. Draining before winter allows you to start the cold weather season with fresh water and gives you the opportunity to perform a complete winterization if you plan to shut down your spa during freezing months.
A pre-summer drain prepares your hot tub for the high-use season when family gatherings, pool parties, and frequent entertaining place extra demands on water quality. Starting summer with pristine water and freshly cleaned filters ensures your spa can handle increased bather loads without water quality issues.
Climate considerations also influence your draining schedule. In regions with hard water and high mineral content, more frequent draining prevents scale buildup on heating elements and plumbing components. Areas with high pollen counts or dust may require additional drains to combat environmental contamination that overwhelms filtration systems.
Preparing to Drain Your Hot Tub: Tools and Safety
Proper preparation transforms hot tub draining from a frustrating chore into a smooth, efficient process. Gathering your tools and supplies before you begin prevents mid-project trips to the hardware store and ensures you can complete every step of the process without interruption.
Essential Tools and Supplies Checklist
A garden hose long enough to reach from your hot tub to an approved drainage location forms the foundation of any draining setup. Measure the distance before you start to avoid discovering your hose falls short halfway through the project.
A submersible pump, also called a sump pump, represents the single best investment for efficient hot tub maintenance. These compact pumps can drain a standard 400-gallon hot tub in 15 to 30 minutes compared to several hours using gravity drainage alone. Quality pumps with built-in float switches automatically shut off when water levels drop too low, preventing motor damage.
Channel locks or pliers help with stubborn hose connections, drain caps that haven’t been opened in months, and filter housings that resist hand-tightening. A dedicated set of pliers for hot tub maintenance prevents cross-contamination from other household projects.
A wet or dry vacuum, commonly called a shop vac, removes the last few inches of water that gravity and pumps cannot reach. This tool is essential for getting your shell completely dry before cleaning and inspection.
Towels or sponges serve as low-tech backup for water removal and are perfect for wiping down surfaces after cleaning. Microfiber cloths work exceptionally well for final polishing without scratching acrylic surfaces.
Spa system flush or line cleaner products break down biofilm and organic buildup in your plumbing before draining. This often-skipped step ensures you truly start fresh rather than refilling onto a foundation of hidden contamination in your pipes.
Non-abrasive hot tub shell cleaner specifically formulated for acrylic or other spa surfaces prevents damage while removing the waterline ring and surface grime. Never use household cleaners that can leave residues harmful to water chemistry or damage your shell finish.
Filter cleaner, whether spray-on or soak formulations, allows you to deep clean your filters while the tub is empty. Clean filters are essential for maintaining water quality in your fresh fill.
Soft cloths or microfiber towels for drying and polishing complete your toolkit, leaving your shell spotless and ready for refilling.
Safety First: Powering Down Your Spa
Electrical safety represents the most critical aspect of hot tub draining and cannot be overstated or skipped under any circumstances. Water and electricity create a potentially lethal combination, and proper shutdown procedures protect both you and your equipment.
Step one requires locating your hot tub’s dedicated circuit breaker in your main electrical panel. Hot tubs typically run on 220-240 volt dedicated circuits clearly labeled in your breaker box. If labels are unclear or missing, identify the correct breaker by noting which one trips when you shut down your spa normally.
Step two involves switching the breaker to the OFF position with firm, deliberate pressure. Some breakers require moving to the full off position rather than just the middle tripped position to ensure complete power disconnection.
Step three demands double-checking the control panel to confirm zero power. Walk to your hot tub and verify that the display is completely dark with no lights, indicators, or sounds. Press buttons to confirm the system is truly dead rather than in sleep mode.
Professional technicians often recommend additional precautions including locking the breaker box or placing a note warning others not to restore power during maintenance. This simple step prevents well-meaning family members from creating a dangerous situation by restoring power while you’re working with the plumbing.
Never skip the power shutdown step, even if you’re “just draining quickly” or “being careful around the equipment.” The few seconds required to walk to your breaker box could save your life and definitely protects expensive spa components from damage caused by running pumps or heaters without water.
Step-by-Step Guide: How to Drain a Hot Tub Using Two Proven Methods
Draining your hot tub properly involves more than simply opening a valve and waiting for the water to disappear. The complete process includes pre-drain system flushing, choosing the right drainage method for your situation, and ensuring every drop of old water is removed before cleaning and refilling.
Pre-Drain Step: Flushing the Plumbing Lines
Before draining a single gallon, flushing your hot tub’s internal plumbing removes biofilm, oils, and organic buildup lurking in pipes where regular circulation and filtration cannot reach. This hidden contamination harbors bacteria and releases dissolved organic compounds back into your fresh water if left untreated.
Biofilm consists of bacterial colonies protected by a slimy matrix that shields them from sanitizers. These colonies establish themselves in pipe elbows, jet assemblies, and anywhere water flow slows enough for bacteria to anchor. System flush products contain surfactants and enzymes that break down biofilm structure and suspend the debris for removal during draining.
Using a spa system flush product starts with removing your filters to allow unrestricted flow through all plumbing lines. Add the flush product according to manufacturer directions, typically one bottle for standard-sized tubs. Run your jets on high speed for the recommended time, usually 15 to 20 minutes, ensuring the cleaner circulates through every line in your system.
The water often becomes noticeably cloudy or foamy during this process as the flush product dislodges accumulated debris. This visible contamination confirms why flushing is essential and what would otherwise remain in your plumbing to contaminate fresh water.
After the flush cycle completes, turn off the power and proceed immediately to draining while the dislodged debris remains suspended in the water. Waiting allows particles to resettle in your plumbing, defeating the purpose of the flush treatment.
Method One: Draining with the Built-In Drain Valve Using Gravity

The gravity drainage method requires no special equipment beyond a garden hose and works reliably for hot tub owners willing to wait several hours for complete draining. This approach is most practical when you’re not in a hurry and want to avoid purchasing additional tools.
Locating the Drain Valve
Hot tub drain valves are typically positioned at the lowest point of the spa, usually in a corner at the base of the cabinet. Most manufacturers place the valve on the front or side panel for easy access, though some models hide it behind removable panels that require unscrewing or unclipping for access.
The valve itself usually consists of a threaded cap that unscrews to reveal a hose connection point. Some higher-end models feature a quick-connect system or dedicated drain valve with an on-off lever. Auxiliary drains on larger tubs provide additional drainage points that can speed the gravity method when used simultaneously with the primary drain.
Consult your owner’s manual if the drain valve location isn’t immediately obvious, as some manufacturers position them in unexpected locations based on internal plumbing configurations. Taking a moment to identify the valve before you need it saves frustration during actual draining.
Attaching the Garden Hose
Thread your garden hose onto the drain valve fitting, turning clockwise until hand-tight. A secure connection prevents leaks that create muddy messes around your hot tub and waste water in unintended areas. If the connection feels loose or worn, a rubber washer replacement creates a better seal.
Stubborn drain caps that haven’t been opened since installation may require channel locks or pliers for initial loosening. Apply steady pressure rather than jerking motions to avoid stripping threads or cracking plastic components. Once you break the initial seal, the cap should unscrew smoothly by hand.
Some drain systems use cam locks or bayonet-style connections rather than threaded fittings. These quick-connect systems simply push on and twist to lock, providing tool-free connection when working properly. Keep these connections clean and dry when not in use to prevent corrosion that interferes with proper sealing.
Positioning the Hose and Opening the Valve
Before opening the drain valve, position the end of your hose at the intended drainage location and ensure it lies downhill from your hot tub. Gravity drainage only works when water can flow downward through the entire length of hose, so eliminating uphill sections is essential for proper flow.
Secure the hose end to prevent it from whipping around when water pressure begins flowing through. A loose hose can cause unexpected flooding as it snakes across your yard or patio. Setting the end in a storm drain, sewer cleanout, or low area of your yard keeps everything controlled and directed.
Open the drain valve slowly by turning counterclockwise or lifting the lever, depending on your valve style. Water should begin flowing immediately if your hose routing is correct. A lack of flow indicates an airlock, kinked hose, or insufficient elevation drop between your tub and drainage point.
Waiting for the Tub to Drain
Gravity drainage is a patient person’s game, with typical drain times ranging from two to ten hours depending on your hot tub’s size, the drain valve diameter, and the elevation difference driving water flow. A 400-gallon hot tub with a standard three-quarter inch drain hose and good elevation drop might drain in three to four hours, while larger tubs or minimal slope can easily exceed eight hours.
Monitor the drainage periodically rather than standing watch for the entire process. Check after the first 30 minutes to confirm water is flowing properly and your hose hasn’t developed leaks or disconnected. Subsequent checks every few hours ensure everything continues working correctly.
The draining rate slows considerably during the final quarter as water levels drop below the drain valve opening. The last few inches may barely trickle, indicating it’s time to move to mechanical removal methods for the remaining water.
Method Two: Draining with a Submersible Pump for Maximum Speed

Submersible pumps transform hot tub draining from an all-day wait into a quick 20 to 30 minute task, making them the preferred choice for anyone who drains their tub regularly or values their time. The modest investment in a quality pump pays dividends in time savings and convenience over years of hot tub ownership.
Choosing the Right Submersible Pump
Pump capacity measured in gallons per hour determines how quickly your hot tub empties. A pump rated at 1200 to 1500 GPH provides excellent performance for residential hot tubs, draining even large 500-gallon spas in well under an hour. Higher flow rates above 2000 GPH offer marginal time savings for most applications and cost significantly more.
The outlet connection size affects compatibility with standard garden hoses. Most utility pumps feature threaded outlets that accept three-quarter inch garden hose fittings, though some include multiple adapter sizes for flexibility. Verify thread compatibility before purchasing to avoid needing additional adapters.
Built-in float switches add convenience and equipment protection by automatically shutting off the pump when water levels drop too low for safe operation. Running a submersible pump dry, even briefly, can damage seals and motor components, making automatic shutoff worth the slight price premium.
Cord length matters more than many first-time buyers realize. A 15 to 20 foot power cord provides enough reach to keep the electrical connection away from water while positioning the pump in your tub. Shorter cords require extension cords, adding potential failure points and safety concerns.
Placing the Pump and Attaching the Hose
Position your submersible pump in the deepest section of your hot tub, typically in a foot well if your model includes them. Placing the pump at the lowest point allows it to remove the maximum amount of water before automatic shutoff or manual intervention is required.
Avoid setting the pump directly on decorative tile or textured acrylic surfaces where suction could mar the finish or vibration could cause scratching. A thin cloth or foam pad under the pump base provides protection without significantly affecting performance.
Thread your garden hose onto the pump outlet, tightening firmly to prevent disconnection when water pressure begins flowing. Some pumps generate surprisingly strong initial flow that can pop loose hoses free if not properly secured.
Running the Hose and Plugging In the Pump
Route your drainage hose to the approved disposal location before energizing the pump, using the same downhill positioning principles as gravity drainage. While pumps can push water uphill short distances, maintaining downward slope throughout the hose length ensures maximum flow rate and prevents backflow.
Secure the hose end to prevent movement from water pressure surges. The initial flow from a submersible pump can be quite forceful, easily pushing an unsecured hose out of position and flooding unintended areas.
Plug the pump into a GFCI-protected outlet appropriate for outdoor use. The pump should activate immediately, and you should see or hear water flowing through the hose within seconds. Modern pumps with automatic switches sense water level and begin pumping without manual switching.
Monitoring the Draining Process
A quality 1500 GPH submersible pump typically drains a standard 400-gallon hot tub in 15 to 30 minutes, making the process quick enough to monitor continuously without major time investment. Watching the water level drop provides satisfying visual feedback and allows immediate response to any problems.
As water levels approach the pump intake, flow rate decreases noticeably and the pump sound changes pitch. This signals the approaching end of the pumping cycle and the need to unplug the unit before it runs dry. Pumps with automatic shutoff handle this transition seamlessly, shutting down when the float switch detects insufficient water depth.
Manual pumps without automatic shutoff require you to unplug them before the intake fully clears the water surface. Running the pump dry even briefly can damage seals and internal components, so err on the side of shutting down while an inch or two of water remains rather than risking equipment damage.
Post-Drain Protocol: Cleaning and Final Steps
With the bulk of water removed, the real work of restoring your hot tub to pristine condition begins. The empty shell provides access for deep cleaning, component inspection, and maintenance tasks impossible to perform when filled. This critical phase determines whether your fresh water starts clean or simply dilutes existing contamination.
Removing the Last Bit of Water
Gravity and pumps inevitably leave behind standing water in low spots, around jets, and in plumbing depressions. This residual water, often containing concentrated sediment and debris, must be completely removed before cleaning can be effective.
A wet-dry shop vacuum provides the fastest, most thorough solution for removing the last few inches of standing water. The vacuum sucks water directly from even the deepest depressions, leaving your shell nearly dry in minutes. Work systematically from one end of the tub to the other, paying special attention to footwells, behind jets, and around filter housings.
The low-tech approach using sponges and buckets works perfectly well if you don’t own a shop vac and don’t want to purchase one. Large car-washing sponges absorb surprising amounts of water and can be wrung into a bucket for disposal. The process takes longer than vacuuming but costs nothing and provides a chance for close visual inspection of every surface.
Tilt or rock inflatable or portable hot tubs to concentrate remaining water in one corner for easier removal. This technique doesn’t work with in-ground or full-size acrylic spas but can save significant time on smaller, moveable units.
How to Deep Clean Your Empty Hot Tub Shell

The empty shell reveals waterline rings, biofilm residue, and surface staining invisible when covered by water. Now is the time to restore your shell to showroom condition using appropriate cleaners and techniques that won’t damage delicate acrylic finishes.
Select a pH-neutral, non-abrasive cleaner specifically formulated for hot tub shells. Products designed for acrylic bathtubs work well if dedicated spa cleaners aren’t available. Absolutely avoid household cleaners containing bleach, ammonia, or abrasive particles that can damage shell finish, leave harmful residues, or react dangerously with water treatment chemicals.
Apply cleaner to small sections at a time using a soft cloth or non-abrasive sponge. Work the cleaner gently over surfaces in circular motions, allowing the chemical action to do the work rather than relying on scrubbing pressure. Stubborn waterline rings may require letting cleaner sit for a minute or two before wiping.
Pay particular attention to the waterline area where oils, minerals, and organic matter concentrate at the air-water interface. This ring of accumulation harbors bacteria and creates an unsightly band if not thoroughly removed.
Clean seats, headrests, and textured surfaces using the same gentle approach, working cleaner into depressions and around jet fittings where grime accumulates. An old soft toothbrush helps with detailed areas without scratching.
Rinse the entire shell thoroughly with clean water after cleaning, ensuring no cleaner residue remains. Soap or cleaner residue will cause foaming and water chemistry problems when you refill, wasting the effort of a fresh start. A final rinse with a garden hose followed by towel drying leaves your shell spotless.
Don’t Forget the Filters
Hot tub filters work tirelessly to trap debris, oils, and particles, making them heavily contaminated by the time you drain. Neglecting filter cleaning wastes the opportunity for a truly fresh start and compromises your new water quality from day one.
Remove all filter cartridges from their housings, noting their orientation for proper reinstallation. Some filters have top and bottom markings that must be observed during replacement.
The high-pressure spray method uses a garden nozzle or pressure washer on low setting to blast debris from between filter pleats. Work from top to bottom, rotating the filter as you spray to address the entire surface. This quick method removes loose debris but doesn’t eliminate oils or deep contamination.
Chemical filter soaks provide deep cleaning that restores filters to near-new performance. Fill a bucket with filter cleaner solution according to product directions and submerge filters completely. Soak times vary from one hour to overnight depending on contamination level and product formulation. After soaking, rinse thoroughly with a high-pressure spray to remove loosened debris and cleaning solution.
Filters showing tears, crushed pleats, or permanent discoloration should be replaced rather than cleaned. Most filters last 12 to 24 months with proper care before requiring replacement. Keeping spare filters on hand lets you immediately install fresh ones while cleaning the dirty set at your leisure.
Maintaining clean filters is as important for water quality as the chemicals you use. For detailed guidance on keeping your water chemistry balanced, including proper use of hot tub chlorine, understanding sanitizer needs ensures your fresh fill stays pristine.
Inspecting Jets and Components
The empty tub provides perfect access for visual inspection of components normally underwater and difficult to examine. Taking a few minutes for systematic inspection can identify developing problems before they cause failures or water quality issues.
Examine jet assemblies for cracks, loose fittings, or calcium buildup that restricts flow. Most jets can be removed by turning counterclockwise, allowing you to clean them individually or replace damaged units. Mineral deposits on jet faces indicate water chemistry imbalances that should be addressed when you refill.
Check the shell surface carefully for cracks, particularly around jets, fittings, and seat edges where stress concentrates. Small cracks can be repaired with acrylic repair kits, preventing water infiltration into insulation and cabinet spaces.
Inspect visible plumbing connections inside filter compartments and equipment bays for signs of leaks, corrosion, or loose fittings. Addressing minor issues now prevents major repairs later.
Look for signs of pest intrusion, particularly in warm climates where insects seek the moist environment under hot tub cabinets. While hot tub spiders and other creatures rarely cause actual damage, identifying nesting areas lets you address potential problems before pests establish themselves.
Where to Drain Hot Tub Water: Legal and Environmental Guide

Disposing of several hundred gallons of chemically treated water demands consideration of both legal regulations and environmental responsibility. Choosing the wrong disposal method can result in fines, environmental damage, and strained neighbor relations, making proper planning essential before you open that drain valve.
Can You Drain Hot Tub Water on Your Lawn or Garden
The answer depends entirely on what’s in your water and how much chemical treatment it’s received recently. Actively chlorinated or brominated water kills grass, plants, and beneficial soil organisms, creating dead patches and potential runoff that affects neighboring properties.
Chlorine concentrations above one to two parts per million cause visible grass damage, with higher levels killing turf outright. Bromine shows similar phytotoxic effects, though at slightly different concentration thresholds. The shock treatments and elevated sanitizer levels typical of hot tub water management make freshly maintained water unsuitable for lawn irrigation.
Dechlorinating your water before draining transforms it from plant poison to acceptable irrigation water. The simplest method involves stopping chemical additions and removing your cover several days before draining, allowing sunlight and aeration to naturally break down chlorine. Testing with standard pool test strips confirms when chlorine drops to zero.
Sodium thiosulfate dechlorinator products neutralize chlorine instantly, eliminating the need to wait days for natural breakdown. These inexpensive products, available at any pool supply store, make same-day draining possible without lawn damage. Follow package directions for dosage based on your water volume and sanitizer concentration.
Even dechlorinated water carries high concentrations of total dissolved solids including calcium, salt, and other minerals that can affect soil chemistry with repeated applications to the same area. Rotating your drainage location prevents mineral buildup in any single spot.
Draining into a Storm Drain Versus a Sanitary Sewer
Understanding the difference between storm drains and sanitary sewers is crucial for legal compliance and environmental protection. These systems, while both consisting of underground pipes, serve entirely different purposes and have different regulations governing what can be discharged into them.
Storm drains collect rainwater from streets, parking lots, and other paved surfaces, channeling it directly to local streams, rivers, or lakes with no treatment whatsoever. The large grates along curbs and in parking areas connect to storm drain systems. Discharging chemically treated hot tub water into storm drains is illegal in most jurisdictions under the federal Clean Water Act and equivalent state regulations.
The Environmental Protection Agency’s Clean Water Act prohibits discharge of pollutants into waters of the United States, a category that includes storm drains since they flow directly to natural waterways. Hot tub water containing chlorine, bromine, algaecides, and other treatment chemicals qualifies as a pollutant under this framework.
Violations can result in substantial fines, particularly for repeat offenders or cases causing documented environmental damage. Many municipalities actively enforce these regulations and investigate reports of improper disposal.
Sanitary sewers serve an entirely different function, collecting wastewater from toilets, sinks, and drains throughout your home and transporting it to municipal treatment plants. Treated water eventually returns to the environment, but only after extensive processing that removes contaminants and pathogens.
Draining hot tub water into your sanitary sewer system is legal in most areas and represents the environmentally responsible choice in urban and suburban settings. The sewer cleanout port on your property, typically a capped pipe in your yard or near your foundation, provides a convenient access point for disposal.
Position your drainage hose at the cleanout, remove the cap, and let water flow directly into your home’s sewer line. Replace the cap when finished to prevent sewer gases from escaping. This method ensures your hot tub water receives proper treatment before environmental release.
Some water districts impose limits on discharge volume to prevent overwhelming sewer capacity, though residential hot tub draining rarely approaches these thresholds. A quick call to your local water department confirms any restrictions or special requirements.
Checking Local City and County Ordinances
While federal and state regulations provide the broad framework, local ordinances often add specific requirements or restrictions for hot tub water disposal. These hyperlocal rules vary dramatically between jurisdictions, making research essential before draining.
Search online for your city or county name plus terms like “hot tub drainage regulations” or “spa water disposal ordinances.” Many municipalities publish detailed guidelines on official websites, sometimes within public works or environmental services departments.
Homeowners associations in planned communities sometimes impose additional restrictions beyond governmental regulations. Review your HOA covenants or contact the board before draining if you live in a managed community.
When online research proves inconclusive, a phone call to your city or county public works department provides definitive answers. Explain that you need to drain your residential hot tub and ask about approved disposal methods. These departments field such questions regularly and can provide clear guidance.
Rural properties with septic systems rather than municipal sewer connections require special consideration. Large volumes of water can overwhelm septic drain fields, causing backups and system failures. Consult a septic professional before draining hundreds of gallons into a septic system, or use alternative disposal methods like gradual lawn irrigation after dechlorination.
Refilling and Relaunching Your Hot Tub
With your shell cleaned, filters serviced, and components inspected, the satisfying process of refilling and restarting your spa brings you back to the enjoyment that makes maintenance worthwhile. Proper refilling techniques and startup chemistry set the foundation for months of clear, balanced water requiring minimal intervention.
The Right Way to Refill Your Hot Tub
Connect your garden hose to an outdoor spigot and place the end inside your filter compartment rather than simply dropping it in the shell. This professional technique serves multiple critical purposes that prevent common post-fill problems.
Filling through the filter compartment allows water to enter your plumbing system from the bottom up, naturally purging air from pipes as water fills them. This prevents air locks that cause pump failures, error codes, and noisy operation when you first restart your system.
The filter compartment placement also eliminates the violent splashing and shell stress that results from blasting water directly onto acrylic surfaces from several feet above. Gentle filling protects your finish and reduces the chance of splash-related damage to cabinet components.
Monitor the filling process periodically, checking that water flows smoothly and watching for leaks around fittings you may have disturbed during cleaning. Catching a small leak during filling is far easier than discovering it after your tub is full and systems are running.
Fill to the level marked on your filter housing or skimmer, typically midway up the skimmer opening. Overfilling causes water to overflow when you enter the tub, while underfilling can allow pumps to draw air and run improperly.
Water temperature from your hose will likely be quite cold, requiring 12 to 24 hours for your heater to bring the spa to soaking temperature. This heating time varies with water volume, heater output, ambient temperature, and cover efficiency.
Powering Up and Balancing Your Water
Return to your circuit breaker and restore power to your hot tub by switching the breaker back to the ON position. Walk to your spa and confirm the control panel illuminates and displays normally, indicating proper power restoration.
The first startup after draining may trigger priming cycles or initial setup sequences depending on your model. Consult your owner’s manual for specific first-start procedures, as some systems require manual priming or specific button sequences to purge air and establish proper flow.
Adding start-up chemicals begins with understanding that fresh fill water requires different treatment than ongoing maintenance. Your water source chemistry determines what adjustments are needed, making testing essential before adding any chemicals.
Test your freshly filled water for pH, total alkalinity, calcium hardness, and any metals if you’re on well water. These baseline measurements reveal exactly what your water needs, preventing the common mistake of blindly dumping chemicals without understanding actual requirements.
Adjust total alkalinity first, as this provides pH buffering that prevents wild swings. Most hot tubs perform best with alkalinity between 80 and 120 ppm. Add alkalinity increaser if testing shows levels below this range.
Balance pH to the ideal range of 7.2 to 7.6 after alkalinity is correct. This pH range ensures sanitizer effectiveness, prevents equipment corrosion or scaling, and provides comfortable water that won’t irritate eyes or skin.
Establish your base sanitizer level using either chlorine or bromine according to your preference and system design. For those using chlorine systems, maintaining proper levels between soaking sessions prevents bacterial growth while minimizing chemical smell and skin irritation.
Calcium hardness should measure between 150 and 250 ppm for most acrylic spas. Too little calcium causes corrosive water that etches surfaces and damages equipment, while excessive calcium leads to scale deposits on heaters and cloudy water.
Advanced Troubleshooting and Considerations
Even with careful planning and proper technique, hot tub draining sometimes presents unexpected challenges. Understanding advanced troubleshooting and special circumstances ensures you can handle complications and adapt standard procedures to unique situations.
What to Do If Your Drain Valve is Stuck or Leaking
Years between uses can leave drain valves seized, corroded, or damaged to the point where standard opening procedures fail. Attempting to force a stuck valve often causes cracks or stripped threads, transforming a minor inconvenience into a repair project.
Apply penetrating oil to threaded drain caps that resist normal loosening efforts. Let the oil soak for 15 to 30 minutes before trying again with gentle, steady pressure using channel locks. Avoid excessive force that could crack plastic housings or strip threads beyond repair.
Heat from a hair dryer can help loosen mineral deposits or corrosion binding valve components. Warm the area gradually for several minutes, then attempt opening with the thermal expansion potentially breaking the seal.
If a valve refuses to open despite these efforts, using a submersible pump makes the stuck valve irrelevant. This approach allows you to drain your tub completely without risking damage to plumbing components from excessive force.
Leaking drain valves during or after draining indicate failed gaskets, cracked housings, or cross-threaded connections. Small leaks can often be solved by ensuring the cap is fully tightened and properly threaded. Persistent leaks may require gasket replacement or complete valve assembly replacement before refilling.
Replacement valves and gasket kits are available from hot tub dealers and online suppliers. Taking photos or bringing the old valve to a dealer helps ensure you purchase the correct replacement for your specific model.
Draining a Hot Tub in Freezing Temperatures
Winter draining in cold climates requires extreme care to prevent freeze damage that can destroy your hot tub in hours. Water expands approximately nine percent when freezing, generating enormous pressure that cracks pipes, fittings, and equipment with devastating results.
Never leave any water in plumbing lines if temperatures may drop below freezing before you refill. The draining methods described earlier remove water from the shell but leave substantial volumes in pipes, pumps, and equipment that will freeze and cause damage.
Complete winterization requires forcing all water from plumbing using compressed air or a wet-dry vacuum configured to blow rather than suck. This process, called blowing out the lines, involves removing drain plugs from pumps and heater, then forcing air through jets until only mist emerges.
Each jet should be addressed individually, closing all others while blowing out one line at a time. This concentrates air pressure for effective water removal rather than dissipating force across multiple openings.
Adding non-toxic antifreeze formulated for RVs and pools to plumbing provides insurance against freeze damage from water that couldn’t be blown out. Pour antifreeze into filter housing and pump it through lines until it emerges from jets, ensuring protection throughout the system.
If you must drain in freezing weather without performing complete winterization, timing becomes critical. Choose the warmest part of the warmest day in the forecast, drain as quickly as possible using a submersible pump, and refill immediately before temperatures drop.
How Draining Differs for In-Ground Spas
Permanently installed in-ground hot tubs present unique challenges that make submersible pumps nearly mandatory rather than optional. The lack of an accessible drain valve in many in-ground designs eliminates the gravity drainage option entirely.
Hydrostatic pressure from groundwater can actually push an empty in-ground spa upward and out of position, particularly in areas with high water tables or during wet seasons. This phenomenon, called floating, can crack shells, rupture plumbing, and require complete spa replacement.
Consult with the original installer or a pool professional before draining an in-ground spa if you’re unfamiliar with local groundwater conditions. Some areas require installing hydrostatic relief valves that allow groundwater pressure to equalize, preventing flotation damage.
Timing in-ground spa draining during dry seasons when water tables are lowest minimizes flotation risk. Never drain an in-ground spa during heavy rain or immediately after significant precipitation when groundwater levels peak.
The deeper equipment placement in many in-ground designs makes complete water removal more challenging. Plan for extended shop vacuum or pump use to reach water in equipment pits and plumbing low points not accessible in above-ground spas.
Conclusion: The Foundation of a Perfect Hot Tub Experience
Draining your hot tub every three to four months ranks among the most important maintenance tasks you’ll perform, directly impacting water quality, equipment longevity, and your family’s health and safety. While the process requires a few hours of work, the reward of crystal-clear, perfectly balanced water makes the effort worthwhile. Remember that safety must always come first by shutting off power at the breaker before beginning any work. Whether you choose the patient gravity method or invest in a time-saving submersible pump, following the proper steps for flushing, draining, cleaning, and refilling ensures your spa performs at its best. The post-drain cleaning phase is just as critical as the draining itself, providing the opportunity to deep clean surfaces, service filters, and inspect components for developing issues. With the knowledge and techniques in this guide, you’re equipped to maintain your hot tub like a professional, ensuring years of reliable performance and therapeutic relaxation.
Frequently Asked Questions
How often should I drain my hot tub?
Drain your hot tub every three to four months under normal usage with two to three people soaking several times weekly. Heavy use with more people or daily soaking requires more frequent draining every two months, while light use might extend the interval slightly. The most reliable indicator is water that becomes difficult to keep clear and balanced despite proper chemical treatment.
What is the absolute fastest way to drain a hot tub?
Using a submersible pump rated at 1200 to 1500 gallons per hour is by far the fastest method, draining a standard 400-gallon hot tub in 15 to 30 minutes compared to two to ten hours using only the built-in gravity drain valve. The pump investment pays for itself quickly in time savings and convenience.
Is it OK to drain hot tub water onto my grass?
Only dechlorinated hot tub water is safe for your lawn and plants, as active chlorine or bromine will damage or kill vegetation. Stop adding chemicals and leave your cover off for several days before draining to allow natural chlorine breakdown, or use a sodium thiosulfate dechlorinator product for immediate neutralization. Test to confirm zero chlorine before draining on grass.
Do I really need to turn off the power to drain my hot tub?
Absolutely yes, turning off power at the circuit breaker is the most critical safety step. This eliminates any risk of electrical shock while working around water and prevents pumps or heaters from accidentally activating while the tub is empty, which would cause severe equipment damage requiring expensive repairs.
How do I get the last few inches of water out of the bottom?
A wet-dry shop vacuum quickly removes the last few inches of standing water that gravity draining and pumps cannot reach. Simply vacuum the remaining water from low spots, around jets, and in footwells. Without a shop vac, large sponges work perfectly well when wrung into a bucket, though the process takes longer.
My hot tub doesn’t seem to have a drain plug. What do I do?
Some hot tub models, particularly older designs and inflatable spas, lack convenient drain valves. A submersible pump becomes essential rather than optional in these cases, providing the only practical drainage method. The pump approach actually works better than gravity draining anyway, making the missing drain valve a non-issue.
Is it bad to leave a hot tub empty for a long time?
Extended empty periods can cause seals and gaskets to dry out and crack, leading to leaks when you eventually refill. If you must leave your spa empty for more than a few days, especially in winter, perform complete winterization including blowing out all plumbing lines to prevent freeze damage. Consider that for smaller units like a 1 person hot tub, the issues of leaving it empty are similar but scaling and winterization needs may be slightly different.
How long does it take to drain a hot tub with a garden hose?
Using only the built-in gravity drain valve with a garden hose typically takes between two and ten hours depending on your hot tub’s size, the drain opening diameter, and the elevation difference between your tub and the hose end. A 400-gallon spa with good downhill slope might drain in three to four hours, while larger tubs or minimal elevation change can easily exceed eight hours.