

Table of Contents - How to Empty a Hot Tub: 3 Methods (Step-by-Step)
- Why Regular Draining Keeps Your Hot Tub Safe
- Before You Start: Safety First
- The 3 Methods: How to Empty a Hot Tub
- Clean Shell & Remove Residual Water
- Brand-Specific Drain Valve Locations
- How to Refill Your Hot Tub After Draining
- Winterizing vs. Routine Maintenance
- Troubleshooting Common Draining Problems
- Frequently Asked Questions
- Limitations and Alternatives
- Your Next Step: Schedule Your First Drain
This blog post may contain affiliate links. As an Amazon Associate I earn from qualifying purchases.
Knowing how to empty a hot tub is one of the most important skills you’ll develop as a new owner. Most hot tubs need a full drain and refill every 3–4 months — and if your water looks cloudy, smells off, or your chemicals won’t balance no matter what you add, that’s your sign it’s time right now.
The good news: draining a hot tub is straightforward. You don’t need a plumber, a specialist, or any expensive equipment. You need the right method for your setup, a clear sequence of steps, and about an hour of your time. This guide covers all three draining methods — submersible pump, built-in drain valve, and garden hose siphon — with exact time benchmarks for each, so you can choose the fastest option for your situation.
You’ll also find what to do after the water is out: how to clean the shell, remove that stubborn last inch of water, safely refill, and winterize if the cold season is coming.
Learning how to empty a hot tub correctly protects your equipment and keeps your water safe year-round.
- The Complete Drain Protocol covers all three methods: submersible pump (~10–20 min), built-in drain valve (1–3 hrs), and garden hose siphon (2–4 hrs).
- Always turn off the circuit breaker before draining — running the pump dry damages it permanently.
- Drain every 3–4 months, or sooner if chemicals won’t balance or water looks cloudy.
- Clean the shell and flush the lines while the tub is empty — skipping this step defeats the purpose of draining.
Why Regular Draining Keeps Your Hot Tub Safe
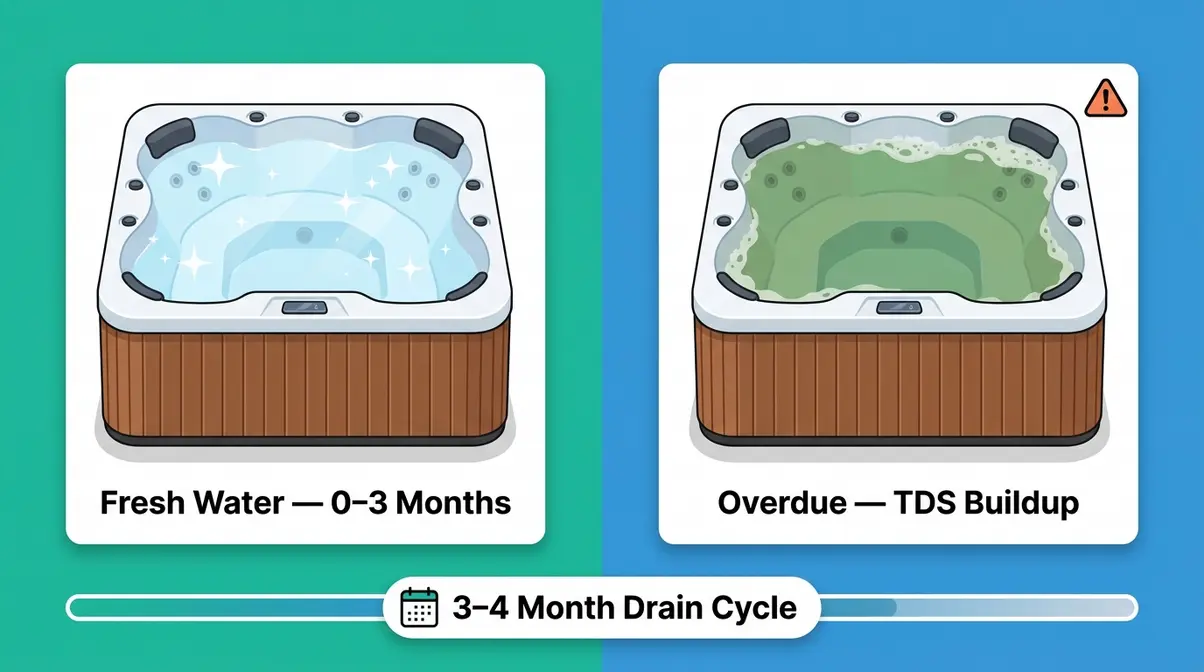
Hot tub water doesn’t stay clean forever — even with perfect chemical maintenance. Every time someone soaks, they introduce body oils, lotions, sweat, and bacteria. Over time, these compounds build up into what water care professionals call total dissolved solids (TDS) — the accumulated waste that chemicals can no longer break down.
According to the Pool & Hot Tub Alliance (PHTA), hot tub water should be fully replaced every 3–4 months under normal use. With heavy use (multiple people, daily soaks), that window shortens to every 6–8 weeks. High TDS levels make it nearly impossible to maintain safe sanitizer levels, which creates conditions for bacteria — including Pseudomonas aeruginosa, the cause of “hot tub rash” — to thrive.
Our team at OneHotTub.com consistently sees the same pattern: owners who skip regular draining spend more on chemicals, deal with more equipment problems, and end up with biofilm buildup in the jets and plumbing lines. Draining on schedule is the single most cost-effective hot tub maintenance task you can perform.
Here’s a quick reference for when to drain:
| Situation | Action |
|---|---|
| Routine schedule | Every 3–4 months |
| Heavy use (daily, multiple users) | Every 6–8 weeks |
| Chemicals won’t balance after 48 hrs | Drain immediately |
| Water is cloudy, foamy, or has odor | Drain immediately |
| Pre-winter storage | Full winterize drain |
| Post-illness (skin infection, illness) | Drain and sanitize |
The CDC recommends checking hot tub sanitizer levels at least twice per week and replacing water regularly to prevent waterborne illness. Regular draining is the foundation of that recommendation — chemicals alone can’t compensate for water that’s past its useful life.
Before You Start: Safety First
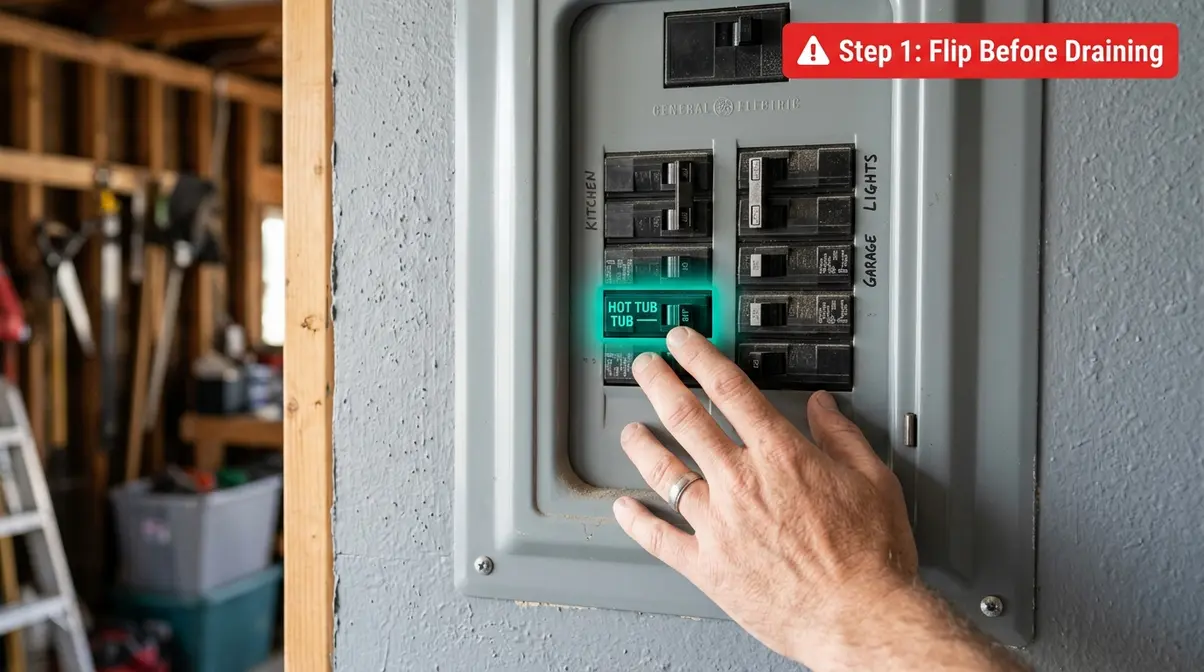
⚠️ SAFETY WARNING — Read Before Any Other Step
Before you touch a hose or open a valve, turn off your hot tub at the circuit breaker (the electrical panel on your wall, not just the control panel on the tub). This is the single most important safety step in the entire process.
Running your hot tub pump without water causes it to overheat and burn out within minutes — a repair that costs $300–$800 or more. Electrical components near a draining tub also create a shock hazard. Flip the breaker. Don’t skip this.
What You’ll Need
Gather your supplies before you start. Having everything on hand prevents mid-drain scrambling.
- For all methods:
- Garden hose (long enough to reach a drainage point)
- Bucket and sponge or old towels
- Hot tub surface cleaner (non-abrasive, spa-safe)
- Wet/dry vacuum (optional but highly recommended for residual water)
- Method-specific additions:
- Submersible pump method: A submersible utility pump (available at hardware stores for $30–$60) and a discharge hose
- Drain valve method: No extras needed — just the hose
- Garden hose siphon method: A standard garden hose, 25 ft minimum
Where to Drain Your Hot Tub Water
Hot tub water contains chlorine or bromine. You cannot drain it onto your lawn, into a storm drain, or into a waterway without first allowing the chemicals to dissipate. The Washington State Department of Ecology recommends letting chlorinated water sit for 1–2 days with the cover off (or adding a neutralizer) before draining to a sanitary sewer drain, such as a utility sink, floor drain, or toilet. Check your local municipality’s guidelines — rules vary by region.
- Safe drain destinations:
- Household sanitary sewer (floor drain, utility sink)
- Municipal storm drain only after dechlorination
- Dedicated drainage area per local code
- Avoid:
- Directly onto grass or garden beds (chemical burn)
- Storm drains with active chlorine
- Waterways, ponds, or streams
The 3 Methods: How to Empty a Hot Tub
This is the core of The Complete Drain Protocol. Choose the method that matches your equipment and timeline. All three work — the right choice depends on how fast you need the tub empty and what tools you have available. If you want to explore different methods to drain a hot tub, understanding the time commitment is crucial.
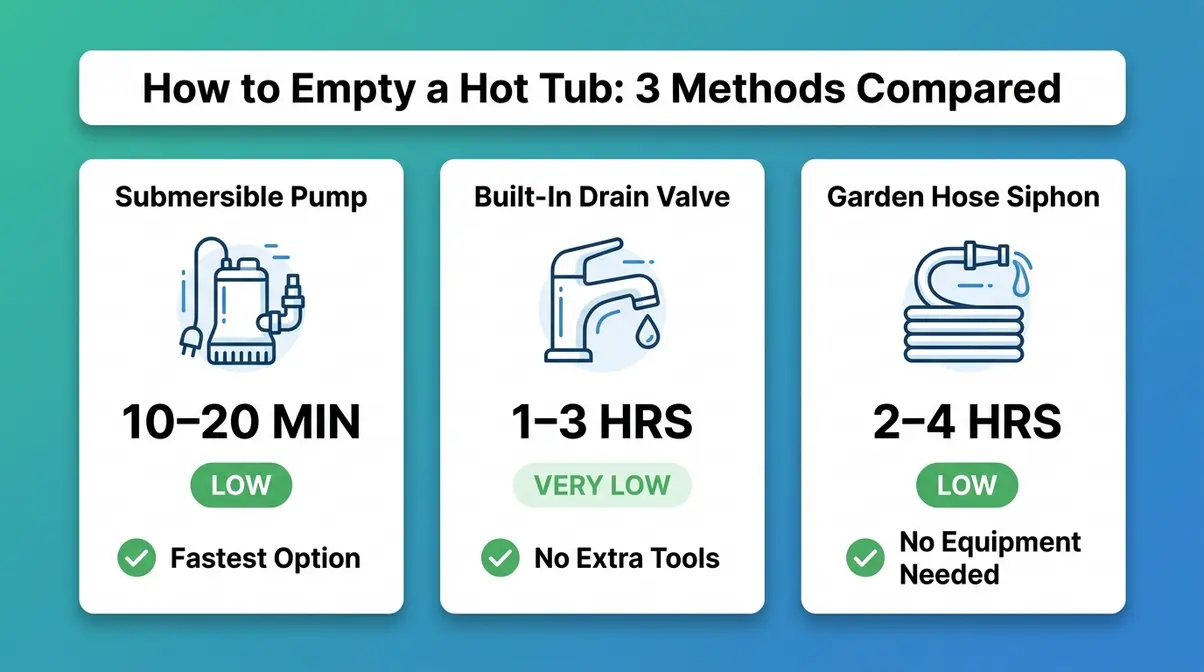
How long to empty a hot tub?
Drain time depends on the method you choose. A submersible pump empties a standard 300–500 gallon hot tub in 10–20 minutes, according to Bob Vila — making it the fastest option by far. A built-in gravity drain valve takes 1–3 hours, and a garden hose siphon takes 2–4 hours. The pump method is worth the $30–$60 investment if you drain your tub regularly.
Drain a hot tub without a pump?
Use the built-in drain valve (if your tub has one) or the garden hose siphon method. The drain valve is the easiest no-pump option — attach a hose to the spigot near the base of your tub, route it downhill, and open the valve. If your tub doesn’t have a valve (common with inflatables), the garden hose siphon method requires no equipment beyond a standard hose. Both methods take 1–4 hours.
| Method | Tools Needed | Drain Time | Effort Level | Best For |
|---|---|---|---|---|
| Submersible Pump | Utility pump + hose | 10–20 min | Low | Fastest option; all tub types |
| Built-In Drain Valve | Garden hose | 1–3 hrs | Very Low | Acrylic/hard-shell tubs with spigot |
| Garden Hose Siphon | Garden hose only | 2–4 hrs | Low | Inflatable/portable tubs; no valve |
Method A: Submersible Pump
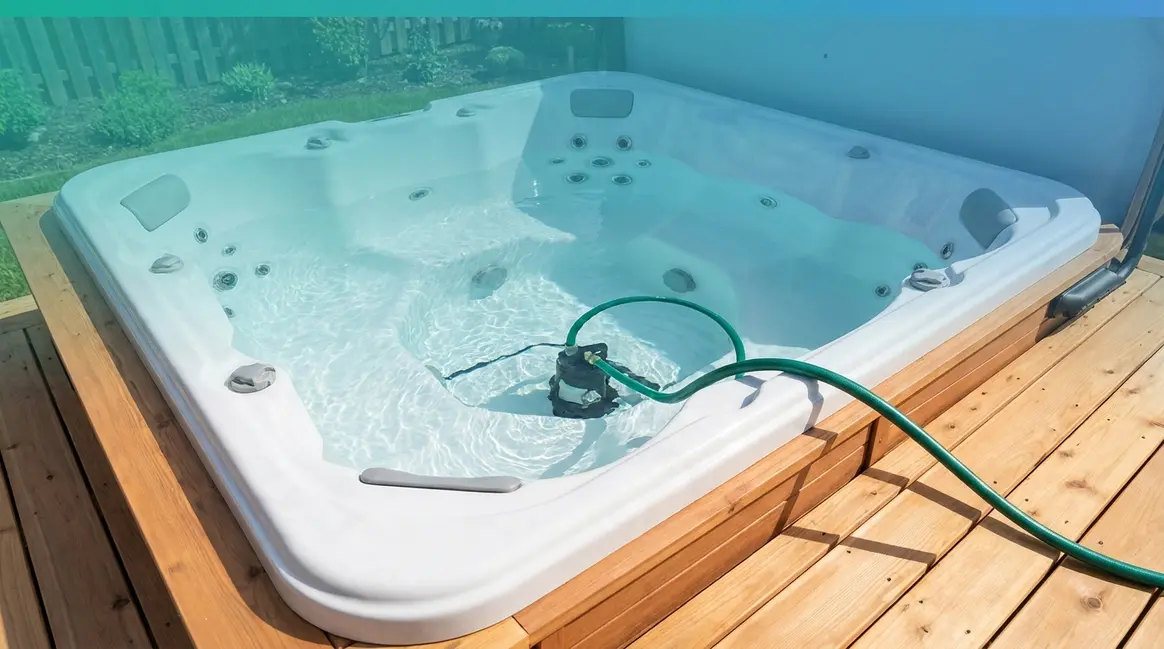
A submersible pump (a small electric pump you lower directly into the water) is the fastest and most reliable way to empty a hot tub. It’s the method hot tub technicians use on service calls. A basic utility pump costs $30–$60 at any hardware store and is worth owning if you plan to drain your tub regularly.
What you need: Submersible utility pump, discharge hose, extension cord (if needed), power outlet away from the water.
- Turn off the circuit breaker. Locate your home’s electrical panel and flip the breaker labeled for your hot tub. Confirm the tub is completely off.
- Remove the filter cartridge. Open the filter compartment (usually a twist-off cap on the side of the tub) and pull out the filter. Set it aside to clean separately.
- Lower the pump into the deep end. Place the submersible pump at the lowest point of the tub so it can pull water right down to the bottom.
- Connect the discharge hose. Attach the pump’s output hose and run it to your chosen drain point — a floor drain, utility sink, or dechlorinated outdoor area.
- Plug the pump into a GFCI outlet. A GFCI outlet (Ground Fault Circuit Interrupter — the type with test/reset buttons, found near water sources) protects against electrical shock. Never use a standard outlet near water.
- Run the pump until water flow slows to a trickle. This takes 10–20 minutes for a standard 300–500 gallon hot tub.
- Unplug the pump before it runs dry. Running a submersible pump on air burns out the motor. When flow drops significantly, pull the plug.
- Remove residual water using the methods in the next section.
What could go wrong: The discharge hose kinks and slows flow — keep it as straight as possible. The pump loses prime if it’s not fully submerged — reposition it lower.
Method B: Built-In Drain Valve
Most hard-shell hot tubs have a drainage spigot (the built-in tap on the side of your tub, usually near the base) that lets water drain by gravity. No pump required. The trade-off is time — gravity is slow. For a full step-by-step guide to emptying your hot tub using gravity, ensure your hose is properly routed.
What you need: Garden hose, hose connector (some spigots are threaded, some require an adapter).
- Turn off the circuit breaker. Same as Method A — flip it before you do anything else.
- Locate your drain valve. It’s typically a small plastic cap or spigot near the bottom exterior of the tub. On Jacuzzi® models, check the equipment bay (the panel on the side). On Sundance® and Bullfrog® tubs, it’s often behind the lower access panel. Consult your owner’s manual if you can’t find it.
- Attach the garden hose to the spigot. Thread the hose onto the drain valve. Make sure the connection is snug to avoid leaks.
- Route the hose to your drain point. Gravity does the work, so the hose end must be lower than the tub’s drain valve. A downhill slope helps significantly.
- Open the drain valve. Turn the cap counterclockwise or pull the plug, depending on your model. Water will begin flowing.
- Monitor every 30 minutes. Gravity drains can slow or stop if the hose kinks or if the drain valve gets clogged with debris.
- Close the valve and remove the hose once flow stops. The tub will have 1–3 inches of residual water remaining — see the residual water section below.
What could go wrong: Flow slows dramatically after the first hour — this is normal as pressure drops. Elevating the back of the tub slightly (for inflatable models) can help. For hard-shell tubs, you’re relying on the slope of the hose.
Method C: Garden Hose Siphon
“Get a garden hose, fully submerge it and ensure all water is out, then put your thumb over one end to seal it, pull it out, and ensure the end with your thumb is lower than the tub before you release it.”
— A hot tub owner on Reddit
This method requires zero equipment beyond a standard garden hose. It’s the go-to for inflatable and portable hot tubs (like Intex SaluSpa or Coleman SaluSpa models) that don’t have a built-in drain valve, or for anyone who doesn’t own a pump.
A siphon works by using gravity and suction to pull water through a hose once flow is established. The physics are simple: as long as the exit end of the hose stays lower than the water surface, water keeps flowing.
What you need: Garden hose (25 ft or longer), a drain point lower than your tub’s water level.
- Turn off the circuit breaker. Non-negotiable, even for inflatable tubs with electrical heaters.
- Submerge the entire hose in the tub. Coil the hose inside the water and let it fill completely. You’ll see air bubbles rising — wait until they stop. A fully water-filled hose is essential for a working siphon.
- Cap one end with your thumb. Place your thumb firmly over one end of the hose (the exit end) while keeping the other end submerged.
- Quickly pull the capped end out of the tub and lower it toward your drain point. Keep your thumb sealed tight.
- Position the exit end lower than the tub’s waterline. This is the key step. The exit end must be physically lower than the water in the tub for gravity to pull water through.
- Release your thumb. Water should begin flowing immediately. If it doesn’t flow within 5 seconds, the siphon didn’t prime — repeat Steps 2–5.
- Keep the exit end lower than the tub throughout the drain. If you raise it above the water level, the siphon breaks and you’ll need to restart.
- Monitor and redirect flow as needed. At 2–4 hours, this is a slow method. Check every 30–45 minutes.
What could go wrong: The most common failure is releasing your thumb before the exit end is lower than the tub. The siphon breaks if the hose kinks or if the exit end rises above water level. Garden hose siphons also leave more residual water than other methods.
Clean Shell & Remove Residual Water
Draining your hot tub without cleaning it is like changing your oil but not wiping down the engine. The drain is your opportunity to clean surfaces that are normally underwater — the shell walls, the jet nozzles, and the waterline ring (that grimy band of body oils and minerals at the old water level).
Remove Residual Water
Every draining method leaves some water behind. Ignoring it creates stagnant puddles that breed bacteria and can freeze and crack your shell in winter. Hot tub owners consistently report that removing this residual water is the most overlooked step in the entire process.
Three methods that work:
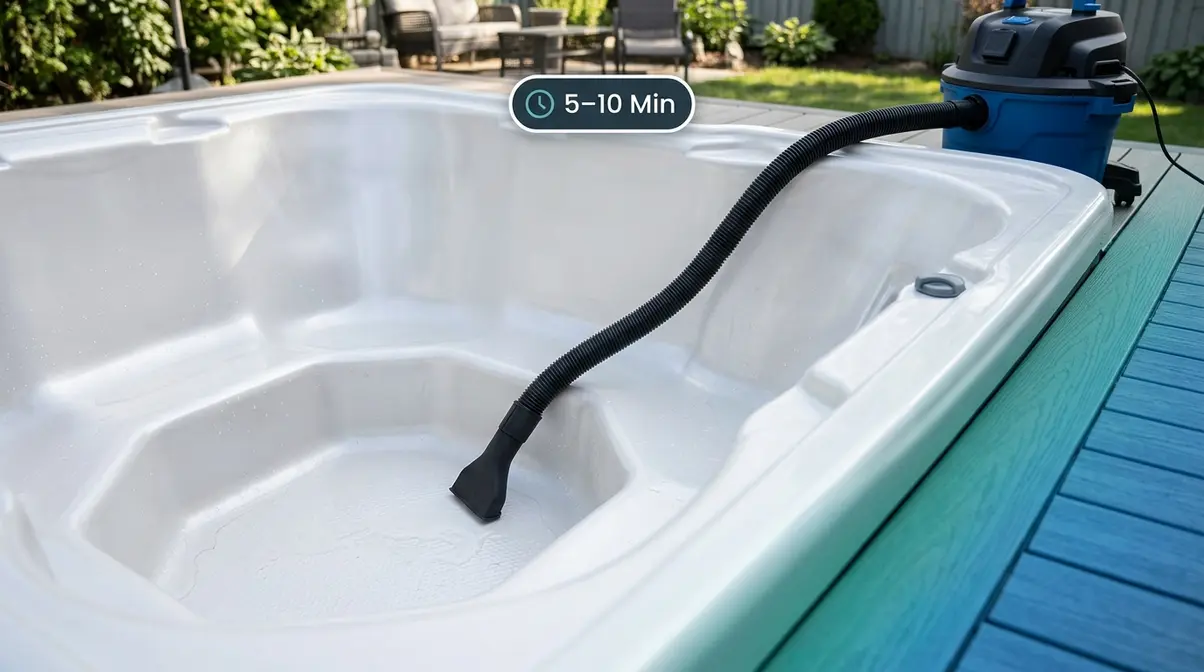
- Wet/dry vacuum: The fastest option. Run the vacuum nozzle along the floor and into the footwell. A standard shop vac removes residual water in 5–10 minutes.
- Towel soaking: Use old bath towels or chamois cloths to absorb water from flat surfaces. Wring them out and repeat. Effective but slower — plan for 15–20 minutes.
- Tipping (inflatable tubs only): For lightweight inflatable models, carefully tip the deflated tub to one side to pour out remaining water. Do this on a flat, clean surface to avoid punctures.
For hard-shell tubs, the wet/dry vacuum is the clear winner. It also pulls water out of the footwell corners that towels can’t reach.
Cleaning the Shell
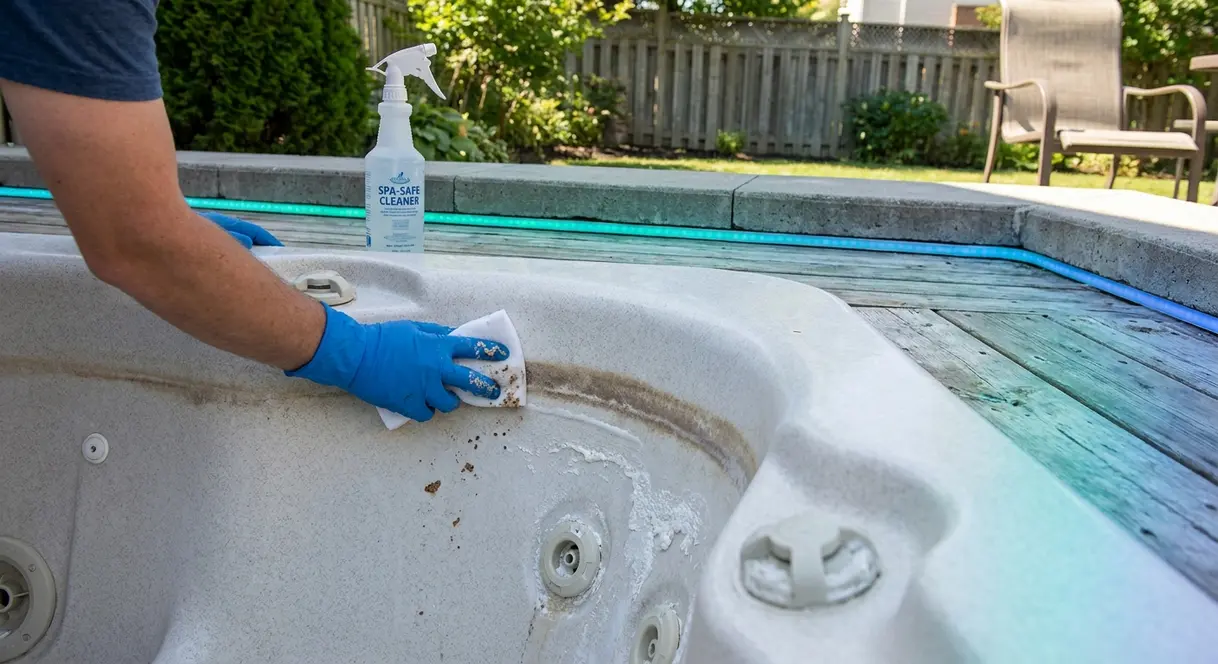
With the tub empty, clean every surface before refilling. This step removes biofilm (a slimy bacterial layer that forms on wet surfaces and hides inside jets) and mineral scale.
What you’ll need: Spa-safe surface cleaner (never use household bleach or abrasive scrubbers on acrylic), a soft cloth or sponge, and an old toothbrush for jet nozzles.
- Spray the shell with spa-safe cleaner. Focus on the waterline ring first — it usually has the heaviest buildup.
- Scrub the walls, floor, and seats with a soft cloth. Use circular motions on stubborn mineral deposits.
- Clean each jet nozzle with an old toothbrush. Twist the nozzle counterclockwise to remove it for deeper cleaning if needed.
- Rinse thoroughly with clean water and remove all cleaner residue. Cleaner residue causes excessive foaming when you refill.
- Wipe the interior dry with a clean towel.
Clean and Inspect the Filter
While the tub is empty, rinse the filter cartridge with a garden hose (spray between the pleats) and inspect it for tears or permanent discoloration. Filters should be deep-cleaned with a filter cleaning solution every 3 months and replaced entirely every 12–18 months. A clogged filter is one of the most common causes of cloudy water and reduced jet pressure.
Brand-Specific Drain Valve Locations
Finding your drain valve is the most common stumbling block for new owners. Manufacturers place it in different locations, and some hide it behind access panels. Here’s where to look for the most common brands:
| Brand | Drain Valve Location | Notes |
|---|---|---|
| Jacuzzi® | Equipment bay (side access panel, near pump) | Usually a 1.5″ threaded spigot; needs a hose adapter |
| Hot Spring / Watkins | Lower equipment panel, rear or side | May have a primary and secondary drain port |
| Sundance Spas | Behind lower cabinet panel, near the equipment | Twist-cap style on most models |
| Bullfrog Spas | Rear lower panel | JetPak system — check manual for exact location |
| Intex SaluSpa (inflatable) | Side of tub, near base — grey rubber plug | Pull plug out; no threading required |
| Coleman SaluSpa (inflatable) | Same side-base rubber plug as Intex | Often labeled “DRAIN” in small text |
| Balboa-controlled tubs | Varies by manufacturer; check equipment bay | Balboa makes the control system, not the cabinet — check your tub brand |
Can’t find your drain valve? Check your owner’s manual first — the diagram is usually on page 3–5. If you don’t have the manual, search ” + + owner’s manual PDF” — most manufacturers post them free online.
How to Refill Your Hot Tub After Draining
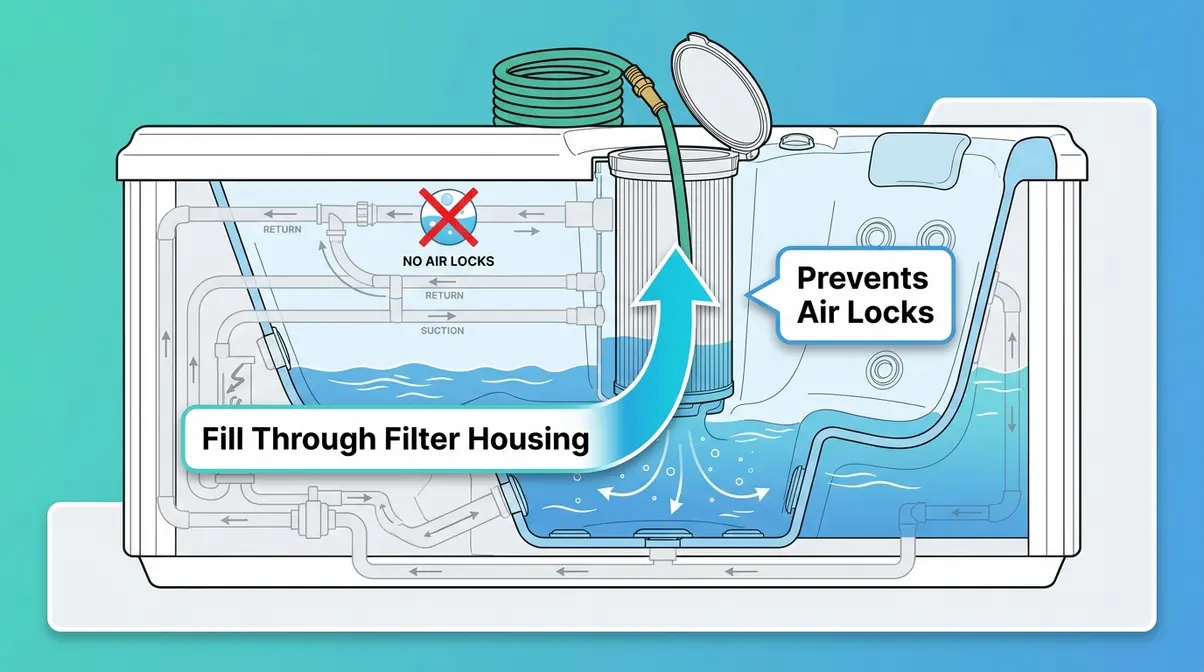
Refilling is faster than draining, but doing it wrong can damage your equipment. The biggest risk is air locks — trapped air pockets in the plumbing lines that prevent your pump from priming and circulating water properly.
Refilling Step-by-Step
- Close the drain valve (or reinstall the drain plug) before adding any water.
- Place your garden hose inside the filter compartment (not over the side of the tub). Filling through the filter housing purges air from the lines and prevents air locks.
- Fill to the recommended level — typically 2–3 inches above the highest jet. Check your owner’s manual for the exact fill line.
- Reinstall the filter cartridge once water reaches the filter housing level.
- Turn the circuit breaker back on. The tub will begin its startup sequence.
- Check for air locks. If jets aren’t flowing within 2–3 minutes of startup, you may have an air lock. Loosen the union fitting (the large plastic nut on the pump’s inlet pipe) slightly to bleed trapped air, then retighten.
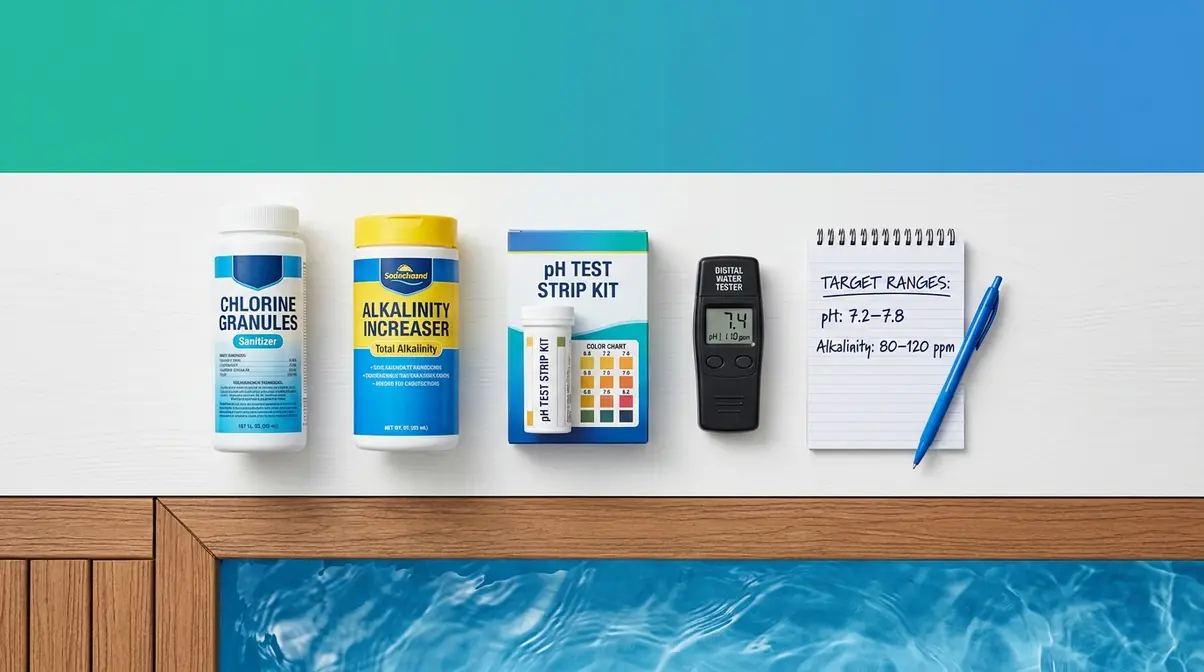
- Balance your water chemistry before your first soak. Add sanitizer (chlorine or bromine), adjust pH (target 7.2–7.8), and alkalinity (target 80–120 ppm). Wait at least 2 hours — ideally overnight — before soaking.
Winterizing vs. Routine Maintenance
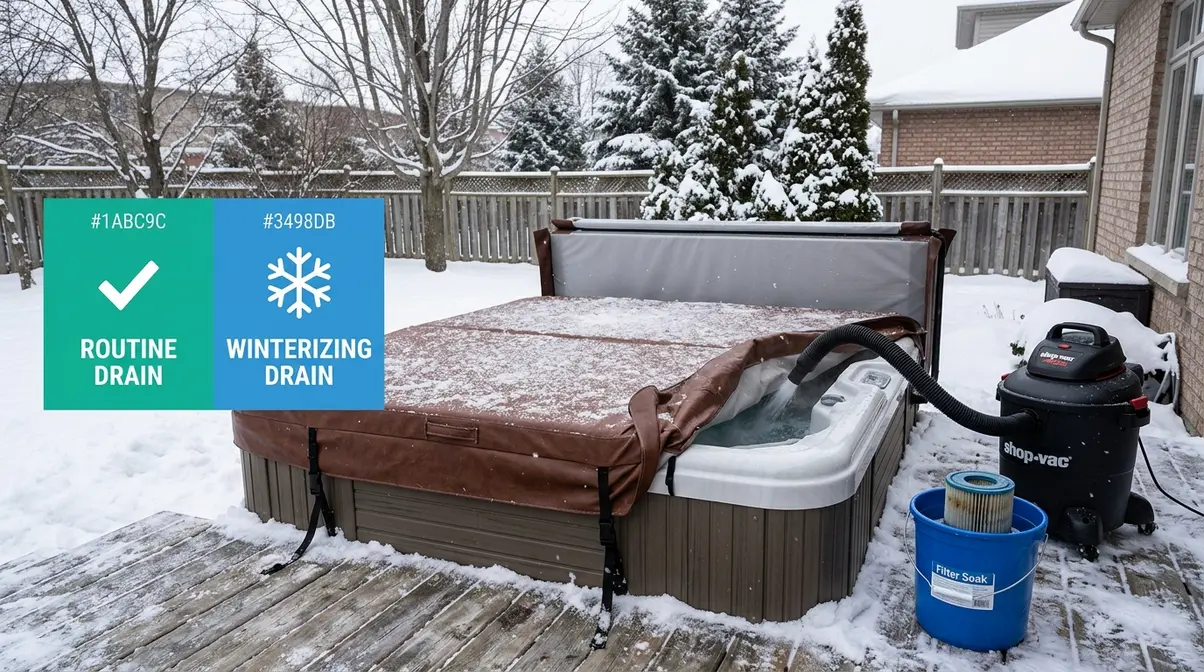
Not all drains are equal. A routine maintenance drain (every 3–4 months) and a winterizing drain (before freezing temperatures arrive) have different goals and require different steps. Confusing the two is one of the most common — and costly — mistakes new owners make. For year-round care, consult a complete hot tub maintenance guide to keep your system running smoothly.
According to Consumer Reports, freeze damage to hot tub plumbing is among the most expensive repairs owners face — often $500–$2,000+ — and it’s almost entirely preventable with proper winterization.
| Step | Routine Drain | Winterizing Drain |
|---|---|---|
| Drain all water | ✅ Yes | ✅ Yes |
| Clean shell and jets | ✅ Yes | ✅ Yes |
| Remove residual water | ✅ Yes | ✅ Yes (critical) |
| Blow out plumbing lines | ❌ Not required | ✅ Required |
| Remove and store filter | ❌ Not required | ✅ Required |
| Disconnect and drain heater | ❌ Not required | ✅ Required |
| Add antifreeze to lines | ❌ Not required | ✅ For harsh climates |
| Cover and secure tub | Basic cover | Insulated, secured cover |
| Refill timeline | Same day or next day | Spring (or when temps stay above freezing) |
Winterizing Extra Steps
After completing a standard drain and cleaning, add these steps for winter storage:
- Blow out the plumbing lines using a shop vac set to “blow” (not vacuum). Insert the nozzle into each jet and run for 30 seconds to force water out of the pipes. Trapped water in lines freezes, expands, and cracks PVC pipes.
- Remove the filter cartridge and store it indoors in a bucket of clean water to prevent the filter media from drying out and cracking.
- Drain the heater manifold. On most tubs, there’s a small drain plug on the heater housing — remove it to let residual water escape.
- Add non-toxic RV antifreeze (not automotive antifreeze — it’s toxic) to the plumbing lines if you’re in a region with sustained temperatures below 20°F (-7°C).
- Lock down the cover with tie-down straps rated for wind and snow load. A saturated, collapsed cover is the second most common winterizing failure after frozen pipes.
Troubleshooting Common Draining Problems
Even with careful preparation, problems happen. Here are the most frequent issues hot tub owners encounter and how to fix them quickly.
My drain valve is stuck or won’t open
Mineral deposits (calcium scale) can seize a drain valve that hasn’t been used in over a year. Apply a small amount of white vinegar around the valve seat and let it sit for 10–15 minutes. Then try turning it again with gentle pressure. Never force it with a wrench — you can crack the fitting. If it still won’t move, use the submersible pump method instead and have the valve inspected at your next service.
Water is draining very slowly
For gravity-drain methods, slow flow usually means one of three things: the hose is kinked, the hose exit isn’t low enough, or the drain valve is partially clogged with debris. Check each in order. For inflatable tubs, the rubber drain plug sometimes sits slightly crooked — remove and reseat it.
Water remains in the jets
Jets connect to plumbing lines that hold a small amount of water. This is normal. Running the jets for 30–60 seconds on the lowest setting before you turn off the circuit breaker will help purge jet lines. For winterizing, use the shop vac blowout method described above.
My pump won’t prime after refilling
This is almost always an air lock. The fix: with the tub running, loosen the union fitting on the pump inlet (a large plastic nut — hand-tight only, no tools needed) just enough to hear air hissing out. Retighten once water starts to seep out. Repeat if needed. Filling through the filter compartment during refill prevents this in the first place.
Frequently Asked Questions
Can I drain my hot tub with just a garden hose?
Yes — using the siphon method, a garden hose alone can drain your hot tub. Fully submerge the hose to fill it with water, cap one end with your thumb, pull it out, position the capped end lower than the tub’s waterline, then release. Water flows by gravity as long as the exit end stays lower than the water surface. This method takes 2–4 hours and works well for inflatable and portable tubs.
How often should I drain my hot tub?
Most hot tubs should be fully drained and refilled every 3–4 months, according to the Pool & Hot Tub Alliance (PHTA). Most manufacturer guidelines align on this schedule for average use (2–4 people, several times per week). With heavier use, drain every 6–8 weeks. If your chemicals won’t balance after 48 hours of adjustment, or if the water looks persistently cloudy or foamy, drain immediately regardless of schedule.
Where to put the drained water?
Let the water dechlorinate before draining to the ground or storm drains. Remove the cover and let the water sit for 24–48 hours with the sanitizer levels dropping naturally, or add a chlorine neutralizer (sodium thiosulfate) to speed the process. Dechlorinated water can be drained to a sanitary sewer (floor drain, utility sink), or to a lawn area in small amounts. Never drain actively chlorinated water into waterways, storm drains, or directly onto plant beds. Check your local municipality’s guidelines, as rules vary.
Limitations and Alternatives
Common Pitfalls to Avoid
Pitfall 1: Forgetting to turn off the circuit breaker. Running the pump or heater without water causes immediate, expensive damage. This is the most costly beginner mistake — a burned pump runs $300–$800 to replace. Always flip the breaker at the wall panel before you open any valve or place any hose.
Pitfall 2: Draining onto grass or garden beds. Even “low” chlorine levels burn grass and kill plants. Hot tub owners consistently report dead patches in their lawns after draining directly onto turf. Route your hose to a floor drain, utility sink, or dechlorinate first.
Pitfall 3: Skipping the residual water removal. That last inch of water left in the footwell looks harmless. In winter, it freezes and can crack the shell or plumbing. In summer, it becomes a warm, stagnant bacterial incubator. Remove it every time with a wet/dry vacuum.
Pitfall 4: Using household cleaners on the shell. Products like Windex, bleach spray, or abrasive scrubbers damage acrylic surfaces and leave chemical residues that foam aggressively when you refill. Use only spa-safe, non-abrasive cleaners.
When to Choose a Different Approach
If your hot tub is under warranty: Check your owner’s manual before attempting any drain valve work. Some manufacturers require professional service for warranty maintenance. Doing it yourself won’t void the warranty in most cases, but confirming first protects you.
If you have a swim spa (1,000+ gallons): A single submersible pump takes 45–90 minutes on a swim spa. Renting a 2″ trash pump from a hardware store cuts that to 15–20 minutes and is worth the $40–$60 daily rental cost.
If your drain valve is leaking after closing: Don’t ignore it. A slow leak can drain your tub partially overnight and run your pump dry. Replace the O-ring on the valve seat (a $2–$5 part) or call a spa technician for a valve replacement.
When to Call a Professional
Call a licensed spa technician if: your drain valve is cracked or leaking and won’t seal, you have freeze damage with cracked PVC pipes, your pump won’t prime after multiple air-lock attempts, or you’re winterizing a large in-ground spa for the first time. These situations involve pressurized plumbing and can cause water damage if handled incorrectly.
Your Next Step: Schedule Your First Drain
The Complete Drain Protocol makes draining a hot tub manageable for any owner, regardless of experience. Choose the method that fits your equipment — submersible pump for speed, built-in valve for simplicity, garden hose siphon when you have no other option — and follow the steps in order. The entire process, including cleaning and refilling, takes 2–4 hours for most owners.
The biggest barrier is usually getting started. Hot tub owners who establish a regular 3–4 month drain schedule consistently report fewer chemical problems, cleaner water, and lower long-term maintenance costs than those who drain reactively when problems arise.
Pick your drain date now. Add it to your calendar. Then pull out this guide when the day comes — and work through each step with confidence.
For more on keeping your water clean between drains, see our guide to a hot tub water maintenance schedule. When it’s time to replace your filter after a drain, our comprehensive hot tub cleaning guide walks you through the full process. If you’re heading into winter, learning how to winterize your hot tub covers every step from blowout to cover storage.