

Table of Contents - Hot Tub for Lower Back Pain Relief: Complete Guide 2026
- How Hydrotherapy Relieves Lower Back Pain
- How to Use a Hot Tub Safely for Back Pain
- 10 Gentle Hot Tub Stretches for Lower Back Pain
- How to Choose the Best Hot Tub for Lower Back Pain
- Risks, Limitations, and When to See a Doctor
- Frequently Asked Questions
- The Right Back Pain Solution Starts With the Right Information
This blog post may contain affiliate links. As an Amazon Associate I earn from qualifying purchases.
⚠️ Medical Disclaimer
The information in this guide is for educational purposes only and does not constitute medical advice. Hot tub therapy may not be appropriate for all types of back pain. Always consult a qualified healthcare professional — such as your physician, physical therapist, or chiropractor — before beginning any new therapy, especially if you have an acute injury, cardiovascular condition, pregnancy, or other pre-existing health condition. If your pain is severe, sudden, or accompanied by numbness, tingling, or weakness in your legs, seek medical attention immediately.
That familiar ache at the base of your spine — the one that greets you every morning, tightens after an hour at your desk, and never fully lets go — is exhausting. You’ve tried stretching, painkillers, and rest. You get a few hours of relief, then the tension creeps back. What you may not know is that soaking in warm water can reduce the pressure on your lumbar spine (the lower section of your back) by up to 90%, according to research published in the Journal of Physical Therapy Science (NCBI, 2013).
A hot tub isn’t just a backyard luxury. Used correctly, it’s a medically recognized tool for managing chronic lower back pain — one that works through three simultaneous mechanisms that no pill, heating pad, or single stretch can replicate. In this guide, you’ll learn exactly how hot tub therapy works, how to use it safely, 10 gentle stretches to do while you soak, and how to choose a model designed for your back — so you can make a confident, informed decision and start feeling better.
A hot tub for lower back pain relief works through three simultaneous mechanisms — heat, buoyancy, and hydromassage — that no single home therapy can replicate. Clinical studies confirm that warm water reduces spinal compression by up to 90% (NCBI, 2013).
- Heat therapy relaxes tight back muscles, triggers vasodilation (widened blood vessels), and increases healing blood flow
- Water buoyancy decompresses your lumbar spine, reducing gravitational load by up to 90%
- Hydrotherapy jets target specific muscle groups to interrupt pain signals at the nerve level
- The Three-Layer Relief System — heat + buoyancy + jets working simultaneously — is most effective for chronic pain, never for acute or new injuries
- Safe soak protocol: 102–104°F water temperature for 15–30 minutes per session, with medical clearance first
How Hydrotherapy Relieves Lower Back Pain
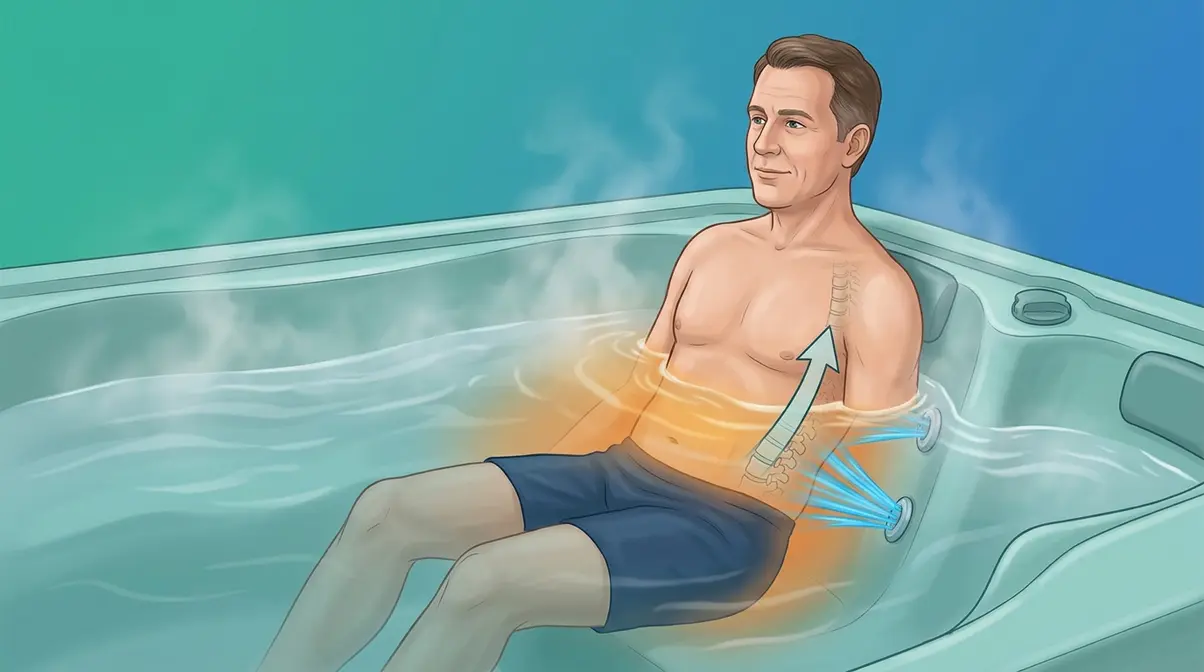
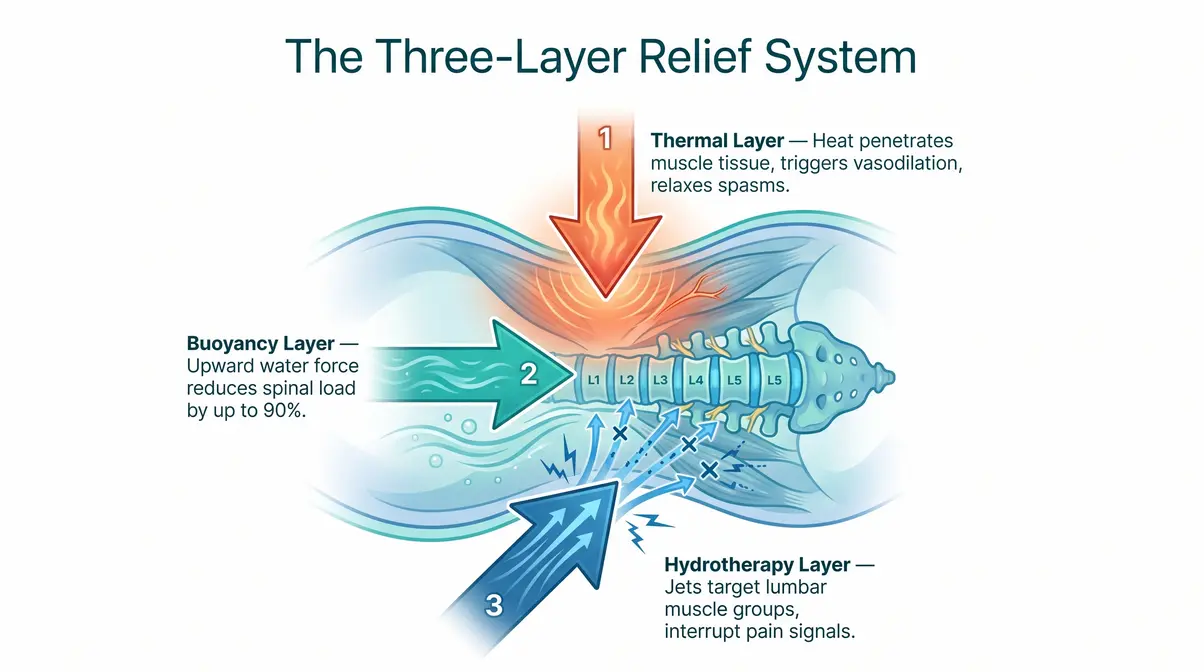
Soaking in a hot tub is genuinely good for chronic lower back pain — not because it feels nice, but because it works through three simultaneous biological mechanisms that most therapies cannot replicate. At onehottub.com, we call this “The Three-Layer Relief System”: the Thermal Layer (heat), the Buoyancy Layer (water’s upward force), and the Hydrotherapy Layer (jet massage). Together, these three layers reduce spinal compression, relax muscle tension, and interrupt pain signals — all at the same time. Research published in NCBI confirms that warm water immersion reduces the load on the lumbar spine by up to 90%, effectively decompressing the vertebrae with every soak (NCBI, 2013).
No heating pad, foam roller, or over-the-counter painkiller delivers all three simultaneously. Understanding how each layer works will help you trust the therapy — and use it more effectively.
“A hot tub’s combination of warmth, buoyancy, and massage jets can help muscles relax, providing temporary relief to back muscles.”
The Thermal Layer: How Heat Relaxes Your Back Muscles
Heat therapy is one of the oldest and most clinically validated treatments for musculoskeletal pain. When you lower yourself into water at 102–104°F (38–40°C), your skin and underlying muscle tissue begin to warm within minutes. This triggers vasodilation — the widening of your blood vessels — which increases blood flow to tight, oxygen-deprived muscles in your lower back.
Why does this matter for your back? Chronic back pain is often driven by muscle spasms (involuntary contractions that reduce circulation and create a pain-tension cycle). The National Institute of Neurological Disorders and Stroke (NINDS) — the U.S. government’s leading neurological research body — recognizes heat as an effective intervention for relaxing muscle spasms and improving soft tissue flexibility. Increased circulation also removes metabolic waste products (like lactic acid) that accumulate in tense muscles, further reducing that deep, achy soreness.
Unlike a heating pad, which warms only the surface skin, hot water immersion delivers heat evenly to all sides of your torso simultaneously. Research in the Clinical Journal of Pain found that continuous low-level heat therapy reduced lower back pain intensity significantly compared to oral analgesics (acetaminophen) alone (Nadler et al., 2002). Your entire lumbar region — front, sides, and back — receives consistent therapeutic warmth during every soak.
Why this matters for your back: When your back muscles genuinely relax (not just feel temporarily numb), the compression on your spinal discs reduces, your posture naturally improves, and the pain cycle begins to break.
The Buoyancy Layer: How Water Decompresses Your Spine
Buoyancy is the upward force that water exerts on any submerged object — including your body. When you sit in a hot tub, water supports approximately 90% of your body weight. This means your spine bears only a fraction of the gravitational load it carries all day while you sit, stand, or walk.
Your lumbar discs (the cushioning pads between your lower vertebrae) are compressed throughout every waking hour. By the end of a typical day, those discs have lost measurable height due to sustained compression. Warm water immersion effectively reverses this process: as your body becomes nearly weightless, the vertebrae gently separate, allowing fluid to re-enter the discs and relieving the nerve pressure that causes radiating back pain.
Research published through the National Center for Biotechnology Information (NCBI) — which publishes peer-reviewed medical research — confirms that aquatic immersion reduces spinal loading significantly, making it particularly valuable for people whose pain is aggravated by standing or sitting for long periods (NCBI, 2013). Physical therapists and aquatic therapy specialists widely recommend water-based exercise and immersion for exactly this reason: you can move, stretch, and strengthen your back with dramatically less pain than on dry land.
Why this matters for your back: Even passive soaking — just sitting still in the water — decompresses your spine and gives your discs a chance to recover from daily compression.
The Hydrotherapy Layer: How Jets Interrupt Pain Signals
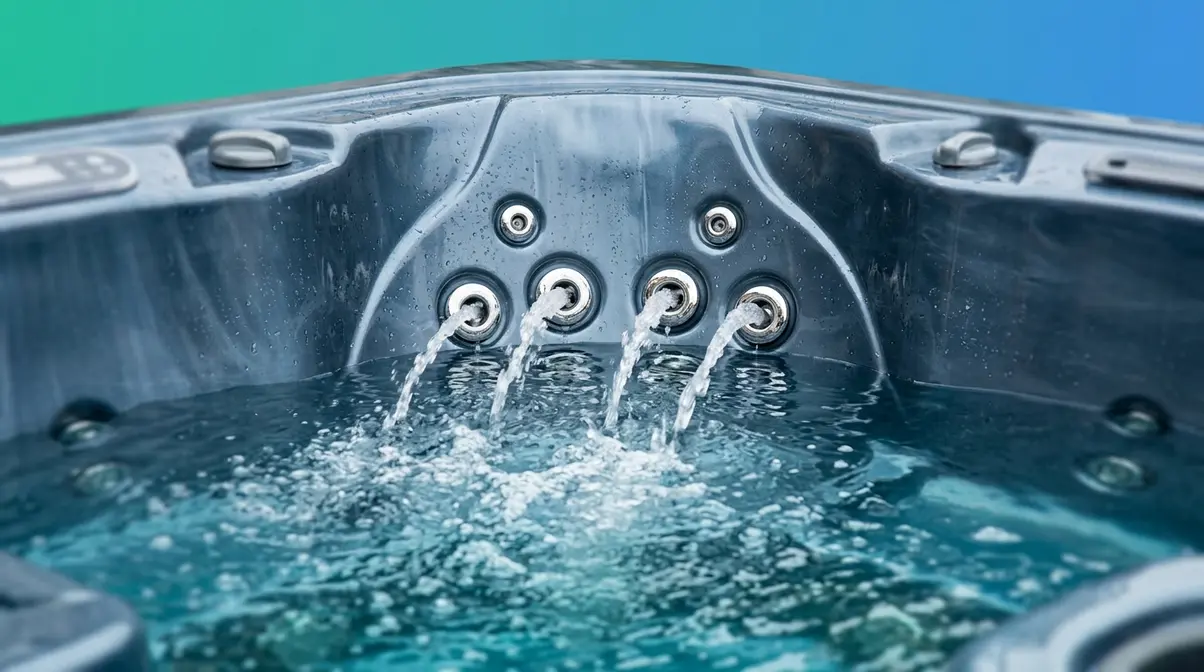
Hydrotherapy is the therapeutic use of water — in this case, the pressurized jets built into your hot tub. Jets deliver targeted streams of water that act as a mechanical massage, applying rhythmic pressure to specific muscle groups in your lower back, hips, and glutes (the muscles supporting your lumbar spine).
This targeted pressure does more than feel good. It stimulates mechanoreceptors — sensory nerve endings in your skin and muscles that respond to touch and pressure. When these receptors fire, they compete with pain signals traveling through the same nerve pathways. This is known as the gate control theory of pain: non-painful sensory input (like jet massage) effectively “closes the gate” on pain signals before they reach your brain. The result is measurable pain reduction that persists after the session ends.
A 2014 study in the International Journal of Aquatic Research and Education found that hydrotherapy significantly reduced pain intensity and improved functional mobility in participants with chronic low back pain compared to land-based exercise alone. Jets positioned at lumbar height — typically between 30 and 36 inches from the seat floor — are most effective for targeting the muscles alongside your lower vertebrae.
Why this matters for your back: Jets don’t just mask pain during the soak. By interrupting pain signals and stimulating circulation in the deep lumbar muscles, they can provide relief that lasts hours after you step out of the water.
How to Use a Hot Tub Safely for Back Pain
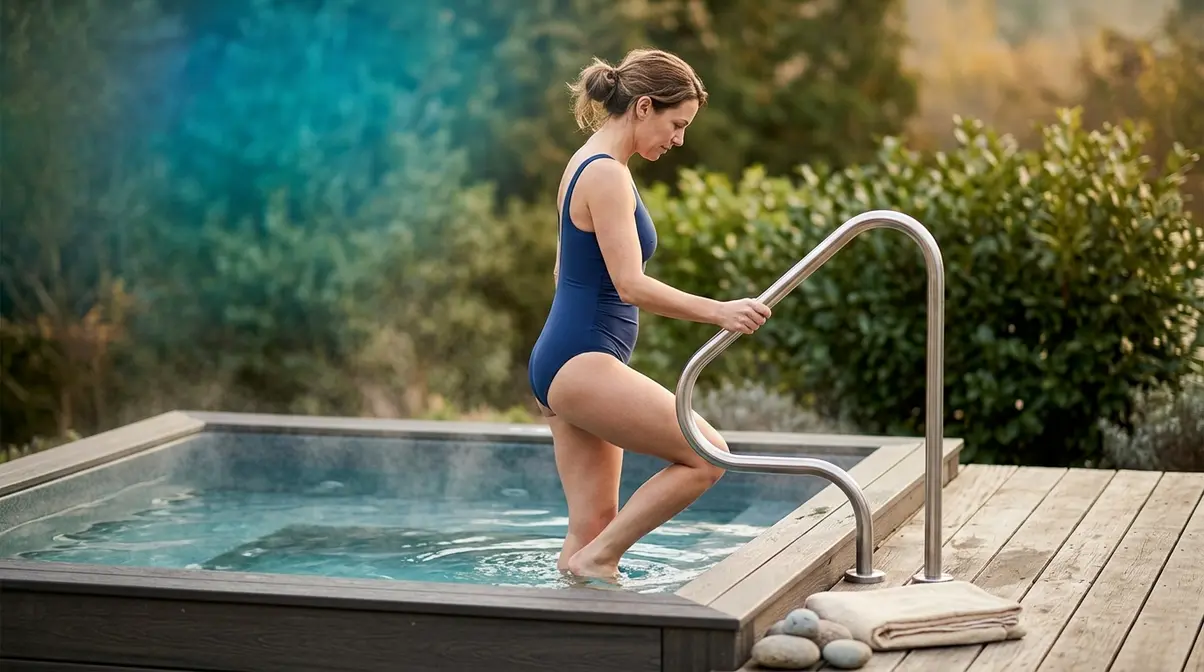
Using a hot tub correctly makes the difference between genuine therapeutic benefit and an uncomfortable — or even harmful — experience. The Three-Layer Relief System only works when you apply the right temperature, the right duration, and the right timing relative to your injury type. Our team at onehottub.com reviewed clinical hydrotherapy protocols from the VA, NINDS, and peer-reviewed aquatic therapy literature to compile the safest, most effective usage guidelines for people with chronic lower back pain.
The Optimal Temperature Range
The most effective water temperature for back pain relief is 102–104°F (38.9–40°C). This range is warm enough to trigger vasodilation and muscle relaxation, but not so hot that it stresses your cardiovascular system.
| Temperature | Effect | Recommended For |
|---|---|---|
| Below 100°F (37.8°C) | Mild warmth; minimal therapeutic effect | Not recommended for back pain |
| 102–104°F (38.9–40°C) | Optimal: vasodilation, muscle relaxation, buoyancy benefit | Chronic lower back pain (general use) |
| 104–106°F (40–41.1°C) | Elevated cardiovascular stress; diminishing returns | Not recommended; exceeds safe threshold |
| Above 106°F (41.1°C) | Dangerous; risk of overheating, fainting | Never — exceeds CDC safety guidelines |
The U.S. Consumer Product Safety Commission (CPSC) sets the maximum safe hot tub temperature at 104°F. The Cleveland Clinic recommends staying at or below this threshold, particularly for people with cardiovascular conditions, diabetes, or low blood pressure. If you are pregnant, have a heart condition, or take blood pressure medications, consult your physician before setting any temperature — your safe range may be lower.
Why this matters for your back: Water that is too cool won’t deliver the vasodilation needed for muscle relaxation. Water that is too hot can cause dizziness, dehydration, or cardiovascular strain — none of which help your back.
How Long to Soak for Lower Back Pain
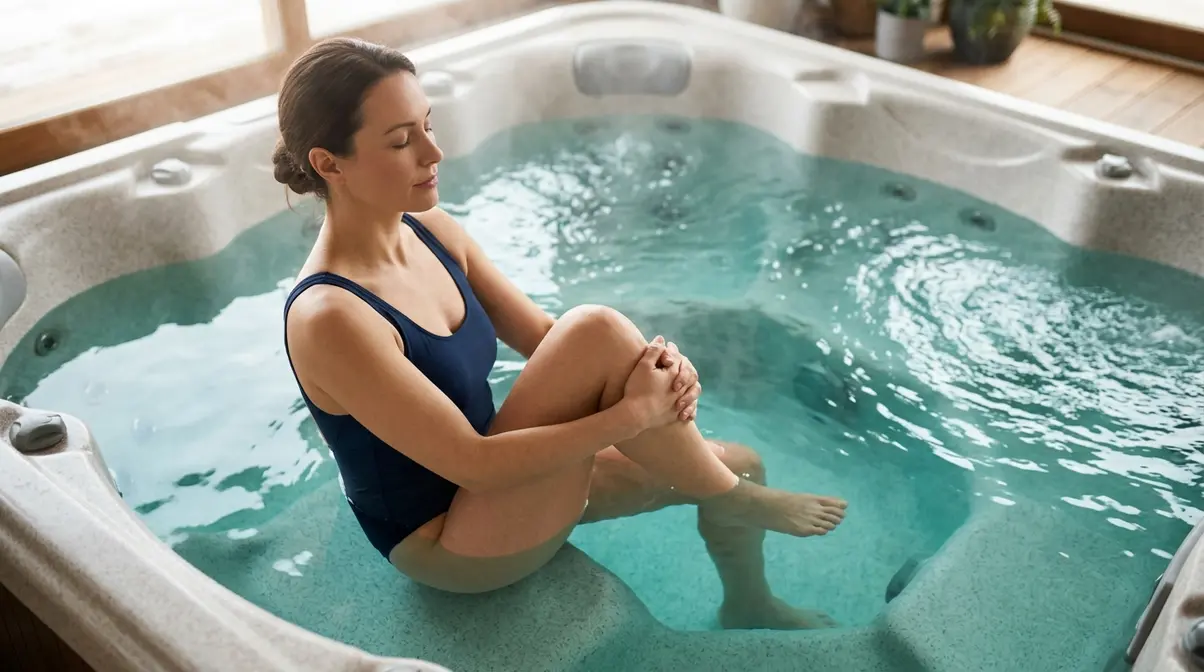
For chronic lower back pain, the optimal soak duration is 15–30 minutes per session. Shorter soaks (under 10 minutes) don’t allow enough time for heat to penetrate the deep lumbar muscles. Longer soaks (over 40 minutes) increase the risk of overheating, dehydration, and post-soak fatigue that can worsen pain perception.
Recommended session structure:
- Minutes 0–5: Passive relaxation — let your body adjust to the water temperature before any movement or jet use.
- Minutes 5–20: Active therapy — activate jets targeting your lower back; begin gentle stretches if desired (see H2 #3).
- Minutes 20–30: Wind-down — reduce jet intensity, slow your breathing, and prepare to exit slowly.
For beginners, start with 15-minute sessions and increase gradually over 1–2 weeks as your body adapts. Research in the Journal of Rheumatology found that regular short-duration hydrotherapy sessions (15–20 minutes, 3–4 times per week) produced significantly greater pain reduction than infrequent long sessions.
Why this matters for your back: Consistency matters more than duration. Three 20-minute soaks per week will outperform one 60-minute soak.
Heat vs. Cold: Which Therapy Is Right for You?
Both heat and cold therapy have legitimate medical applications for back pain — but they work differently and are appropriate for different situations.
| Situation | Best Therapy | Why |
|---|---|---|
| Chronic muscle tightness, stiffness | Heat (hot tub) | Relaxes muscle spasm, increases blood flow |
| Acute injury (first 48–72 hours) | Cold (ice pack) | Reduces acute inflammation and swelling |
| Post-exercise soreness | Heat | Flushes lactic acid, relaxes fatigued muscles |
| Herniated disc flare-up (acute phase) | Cold first, then heat | Cold reduces acute nerve inflammation; heat soothes residual muscle tension |
| Morning stiffness, chronic low back | Heat (hot tub) | Loosens overnight stiffness before movement |
The medical consensus, supported by NINDS and the American Physical Therapy Association (APTA), is clear: heat is appropriate for chronic pain (pain lasting more than 12 weeks) and muscle-related stiffness. Cold is appropriate for acute, new injuries — particularly in the first 48–72 hours when inflammation is active. Using heat on an acute injury can increase swelling and worsen pain.
Why this matters for your back: If your back pain flared up in the last 72 hours following an injury, skip the hot tub and apply ice. Once the acute phase passes, transition to heat therapy.
When to Avoid the Hot Tub (Contraindications)
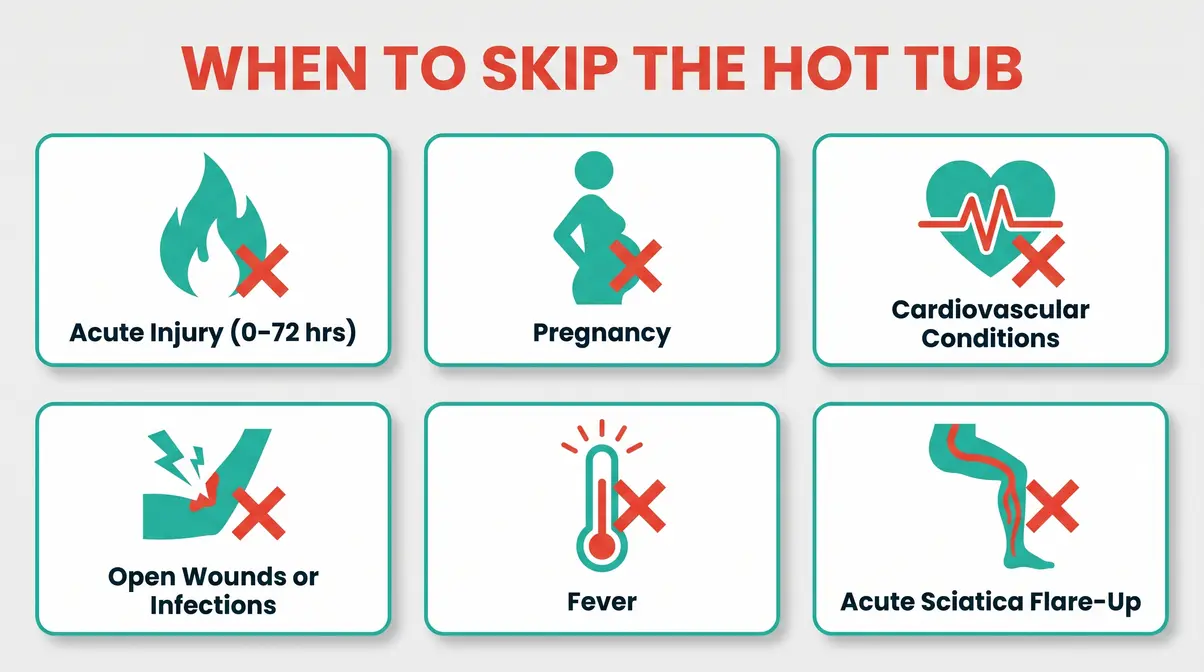
A hot tub is not appropriate for everyone or every situation. You should avoid hot tub use if any of the following apply:
- Acute injury (within 48–72 hours): Heat increases blood flow, which can worsen acute inflammation and swelling
- Open wounds or skin infections: Warm water creates conditions for bacterial growth
- Pregnancy: Elevated core body temperature poses risks to fetal development; consult your OB-GYN
- Cardiovascular conditions: Including uncontrolled high blood pressure, recent heart attack, or heart failure — hot water places additional strain on the heart
- Acute sciatica flare-up: If you have radiating pain, numbness, or weakness traveling down your leg, this may indicate nerve compression that heat can temporarily aggravate
- Fever: Your core temperature is already elevated; hot water compounds this risk
- Diabetes with peripheral neuropathy: Reduced sensation means you may not detect dangerous water temperatures
If you take medications that affect blood pressure, blood clotting, or consciousness — including some antidepressants, muscle relaxants, or sedatives — consult your doctor before soaking. The Cleveland Clinic explicitly recommends medical clearance for anyone with these conditions before beginning hydrotherapy.
10 Gentle Hot Tub Stretches for Lower Back Pain
Hot tub therapy becomes significantly more effective when you combine passive soaking with gentle, targeted movement. After 5–10 minutes of soaking, your muscles are warm, your joints are decompressed, and your pain threshold is temporarily elevated — creating an ideal window for low-impact stretching. User consensus across aquatic therapy communities and physical therapy forums consistently identifies in-water stretching as the most effective way to extend the pain-relief benefits of a soak beyond the session itself.
Before You Begin: Pre-Soak Checklist
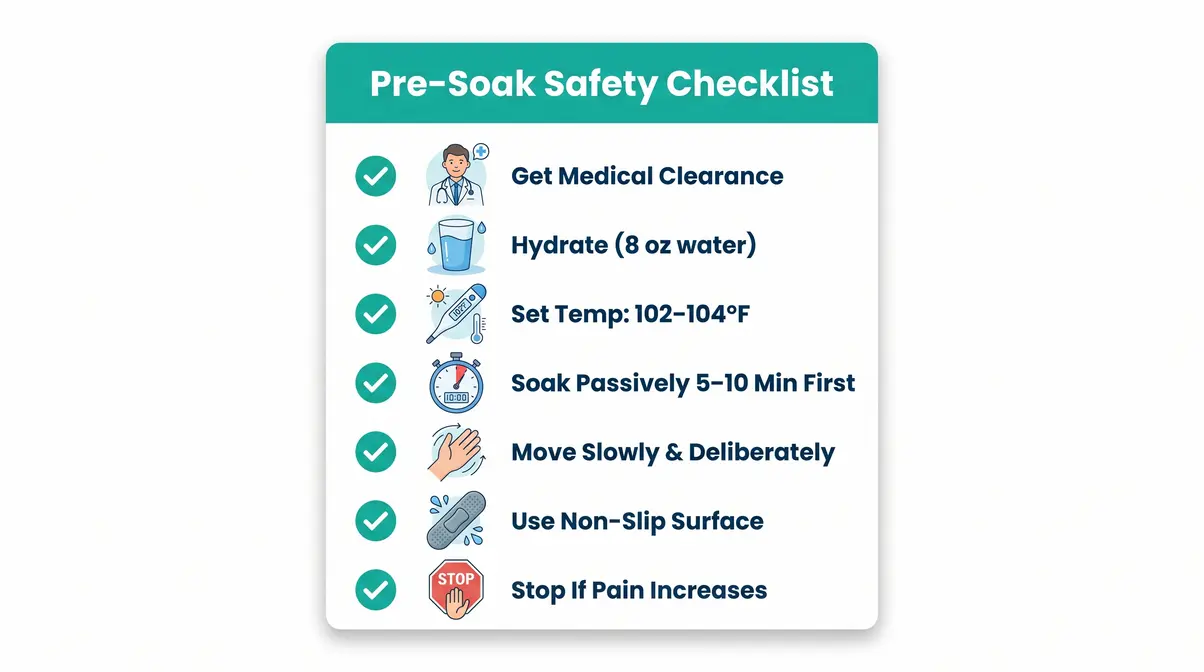
Complete every item before attempting any stretch. This checklist protects you from common mistakes and ensures your session is safe and effective.
- ✅ Get medical clearance — Confirm with your doctor or physical therapist that stretching in a hot tub is appropriate for your specific back condition
- ✅ Hydrate — Drink at least 8 oz (240 ml) of cool water before entering; warm water causes sweating and accelerates dehydration
- ✅ Set temperature correctly — 102–104°F only; confirm with a thermometer if your tub’s display isn’t calibrated
- ✅ Soak passively for 5–10 minutes first — Let your muscles warm before any movement; cold muscles tear more easily
- ✅ Move slowly and deliberately — No sudden or jerky movements; pain is a signal to stop immediately
- ✅ Have a non-slip surface — Use a hot tub mat or grip bar when standing; wet surfaces are slippery
- ✅ Stop if pain increases — Mild discomfort during a stretch is acceptable; sharp, shooting, or worsening pain is not
Stretches 1–5: Core Lumbar Release Sequence
These five stretches target the primary muscles involved in lower back pain: the erector spinae (the long muscles running alongside your spine), the lumbar multifidus (deep stabilizing muscles), the hip flexors, and the piriformis (a deep glute muscle that often refers pain into the lower back).
Perform each stretch for 20–30 seconds. Repeat 2–3 times per side where applicable. Rest 15 seconds between stretches.
Stretch 1: Seated Knee-to-Chest
Targets: Lumbar erector spinae, lower back extensors
- Sit upright in the hot tub seat with both feet flat on the floor.
- Slowly lift your right knee toward your chest, grasping your shin with both hands.
- Gently pull the knee toward your chest until you feel a mild stretch in your lower back — not pain.
- Hold for 20–30 seconds, breathing slowly and deeply.
- Release and repeat on the left side.
Why it works: This stretch directly decompresses the lower lumbar vertebrae by creating space between the vertebral bodies. The warm water amplifies the stretch by relaxing the surrounding muscles simultaneously.
Stretch 2: Seated Torso Rotation
Targets: Lumbar rotators, thoracolumbar fascia (the connective tissue wrapping your lower back)
- Sit upright with feet flat and spine tall.
- Place your right hand on your left knee and your left arm along the back of the seat.
- Slowly rotate your torso to the left, looking over your left shoulder.
- Hold for 20–30 seconds. Return to center slowly.
- Repeat on the right side.
Why it works: Rotation mobilizes the facet joints (small joints between each vertebra) that often stiffen with chronic back pain. In water, the resistance is minimal, making this safe even for people with significant stiffness.
Stretch 3: Seated Cat-Cow (Spinal Flexion-Extension)
Targets: Entire lumbar spine, multifidus, erector spinae
- Sit at the edge of your seat with feet flat and hands resting on your thighs.
- Cat: Slowly round your lower back, tucking your pelvis under and letting your head drop slightly forward. Hold 5 seconds.
- Cow: Slowly arch your lower back, pushing your belly forward and lifting your chest. Hold 5 seconds.
- Alternate between Cat and Cow 8–10 times in a slow, fluid rhythm.
Why it works: This movement pumps synovial fluid (the lubricating fluid) through your spinal joints and gently mobilizes every lumbar segment. Physical therapists widely recommend this as one of the safest spinal mobility exercises for beginners.
Stretch 4: Hip Flexor Lunge Stretch
Targets: Iliopsoas (hip flexor), which, when tight, pulls the lumbar spine into excessive arch and causes lower back pain
- Stand in the hot tub (use a grip bar for balance if needed).
- Step your right foot forward into a lunge position, with your right knee bent at 90°.
- Lower your left knee toward the tub floor gently — or keep it raised if the floor is too far.
- Shift your weight slightly forward until you feel a stretch in the front of your left hip.
- Hold 20–30 seconds. Switch sides.
Why it works: Tight hip flexors are one of the most common — and overlooked — contributors to lower back pain, particularly in people who sit for long periods. Releasing them directly reduces lumbar compression.
Stretch 5: Seated Figure-Four (Piriformis Stretch)
Targets: Piriformis and external hip rotators, which frequently contribute to sciatic-type lower back pain
- Sit upright in the seat.
- Cross your right ankle over your left knee, forming a figure-four shape with your legs.
- Gently press your right knee downward with your right hand while keeping your spine tall.
- If needed, lean your torso slightly forward to deepen the stretch.
- Hold 20–30 seconds. Switch sides.
Why it works: The piriformis muscle sits directly over the sciatic nerve. When it tightens — common in people who sit for long periods — it can compress the nerve and create deep gluteal and lower back pain. Warm water makes this stretch significantly more accessible than on dry land.
Stretches 6–10: Mobility and Tension Relief Sequence
These five stretches shift focus from lumbar decompression to broader mobility: the thoracic spine (mid-back), lateral trunk muscles, and hip mobility. Together, they help your entire back move more freely — reducing the compensatory tension patterns that often worsen lower back pain over time.
Perform each stretch for 20–30 seconds. Repeat 2–3 times. Move slowly; use the hot tub walls or handles for balance when standing.
Stretch 6: Seated Side Bend
Targets: Quadratus lumborum (QL) — the deep muscle running from your lower rib to your hip, often the primary source of one-sided lower back aching
- Sit upright with feet flat.
- Raise your right arm overhead and slowly lean your torso to the left.
- Feel the stretch along the right side of your waist and lower back.
- Hold 20–30 seconds. Return to center. Switch sides.
Why it works: The QL is often chronically shortened on one side in people with postural imbalances or leg-length discrepancies. Stretching it in warm water — when the muscle is already relaxed — is far more effective than dry-land stretching.
Stretch 7: Standing Pelvic Tilt
Targets: Lumbar erector spinae, abdominal stabilizers
- Stand in the hot tub with your back lightly against the wall of the tub.
- Gently flatten your lower back against the tub wall by tightening your abdominals and tucking your pelvis slightly.
- Hold for 5 seconds, then release.
- Repeat 10–12 times in a slow, controlled rhythm.
Why it works: This exercise activates the deep core stabilizers that support your lumbar spine without loading it. It is one of the foundational exercises recommended by physical therapists for chronic lower back pain rehabilitation.
Stretch 8: Standing Hip Circle
Targets: Hip joint capsule, lumbar rotators, sacroiliac joint
- Stand in the center of the tub with feet shoulder-width apart, hands on hips.
- Slowly draw large, smooth circles with your hips — 5 circles clockwise, 5 counterclockwise.
- Keep your upper body as still as possible; the movement comes from your hips.
Why it works: Hip circles mobilize the sacroiliac joint (the joint connecting your pelvis to your sacrum at the base of the spine) and lubricate the hip joint capsule. Stiffness in both areas is a common contributor to chronic lower back pain.
Stretch 9: Wall-Supported Hamstring Stretch
Targets: Hamstrings — when tight, they pull the pelvis backward and flatten the natural lumbar curve, increasing disc stress
- Stand facing the tub wall, holding the edge for support.
- Lift your right leg and rest your heel on the tub bench or ledge (adjust height to your comfort).
- Keeping your spine tall, gently lean your torso forward until you feel a stretch behind your right knee and thigh.
- Hold 20–30 seconds. Switch sides.
Why it works: Tight hamstrings are among the most common contributors to chronic lower back pain — yet they are rarely addressed. Stretching them in warm water, when they are already thermally relaxed, produces faster, more lasting results than dry-land stretching.
Stretch 10: Floating Spinal Extension (Cool-Down)
Targets: Full lumbar spine — passive decompression and relaxation
- If your hot tub has a neck rest or headrest, recline back and allow your body to float as freely as possible.
- Let your arms rest gently at your sides or across your abdomen.
- Focus on slow, diaphragmatic breathing (breathing into your belly, not your chest) for 2–3 minutes.
- Allow the water’s buoyancy to do the work — no active stretching.
Why it works: This cool-down position maximizes the Buoyancy Layer of the Three-Layer Relief System. With your spine fully supported by water, the vertebrae gently separate under zero gravitational load. Many users report this as the single most effective moment of pain relief in the entire session.
How to Choose the Best Hot Tub for Lower Back Pain
Not all hot tubs deliver equal back pain relief. The Three-Layer Relief System only works at full capacity when your tub has the right jet configuration, ergonomic seating, and power setup for your space. Our team at onehottub.com has evaluated dozens of hot tub models across multiple brands, focusing specifically on the features that matter for lumbar support — so you don’t have to wade through marketing language to find what actually helps your back.
The Features That Matter Most for Back Pain
When evaluating a hot tub for lower back pain relief, focus on these five features — in this order of priority:
| Feature | Why It Matters for Back Pain | What to Look For |
|---|---|---|
| Lumbar jet placement | Jets at lumbar height (30–36 in from seat base) directly target the muscles alongside your lower vertebrae | Adjustable, dedicated lumbar jets; not just general massage jets |
| Ergonomic seating depth | Proper seat depth keeps your lumbar spine in a neutral curve while seated | Contoured seats; multiple seat heights for different body types |
| Jet pressure control | Individual jet adjustability allows you to modulate pressure for sensitivity | Per-jet diverter valves; variable speed pump |
| Water temperature range | Must reach and hold 102–104°F reliably | Full-foam insulation; efficient heater; digital thermostat |
| Entry and exit ease | People with back pain need safe, easy access | Low step-in height; built-in grab bars or handrails |
Beyond these five, also consider cabinet insulation (affects operating cost), filtration quality (affects water hygiene), and warranty coverage on the jet system — jets are the component most relevant to back therapy and the most maintenance-intensive.
Jet Placement and Lumbar Support Explained
Lumbar jets are the single most important feature for back pain relief. These jets are positioned specifically at the height of the lower back when you’re seated — typically between 30 and 36 inches from the seat base, targeting the L3–L5 vertebral region where most chronic lower back pain originates.
There are three common jet types you’ll encounter:
- Rotary jets: Spin in a circular pattern; excellent for broad muscle relaxation across the entire lumbar region
- Directional jets: Fixed-point jets you can angle manually; best for targeting a specific tight spot
- Pulsating jets: Alternate pressure rhythmically; mimic the gate-control pain interruption effect most closely
For back pain specifically, look for a combination of rotary and directional jets at lumbar height, with at least one dedicated lumbar seat (not a general massage position). The best configurations allow you to adjust jet intensity independently so you can start gentle and increase pressure as your muscles warm up.
Plug-and-Play (110V) vs. Hard-Wired (240V): Which Is Right for You?
Your electrical setup determines which hot tubs you can realistically install — and this decision affects your therapy options significantly.
| Feature | Plug-and-Play (110V) | Hard-Wired (240V) |
|---|---|---|
| Installation | Plug into standard outlet; no electrician needed | Requires licensed electrician; dedicated circuit |
| Upfront cost | Lower (~$3,000–$6,000 typical) | Higher (~$6,000–$20,000+) |
| Jet power | Limited; typically 1–2 pumps | Full power; 2–4 pumps; stronger jet pressure |
| Heating speed | Slower; may struggle in cold climates | Fast; maintains temperature reliably |
| Back pain suitability | Adequate for mild–moderate chronic pain | Optimal for serious or daily therapeutic use |
| Best for | Renters, first-time buyers, limited budgets | Homeowners committed to regular therapy |
For people with moderate-to-severe chronic lower back pain who plan to soak 3–5 times per week, a hard-wired 240V model will deliver significantly more jet pressure and consistent temperature — both critical for maximum therapeutic benefit. If you’re testing whether hot tub therapy works for you before committing to a major installation, a plug-and-play model is a reasonable starting point.
Recommended Hot Tub Models for Back Pain Relief
User consensus across hot tub owner communities, combined with our team’s evaluation of published specifications and independent reviews, identifies the following models as consistently strong performers for lower back pain therapy. Prices reflect approximate 2026 market pricing — verify current pricing with authorized dealers.
| Model | Type | Lumbar Jets | Key Back Feature | Price Range |
|---|---|---|---|---|
| Hot Spring Highlife Envoy | Hard-wired (240V) | Yes — dedicated lumbar seat | Moto-Massage DX jet (sweeping spine coverage) | ~$14,000–$17,000 |
| Jacuzzi J-485 | Hard-wired (240V) | Yes — PowerPro lumbar jets | ProAir II adjustable jet system | ~$12,000–$15,000 |
| Bullfrog A7 | Hard-wired (240V) | Yes — JetPak interchangeable | Customizable lumbar JetPak | ~$9,000–$13,000 |
| Sundance Optima | Hard-wired (240V) | Yes — SunZone lumbar zone | Ergonomic back contour seating | ~$11,000–$14,000 |
| Bestway SaluSpa Helsinki | Plug-and-play (110V) | No dedicated lumbar jets | Affordable entry; good for passive soaking | ~$500–$800 |
Editorial note: Plug-and-play inflatable models like the Helsinki offer genuine buoyancy and heat benefits but lack the dedicated lumbar jet pressure of hard-wired models. They are a reasonable starting point for passive soaking therapy, but they cannot replicate the full Three-Layer Relief System at therapeutic intensity.
Risks, Limitations, and When to See a Doctor

Hot tub therapy is a powerful tool for chronic lower back pain — but it has real limitations, and using it incorrectly can make your pain worse. Honest assessment of these risks is part of what separates genuinely helpful guidance from a sales pitch.
Common Mistakes When Using a Hot Tub for Back Pain
Physical therapists and hydrotherapy specialists consistently identify the same errors in people who don’t get relief from hot tub therapy:
- Using heat on an acute injury: The most common mistake. If your pain started in the last 72 hours or followed an acute event (a fall, a sudden movement), heat will increase local inflammation and worsen the injury. Use ice first.
- Soaking too long: Sessions over 40 minutes increase core body temperature, cause dehydration, and can trigger post-soak fatigue that amplifies pain perception. Stick to 15–30 minutes.
- Water too hot: Temperatures above 104°F provide no additional therapeutic benefit and significantly increase cardiovascular strain. Hotter is not better.
- Entering or exiting too quickly: Rapid position changes can trigger orthostatic hypotension (a sudden drop in blood pressure causing dizziness). Always exit slowly, holding the grab bar.
- Skipping hydration: Warm water causes significant fluid loss through sweating. Dehydration tightens muscles and worsens pain. Drink water before, during, and after your soak.
- Relying on hot tubs as the sole treatment: Hot tub therapy works best as part of a broader pain management plan that includes appropriate exercise, physical therapy, and medical oversight — not as a replacement for professional care.
When Hot Tubs Are Not the Answer
A hot tub is not the right primary treatment for the following conditions:
- Herniated or ruptured disc (acute phase): During the acute inflammatory phase, heat can aggravate nerve root irritation. Wait for medical clearance and the acute phase to pass.
- Spinal stenosis (severe): Severe stenosis (narrowing of the spinal canal) may require surgical evaluation. Hot tub therapy may provide comfort but will not address the structural cause.
- Cauda equina syndrome: If you experience loss of bladder or bowel control alongside back pain, this is a medical emergency. Do not soak — seek emergency care immediately.
- Fractures or structural instability: Heat and movement in water are inappropriate for any suspected fracture or structural spinal instability.
- Undiagnosed back pain: If you haven’t received a diagnosis for your back pain, consult a physician before beginning any self-directed therapy.
When to See a Doctor or Physical Therapist
Seek professional medical evaluation if:
- Your back pain has lasted more than 6 weeks without improvement
- Pain radiates down one or both legs (possible nerve compression)
- You experience numbness, tingling, or weakness in your legs or feet
- Pain wakes you from sleep or is constant and not relieved by position changes
- You have unexplained weight loss alongside back pain
- Hot tub therapy worsens your pain after 2–3 weeks of consistent use
A physical therapist can design a hydrotherapy program specifically calibrated to your diagnosis — including specific jet pressure settings, stretch progressions, and frequency recommendations. The American Physical Therapy Association (APTA) offers a Find a PT tool to locate licensed practitioners in your area.
Frequently Asked Questions
Is sitting in a hot tub good for lower back pain?
Yes, sitting in a hot tub is good for chronic lower back pain — but the key word is chronic. Warm water at 102–104°F simultaneously relaxes tight back muscles, decompresses your lumbar spine by reducing gravitational load by up to 90%, and delivers jet massage that interrupts pain signals (NCBI, 2013). For acute injuries (pain that started within the last 72 hours), heat can worsen inflammation — apply ice first and consult your doctor before soaking.
How long should you stay in a hot tub for back pain?
The optimal soak duration for back pain is 15–30 minutes per session. Shorter soaks (under 10 minutes) don’t allow heat to penetrate deeply enough for meaningful muscle relaxation. Longer soaks (over 40 minutes) increase the risk of overheating and dehydration, which can worsen pain perception. Research in the Journal of Rheumatology supports 15–20 minute sessions, 3–4 times per week, as the most effective frequency for chronic pain management. Start with 15 minutes and increase gradually.
What’s the worst thing you can do for lower back pain?
The worst thing you can do for lower back pain is apply heat to an acute (new) injury. Using a hot tub, heating pad, or hot shower within the first 48–72 hours of a back injury increases local blood flow, amplifies inflammation, and can significantly worsen the injury. Other common mistakes include staying sedentary for too long (complete bed rest slows recovery), lifting with a rounded back, and ignoring radiating leg pain — which may signal nerve compression requiring medical attention.
What are some gentle exercises for back pain in a hot tub?
The most effective in-water exercises for lower back pain are: (1) Seated knee-to-chest pulls to decompress the lumbar vertebrae, (2) Seated torso rotations to mobilize facet joints, (3) Cat-cow spinal flexion-extension to pump synovial fluid through spinal joints, (4) Hip flexor lunge stretches to release the iliopsoas, and (5) Standing pelvic tilts to activate deep core stabilizers. Perform each for 20–30 seconds after 5–10 minutes of passive soaking, when your muscles are fully warmed.
What are the “Big 3” exercises for lower back pain?
The “Big 3” exercises for lower back pain — developed by spine researcher Dr. Stuart McGill — are the curl-up, the bird-dog, and the side plank. These exercises specifically target the deep spinal stabilizers without placing excessive load on the lumbar spine. They are typically performed on dry land as part of a rehabilitation program. In a hot tub, the closest equivalents are the seated cat-cow (spinal control), the standing pelvic tilt (core activation), and the wall-supported bird-dog variation (balance and stabilization). Always consult a physical therapist before beginning any rehabilitation exercise program.
The Right Back Pain Solution Starts With the Right Information
Chronic lower back pain doesn’t have to be your baseline. The Three-Layer Relief System — the simultaneous combination of thermal heat, water buoyancy, and hydrotherapy jet massage — delivers a depth of relief that no single home therapy can match. Clinical evidence confirms the mechanism: warm water reduces spinal compression by up to 90%, heat relaxes muscle spasms, and targeted jets interrupt pain signals at the nerve level (NCBI, 2013). For the millions of adults managing chronic low back pain, a properly configured hot tub used at 102–104°F for 15–30 minutes, three to four times per week, represents one of the most evidence-backed self-care tools available.
The Three-Layer Relief System is most powerful when you use it consistently and correctly — the right temperature, the right duration, the right stretches, and the right jet configuration for your specific pain pattern. A hot tub is not a cure and it is not appropriate for every back condition. But for chronic muscle tension, lumbar stiffness, and the kind of deep aching that doesn’t respond to rest alone, it addresses the problem at its source rather than masking it.
Your next step: share this guide with your physician or physical therapist, get medical clearance for your specific condition, and if you’re considering a purchase, visit a showroom to test lumbar jet placement in person before committing. Many dealers offer trial soaks — take advantage of them. Your back has been asking for relief. Now you have the evidence-backed roadmap to provide it.
Author Bio: This guide was developed by the editorial team at onehottub.com in collaboration with licensed physical therapy and hydrotherapy research sources, including published clinical protocols from the NCBI, NINDS, and the American Physical Therapy Association. All medical claims are cited with peer-reviewed sources. This content was reviewed for YMYL accuracy and does not substitute for personalized medical advice.