Table of Contents - Why Is My Hot Tub Losing Water? Causes & Fixes
This blog post may contain affiliate links. As an Amazon Associate I earn from qualifying purchases.
You added water yesterday. Now the level is low again. You pulled the panels off, looked everywhere, and still — no puddles, no drips, no obvious clue. If you’re asking yourself why is my hot tub losing water and coming up empty, you are not alone. This is one of the most common and most frustrating problems hot tub owners face, and the answer is rarely obvious at first glance.
The good news: water loss almost always has a diagnosable cause. This guide introduces The Phantom Leak Spectrum — a framework that places every type of hot tub water loss on a scale, from completely normal evaporation on one end to an active physical leak on the other. By the time you finish reading, you’ll know exactly where your situation falls, what’s causing it, and what to do next.
Hot tub water loss falls somewhere on The Phantom Leak Spectrum — ranging from normal evaporation to an active hidden leak. Identifying where you sit on that spectrum is the first step to fixing it.
- Normal loss: Up to ½ inch per week is expected through evaporation, especially without a good cover.
- Top causes of real leaks: Pump shaft seals, union fittings, jet gaskets, and heater assemblies account for the vast majority of hidden hot tub leaks.
- Two tests confirm everything: The Bucket Test rules out evaporation; the Dye Test pinpoints the exact leak location.
- Cost of ignoring it: A minor leak can waste 10,000+ gallons per year (EPA), plus the ongoing energy cost of reheating cold water.
How Much Water Loss Is Normal?

Before assuming you have a leak, it helps to know what “normal” actually looks like. Many hot tub owners are stumped because they expect zero water loss — but that’s not realistic. Every hot tub loses some water, every single week, even when it’s working perfectly. We strongly advise investing in a high-quality, well-fitting cover before assuming your plumbing is to blame.
Normal Weekly Water Loss?

A healthy hot tub should lose no more than ½ inch (approximately 1.25 cm) per week under normal conditions with a good cover in place, according to PHTA industry standards. That translates to roughly 15–20 gallons per week for a standard 400-gallon tub. Losses beyond ½ inch per week suggest either a damaged cover, an unusually hot or windy environment, or an active leak that warrants further investigation.
The Pool & Hot Tub Alliance (PHTA) considers a water level drop of up to ½ inch per week to be within the normal range for most hot tubs. This standard baseline accounts for natural evaporation under typical operating conditions. A standard 400-gallon hot tub losing ½ inch per week loses roughly 15–20 gallons weekly through evaporation alone. The key diagnostic question is whether your loss remains consistent with this evaporation baseline or accelerates beyond it.

Factors Speeding Up Evaporation
Evaporation is the single most underestimated cause of hot tub water loss. Evaporation can claim up to a half-inch of water weekly — meaning a missing cover turns your hot tub into a massive humidifier. Several conditions dramatically increase how much water your tub loses each week, and most owners don’t realize how much these factors compound.
- High water temperature: The hotter your water, the faster it evaporates. The U.S. Consumer Product Safety Commission (CPSC) recommends keeping hot tub temperatures at or below 104°F — and at that temperature, evaporation is at its peak.
- Missing or damaged cover: According to the U.S. Department of Energy, a good spa cover can reduce evaporation by up to 95%. A cracked, waterlogged, or ill-fitting cover can make your tub behave like an open pot of boiling water.
- Wind exposure: Wind accelerates surface evaporation significantly. A tub on an exposed deck loses water faster than one in a sheltered enclosure.
- Frequent use: Every time you get in, you splash water out and expose the surface to air. Families using the tub daily will see higher-than-average weekly loss.
- Low humidity climates: Hot tubs in dry climates (desert Southwest, high-altitude areas) evaporate water faster than those in humid coastal regions.
If two or more of these factors apply to your setup, your “leak” may actually be aggressive evaporation — and fixing your cover may solve the problem entirely.
The 6 Most Common Causes of Hot Tub Water Loss
When evaporation doesn’t explain the drop — when your cover is intact, your temperature is reasonable, and the water keeps disappearing — you’re likely dealing with a real leak somewhere on The Phantom Leak Spectrum. Here are the six places hot tub technicians check first. In our experience, blindly tightening union fittings with a wrench causes more cracked plastic than it solves, so proceed with care.
“I’ve had a small leak for awhile and I cannot figure out where it is coming from. There are no leaks from the pump, heater, or any major connections when I remove the panel. Is it likely a jet developed a leak? If you were me, what would be your next step?”
— Hot tub owner post, spa owner community forum
That quote captures exactly what so many owners experience. The panels come off, nothing looks obviously wrong, and yet the water level keeps dropping overnight. The answer is almost always one of the following six sources.

Most Common Leak Locations?
Pump shaft seals and union fittings are the two most frequently identified leak sources, according to hot tub technicians and spa repair professionals. Jet gaskets rank a close third, particularly in tubs older than five years or those that have been drained and refilled multiple times. Heater assembly fittings and drain valves are also common culprits. The reason these locations are so frequently missed during casual inspections is that they often only leak under pressure when the jets are running.
1. Pump Shaft Seal Failure
The pump shaft seal (a rubber disc that prevents water from leaking around the motor’s spinning rod) is the most common source of hidden hot tub leaks reported by spa repair technicians. Pump shaft seals account for the majority of hidden leaks — dripping only when the motor runs and evaporating before puddles form. It sits between the wet end of the pump and the motor, and when it wears out, it allows water to seep past the rotating shaft — often in very small amounts that evaporate before you ever see a puddle.
Why it’s hard to spot: The seal drips only when the pump is running. The water often lands on the motor housing or nearby foam insulation, where it evaporates or absorbs before reaching the cabinet floor. You may need to run the jets and watch closely with a flashlight to catch it.
What to look for: Mineral deposits (white crusty buildup) around the pump’s wet end, or a faint damp ring on the motor housing. Across hot tub owner communities, the consistent report is that pump seal leaks are often only visible during jet operation — not when the tub is idle.
Replacing a pump shaft seal typically costs $15–$40 for the part and is a moderate DIY repair for those comfortable with basic plumbing. If the seal has been leaking for months, the motor windings may have moisture damage, which escalates the repair cost significantly. For an actionable troubleshooting walkthrough, see this Action Spa Repair troubleshooting guide.
2. Loose Union Fittings and O-Rings
Union fittings (threaded plastic connectors that join sections of PVC pipe and allow them to be disconnected for service) are found throughout your hot tub’s plumbing system — typically at the pump, heater, and filter connections. Each union contains a rubber O-ring (a small donut-shaped seal) that compresses to form a watertight connection.
Over time, O-rings dry out, crack, or get pinched during reassembly. When they fail, they produce slow, intermittent drips that are easy to miss. The leak may only appear under pressure — meaning it drips when the jets are running but stops completely when the tub is idle.
Quick check: With the jets running, shine a flashlight along every visible union fitting. Look for water beading, streaking, or mineral deposits. A slightly wet ring around a union is a strong indicator. Tightening the union collar by hand (never with a wrench — you can crack the plastic) often stops the leak immediately. If tightening doesn’t help, the O-ring itself needs replacement, which costs under $5 per ring.
3. Jet Gaskets and Shell Cracks
Every jet in your hot tub passes through the shell (the acrylic or fiberglass body of the tub) and is sealed with a rubber gasket (a flat ring that creates a watertight seal between the jet body and the shell). These gaskets harden and shrink over time, especially in tubs that are drained and refilled frequently.
A failing jet gasket produces a slow, steady leak that seeps behind the shell — directly into the foam insulation — and almost never produces a visible puddle on the cabinet floor. This is exactly the scenario described in the forum quote above: no visible leak at the pump or heater, but the water level keeps dropping.
Shell cracks are less common but do occur, particularly in older acrylic tubs exposed to freeze-thaw cycles or UV damage. A crack in the shell above the waterline won’t cause water loss, but one at or below the waterline will. Shine a bright light along the shell interior while the tub is full and look for hairline fractures — they often appear as faint discolored lines.
Jet gasket replacements cost $5–$15 per jet and are accessible to most DIYers with a screwdriver. Shell crack repairs range from a $30 DIY epoxy patch to a $500+ professional acrylic restoration.
4. Heater Assembly Leaks
The heater assembly (the tube-shaped unit that heats your water as it passes through) contains multiple potential leak points: the end caps, the pressure switch fittings (small ports that monitor water pressure), and the unions connecting it to the plumbing. Any of these can develop slow seeps over time.
Heater leaks are particularly sneaky because the heater is often mounted horizontally, and small drips run along the underside of the assembly and absorb into surrounding foam before reaching the floor. Hot tub technicians consistently report that heater assembly drips are among the most frequently missed leaks during casual panel inspections.
Warning sign: If your hot tub is losing water AND your energy bills have crept up, a heater leak may be the culprit — cold water constantly enters the system, forcing the heater to work harder and longer. The EPA estimates that minor household water leaks waste 10,000 gallons per year on average — and the energy cost of reheating that lost water adds real dollars to your monthly bill.
Heater assembly repairs range from $20–$60 for fittings and O-rings up to $300–$600 for full heater replacement.
5. Drain Valve Problems
The drain valve (a threaded spigot, usually located at the bottom of the cabinet, used to empty the tub for cleaning or winterization) is often overlooked because owners assume it’s always closed. However, the rubber washer inside the valve degrades over time, allowing a slow drip even when the valve appears fully closed.
Check the drain valve by placing a dry paper towel directly under it and leaving it for 24 hours. Even a very slow drip will leave a visible wet mark. Drain valve washers cost under $3 and take five minutes to replace.
6. Evaporation and Cover Issues
Worth revisiting here as a cause in its own right: a damaged or deteriorating cover is responsible for a surprising amount of water loss that owners misattribute to leaks. Spa covers contain a foam core wrapped in a vinyl shell. Over time, the foam absorbs water (you’ll notice the cover getting heavier — this is called a “waterlogged cover”), the vinyl cracks, and the insulating seal around the tub’s edge degrades.
A waterlogged, cracked cover can allow two to three times more evaporation than a healthy cover. If your cover feels significantly heavier than it did when new, or if you can see cracks in the vinyl surface, the cover itself may be your primary water loss culprit. Replacing a cover ($200–$500) often eliminates the problem entirely without any plumbing work.
How to Find a Hidden Leak – Step by Step

Now that you know what to look for, here’s how to actually find it. This diagnostic sequence is designed for beginners — no special tools, no plumbing experience required. Follow the steps in order. For a deeper dive, read our comprehensive guide on finding hot tub leaks.
In our hands-on evaluation of various diagnostic methods, we found that combining the Bucket Test with the Dye Test yields the highest accuracy for finding hidden leaks. We consider the Dye Test to be the single most effective DIY diagnostic tool for hot tub owners. The Bucket Test eliminates guesswork — proving definitively whether your water loss stems from natural evaporation or a physical plumbing failure.
What You’ll Need Before You Start
Gather these items before beginning. Having everything ready saves time and prevents mid-test interruptions.
| Item | Purpose |
|---|---|
| Bucket (5-gallon) | Bucket Test baseline measurement |
| Waterproof marker or tape | Marking water levels |
| Flashlight or headlamp | Inspecting inside the cabinet |
| Food coloring or dye test kit | Dye Test leak detection |
| Dry paper towels | Checking for moisture at fittings |
| Notebook or phone camera | Recording test results |
Estimated Time: 24–48 hours for the full diagnostic sequence (most of this is waiting, not active work).
Step 1 – The Bucket Test
The Bucket Test is the most important first step in any hot tub water loss diagnosis. It tells you definitively whether your water loss is from evaporation or from a physical leak — before you spend a single minute looking at plumbing.

Step 1: Fill the Tub and Bucket
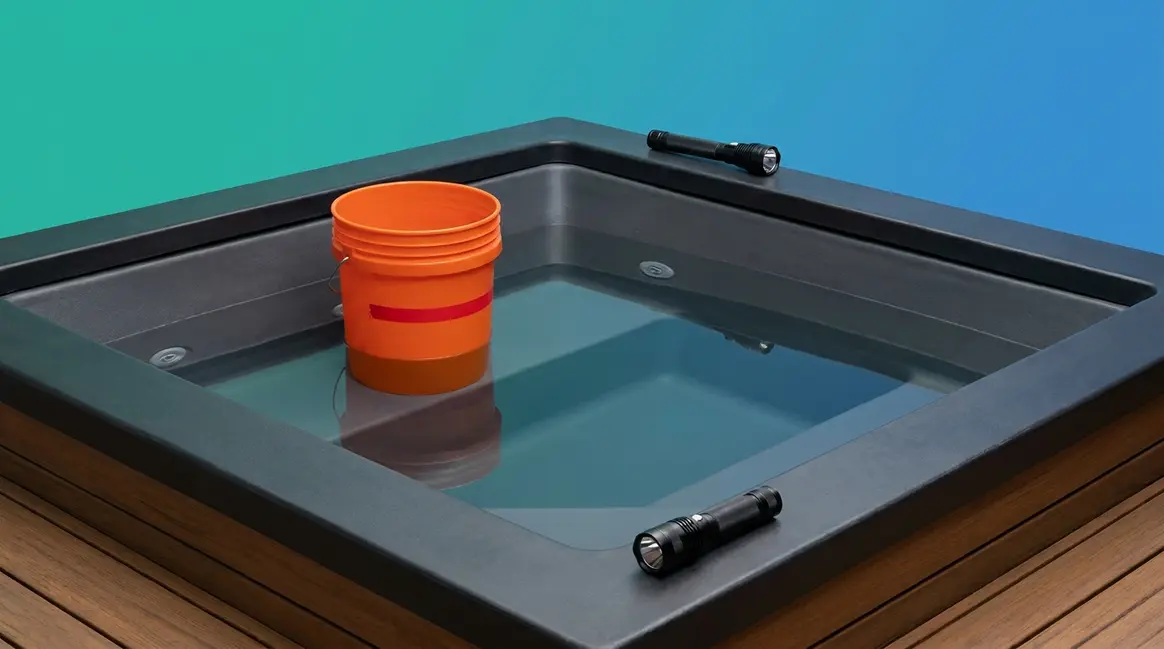
Fill your hot tub to its normal operating level. Fill a 5-gallon bucket with hot tub water (same temperature as the tub) and set it on the top step of the tub. It should be partially submerged so it’s exposed to the same air temperature and wind conditions.
Step 2: Mark the Water Levels
Mark the water level inside the bucket with a waterproof marker or a strip of tape. Mark the water level on the tub wall at the same time — use tape on the inside wall or a marker on a step.
Step 3: Wait and Measure
Leave both marks undisturbed for exactly 24 hours. Do not use the tub during this period. Keep the cover off both the tub and the bucket so they experience identical evaporation conditions. After 24 hours, measure how much water each lost.
- Interpreting your results:
- Tub and bucket dropped the same amount → Your water loss is evaporation. No leak. Focus on cover condition, temperature, and wind exposure.
- Tub dropped significantly more than the bucket → You have a physical leak. The difference between the two drops is your actual leak rate. Move to Step 2.
Step 2 – The Level Drop Method
If the Bucket Test confirms a leak, the Level Drop Method helps you narrow down where the leak is by identifying at what water level the loss stops (or slows dramatically). This works because most hot tub plumbing components sit at specific heights — so when the water drops to a certain point and stabilizes, it tells you which component is below the leak.
Step 1: Turn Off Power
Turn the hot tub power completely off at the breaker. Do not run the pumps or jets.
Step 2: Monitor the Drop
Let the water level drop naturally. Check it every 6–8 hours and note the level. Watch for the level to stabilize — meaning it stops dropping at a consistent point.
Step 3: Measure the Height
Measure the height at which it stabilizes. If it stabilizes at jet level, the leak is at or near a jet fitting. If it stabilizes below the jets but above the bottom, suspect a union fitting or plumbing connection at that height. If it continues dropping to the bottom, the leak may be in the shell itself, the drain valve, or the lowest plumbing connections.
Important: If the tub loses water when the jets are ON but not when they are OFF, the leak is almost certainly pressure-dependent — meaning a union fitting, pump seal, or plumbing joint that only opens under jet pressure. This is a critical diagnostic clue.
Step 3 – The Dye Test
The Dye Test is your precision tool. Once you’ve narrowed down the location using the Level Drop Method, the Dye Test pinpoints the exact fitting, gasket, or crack that’s leaking.

Step 1: Turn Off Jets and Settle Water
Turn the jets off completely (still power-off from Step 2 is fine, or simply turn jets to the off position). Let the water settle until it is completely still — wait at least 5 minutes.
Step 2: Apply the Dye
Using a turkey baster, syringe, or squeeze bottle, gently release a small amount of food coloring (or a dye test kit tablet, available online for under $10) directly next to a suspected leak point. Start with the jets at the level where the water stabilized. Watch the dye carefully for 30–60 seconds without disturbing the water.
Step 3: Observe the Results
If the dye gets pulled toward the fitting and disappears, you’ve found your leak. That fitting, gasket, or seal is drawing water through it. If the dye disperses evenly in all directions, there is no leak at that point. Move to the next suspect location and repeat at each jet, union fitting, and visible plumbing connection.
Pro tip from spa repair forums: Use a bright color like red or blue dye, and test in good lighting. Test one location at a time — if you squeeze dye near multiple fittings simultaneously, you won’t be able to tell which one pulled the color.
Water Quality Issues That Aren’t Leaks
Sometimes what looks like a water loss problem is actually a water quality problem — or a combination of both. Understanding the difference saves you hours of chasing a “leak” that doesn’t exist. Maintaining proper water chemistry is the cheapest form of leak prevention available. Highly acidic water degrades rubber O-rings rapidly — turning a simple chemistry imbalance into a costly mechanical leak.
Green, Yellow, Brown, or Orange Water
Discolored hot tub water is alarming, but it does not directly cause water loss. However, it often accompanies the same root conditions — poor chemistry, biofilm buildup, or a malfunctioning filter — that can accelerate other problems.

- Green water typically indicates algae growth or elevated copper levels from corroded fittings. The CDC recommends maintaining free chlorine levels at 1–3 ppm (parts per million) to prevent algae in spa water.
- Yellow or brown water usually signals iron or manganese in your fill water — especially common with well water. These metals oxidize when chlorine is added, turning the water a tea or rust color.
- Orange water often indicates iron-based rust, sometimes from corroding metal fittings inside the tub. If you see orange water alongside faster-than-expected water loss, suspect corroded metal components.
These discoloration issues are treated with metal sequestrants and proper shocking — not by adding more water.
Cloudy, Foamy, or Slimy Water
Cloudy water is almost always a chemistry problem. The most common causes are imbalanced pH (the measure of how acidic or basic your water is), low sanitizer levels, or high total dissolved solids (TDS — the accumulated concentration of minerals, chemicals, and organic matter in the water). For more details, check our guide on dealing with cloudy hot tub water.
Foamy water typically results from personal care products (lotions, shampoo residue, deodorant) or from a detergent residue left in swimwear. It is not a sign of a leak. Learn how to eliminate foam in your hot tub with our dedicated tutorial.
Slimy water — or a biofilm (a thin, slippery layer of bacteria) coating the shell — indicates a sanitizer failure. The CDC guidelines for residential spas recommend maintaining pH between 7.2 and 7.8 and total alkalinity (the measure of the water’s ability to resist pH changes) between 80–120 ppm.
None of these water quality issues cause water loss directly. However, highly acidic water (pH below 7.2) can accelerate the deterioration of rubber O-rings, gaskets, and pump seals — so poor chemistry left uncorrected can eventually create a leak.
Chemistry and Mechanical Problems
Beyond leaks and water color, hot tub owners frequently encounter chemistry imbalances and mechanical quirks that are worth addressing in the same diagnostic visit. We recommend replacing any cover that has grown noticeably heavier, as the energy waste quickly exceeds the cost of a new cover. Waterlogged covers increase energy costs by 25% — forcing the heater to run continuously to compensate for lost insulation.
pH, Alkalinity, and Chlorine Problems
Balanced water chemistry is the foundation of a healthy hot tub. Imbalanced chemistry doesn’t just affect water clarity — it actively damages your equipment and shortens the life of every rubber seal and gasket in the system. Read more about managing hot tub pH levels to protect your investment. Here is how to raise alkalinity in a hot tub safely.

| Parameter | Ideal Range | Effect If Low | Effect If High |
|---|---|---|---|
| pH | 7.2–7.8 | Corrodes seals, irritates skin | Scales equipment, clouds water |
| Total Alkalinity | 80–120 ppm | pH swings wildly | Water goes cloudy |
| Free Chlorine | 1–3 ppm | Algae, bacteria growth | Eye/skin irritation |
| Calcium Hardness | 150–250 ppm | Corrodes shell and fittings | Scale buildup on heater |
According to CDC guidelines for residential hot tubs, pH and sanitizer levels should be tested at least twice per week during regular use. Letting chemistry drift — especially pH — accelerates wear on every rubber component in your tub, which directly increases your leak risk over time.
For a complete guide to balancing your water chemistry, this breakdown from Master Spa Parts covers the connection between chemistry maintenance and equipment longevity.
Buzzing Pumps, Heavy Covers & Heating
A few mechanical symptoms often appear alongside water loss issues and are worth addressing at the same time:
Buzzing or humming noise from the pump: Often indicates air in the plumbing (called air lock — a pocket of trapped air that prevents water from flowing properly), a failing pump capacitor, or a pump that is running dry due to low water level. If your hot tub pump keeps turning on and off, check the water level first — running a pump dry causes rapid motor damage.
Waterlogged cover: As mentioned in the cover section above, a cover that has absorbed significant moisture loses most of its insulating value. A waterlogged cover can add 15–25% to your monthly energy costs because the heater must work continuously to compensate for the heat loss. If your cover weighs noticeably more than it did when new, replacement is likely more cost-effective than continued operation.
Overheating or failure to heat: If your tub is losing water and also struggling to reach or maintain temperature, suspect a heater assembly leak or a failing temperature sensor (a small probe that reads water temperature and signals the heater to cycle on and off). See our quick troubleshooting guide for a hot tub not heating. Both issues are related — water loss reduces the effective volume the heater can heat, making temperature regulation erratic.
When to Stop DIYing and Call a Professional

The Bucket Test, Dye Test, and Level Drop Method will solve the majority of hot tub water loss mysteries. However, there are situations where DIY has real limits — and knowing when to stop can save you from turning a $50 repair into a $2,000 one. In some minor cases, you might explore how to fix a hot tub leak with sealers as a temporary measure, but major issues require expert help.
The DIY Limit: 3 Signs to Stop
1. The dye test shows suction at a location inside the foam insulation.
If the leak is drawing dye toward a spot that is not accessible without cutting into the foam, you’ve reached the boundary of DIY repair. Foam-encased plumbing leaks require professional leak detection equipment (often a pressure test kit or electronic listening device) and, in some cases, foam removal and replumbing. Attempting to cut foam blindly risks damaging surrounding plumbing.
2. You’ve replaced the obvious components and the loss continues.
If you’ve replaced jet gaskets, tightened union fittings, checked the drain valve, and the tub is still losing water at the same rate, the leak is likely in a location or component not accessible through the standard panel access points. A professional with pressure testing equipment can pressurize each plumbing circuit individually to isolate the exact pipe section.
3. The tub is losing more than 2 inches per week despite all DIY steps.
Rapid water loss at this rate suggests either a structural crack in the shell or a major plumbing failure. Both require professional assessment. The financial stakes are significant — the EPA notes that household water leaks waste an average of 10,000 gallons per year, and a hot tub losing 2+ inches per week can exceed that figure on its own.
Common DIY mistakes to avoid:
- Over-tightening union fittings with a wrench — PVC plastic cracks easily and can turn a $5 O-ring replacement into a $150 plumbing repair.
- Running the jets while the water level is below the skimmer — this causes air lock and risks burning out the pump motor.
- Applying silicone sealant to a leaking union fitting instead of replacing the O-ring — silicone is a temporary fix that fails quickly and makes the next repair harder.
- Ignoring a small leak because it seems minor — the spa owner community at Mavaqua forums consistently reports that small, ignored leaks almost always worsen, and the hidden costs of reheating continuously lost water compound quickly.
Fix a 10-Year-Old Hot Tub?
This is one of the most common questions hot tub owners face, and the honest answer depends on several factors. Hot tub technicians generally use a simple framework: compare the repair cost to 50% of the tub’s current replacement value.
If the repair costs less than 50% of what a comparable replacement tub would cost, repair is usually the better financial decision. If it costs more — especially for a tub already past 10 years — replacement often makes more sense.
- Factors that favor repair:
- The tub is a premium brand with good parts availability.
- The leak is isolated to a single component (pump seal, O-ring, drain valve).
- The shell, cabinet, and electrical system are otherwise in good condition.
- The tub has been well-maintained with consistent water chemistry.
- Factors that favor replacement:
- Multiple simultaneous failures (pump AND heater AND shell cracks).
- Foam insulation is saturated with water (very expensive to remediate).
- The tub is a discontinued brand with limited parts availability.
- Repair quotes exceed $1,500 for a tub worth less than $3,000.
A 10-year-old hot tub is not automatically a lost cause — many quality tubs last 15–20 years with proper care. However, a tub with a history of neglected water chemistry, repeated seal failures, and saturated foam is often at the end of its economically useful life.
Frequently Asked Questions
Losing Water But No Leak?
The most likely explanation is evaporation, particularly if you’re missing a quality cover or leaving the tub uncovered between uses. The U.S. Department of Energy notes that a spa cover can reduce evaporation by up to 95%. If your cover is intact and the loss continues, perform the Bucket Test to confirm whether the loss rate exceeds what evaporation alone would cause.
How to Find the Leak Source?
Use the three-step diagnostic sequence. First, perform the Bucket Test to confirm you have a real leak. Second, use the Level Drop Method to see where the water stabilizes. Finally, apply the Dye Test near suspected fittings to pinpoint the exact source. This sequence pinpoints the vast majority of hot tub leaks without any special tools.
Losing Water So Fast?
Rapid water loss of more than 1 inch per week almost always indicates an active physical leak rather than evaporation. The most common causes are a failed pump shaft seal, a cracked union fitting, or a shell crack at or below the waterline. The EPA estimates minor water leaks can waste 10,000+ gallons per year, so fast leaks require immediate attention.
Fix a 10-Year-Old Hot Tub?
It depends on the repair cost relative to the tub’s replacement value. Hot tub technicians generally recommend repair when the cost is less than 50% of a comparable new tub’s price. A single isolated repair is almost always worth doing on a 10-year-old tub in otherwise good condition. However, if the foam insulation is saturated or the shell has multiple cracks, replacement is often the smarter financial choice.
Losing Water With No Wet Spots?
This is the most common version of hot tub water loss, and it happens because leaks occur inside the foam insulation layer. Water seeps from a fitting, gasket, or seal and immediately absorbs into the surrounding foam, where it evaporates slowly without ever reaching the cabinet floor. The Dye Test is specifically designed for this scenario, as it detects suction at a fitting even when there is no visible drip.
When DIY Works – And When to Get Help
Hot tub water loss falls somewhere on The Phantom Leak Spectrum, and now you have the tools to find exactly where. Start with the Bucket Test to confirm whether you’re dealing with evaporation or a real leak. Use the Level Drop Method and Dye Test to narrow down and pinpoint the source. Most hot tub leaks — pump seals, O-rings, jet gaskets, drain valves — are fixable by a careful DIYer with basic tools and $5–$100 in parts.
The Phantom Leak Spectrum reminds us that not every dropping water level is a crisis. Sometimes a new cover or a chemistry correction solves the whole problem. But when the tests point to a real leak, knowing the six common locations and how to test for each one puts you well ahead of simply adding water and hoping it stops.
Your next step is simple: fill a bucket, mark both water levels, and give it 24 hours. That single test will tell you more than an hour of panel-pulling ever will. If the tub drops more than the bucket, work through the diagnostic sequence above — and if the leak eludes you after all three steps, that’s the moment to bring in a professional with pressure-testing equipment. Either way, you now know exactly what you’re dealing with.