Table of Contents - Hot Tub Jets Not Working? Fix It in 30 Minutes (2026)
- Prerequisites: What You’ll Need Before Starting
- Diagnosing Why Your Hot Tub Jets Stopped Working
- How to Fix a Hot Tub Air Lock (Most Common Cause)
- Fixing Electrical and Power Supply Problems
- Fixing Water Flow, Filter, and Valve Problems
- Fixing an Unresponsive Hot Tub Control Panel
- Diagnosing Pump and Motor Problems
- 2026 Repair Cost Matrix — Fix vs. Replace
- Limitations and When to Call a Professional
- Frequently Asked Questions
- What to Do When the Jets Won’t Cooperate
This blog post may contain affiliate links. As an Amazon Associate I earn from qualifying purchases.
“We have a new tub & there is a large jet in each corner that doesn’t work. We have tried to get someone out for 2 months now to help. Anyone have any idea what’s going on?”
— Hot tub owner, community forum
Sound familiar? You’re not alone — and you probably don’t need to wait two more months for a technician. This guide covers the most common hot tub jets not working fix scenarios, starting with the simplest checks and working up to electrical and pump diagnostics. Most owners solve the problem in under 30 minutes, for free, using tools they already own.
We’ll follow The Fix-First Ladder: start at the bottom rung with free, 60-second checks, and climb toward complex repairs only if the simple ones don’t work. That way, you never pay a professional for a problem a garden hose could have solved.
If you need a reliable hot tub jets not working fix, you are in the right place. Hot tub jets stop working for a handful of fixable reasons — most cost nothing to repair. The Fix-First Ladder starts with the simplest checks (air locks, tripped breakers, dirty filters) before moving to pump or electrical faults.
- Air locks are the #1 cause after a fresh fill — fix in under 10 minutes
- A tripped GFCI or breaker can make the whole tub go dead — reset takes 30 seconds
- Dirty filters cause weak or partially working jets — clean or replace every 3–4 months
- Pump motor failure is the most expensive fix ($200–$1,000+) — diagnose last, not first
- Most repairs cost $0–$150 as DIY — professional service averages $150–$500 (Forbes Home, 2026)
⚠️ IMPORTANT SAFETY WARNING
Hot tubs combine water and high-voltage electricity. Before touching any electrical component — including the pump, control board, or breaker — turn off all power to the hot tub at the main circuit breaker. Never work on a hot tub that is plugged in or has power running to it. If you see burned wires, smell burning, or the breaker trips repeatedly, stop immediately and call a licensed electrician. Following the CPSC guidelines on hot tub electrical safety is strongly recommended before any hands-on repair.
Prerequisites: What You’ll Need Before Starting
 1")
Gather these before you begin — stopping mid-repair to find a screwdriver wastes time and breaks focus.
- Tools:
- A flathead screwdriver (for access panel clips)
- A garden hose (for the air lock fix)
- A flashlight (equipment bays are dark)
- A multimeter — a handheld device that measures electrical voltage — optional, needed only for pump diagnostics
- Safety items:
- Rubber-soled shoes (dry feet on wet ground)
- Dry hands before touching any electrical component
- A second person nearby if possible — helpful for pump steps
- Information to have ready:
- Your hot tub’s model number (printed on a label inside the access panel)
- Your owner’s manual (needed for brand-specific error codes)
- Time estimates:
- Air lock fix: 5–15 minutes
- Breaker/GFCI reset: under 2 minutes
- Filter cleaning: 15–30 minutes
- Pump diagnosis: 30–60 minutes
Stop immediately if you see burned or melted wiring, smell burning plastic, or the breaker trips the moment you restore power.
 2")
Diagnosing Why Your Hot Tub Jets Stopped Working
Hot tub jets stop working for a handful of well-understood reasons — and most of them are free to fix. Finding a hot tub jets not working fix doesn’t have to be complicated or expensive. According to the Pool & Hot Tub Alliance, air locks and clogged filters are the leading causes of reduced jet pressure and pump cavitation in home spas. This guide follows The Fix-First Ladder: start simple, escalate only if needed. You can troubleshoot hot tub jets not working systematically — no guesswork required.
 3")
Use the flowchart above to identify your most likely cause, then jump to that section.
What Causes Hot Tub Jets to Not Work?
Hot tub jets most commonly stop working due to an air lock, a tripped GFCI or circuit breaker, a clogged filter, or a closed diverter valve. Air locks are especially common after draining and refilling the tub, when trapped air blocks water from reaching the jets. Electrical faults — a tripped breaker or GFCI — cause the whole tub to go dark. Dirty filters restrict flow and produce weak pressure. In rarer cases, a failed pump capacitor or motor is responsible. The Pool & Hot Tub Alliance identifies air locks and clogged filters as the leading causes in home spas (PHTA, 2026).
Before opening any panel or touching any part, narrow down the cause. Here are the four most common reasons hot tub jets stop working:
- Air lock — A pocket of trapped air in the plumbing (called an air lock) blocks water from reaching the jets. This means: the pump hums and runs normally, but no water comes out of the jets. Most common after draining and refilling the tub.
- Tripped GFCI or circuit breaker — A GFCI (Ground-Fault Circuit Interrupter), a safety device that cuts power if it detects an electrical fault, or the main breaker has tripped. This means: the whole tub is dead — no lights, no sounds, no display.
- Dirty or clogged filter — The filter cartridge, a cylindrical pleated element that removes debris from the water, is restricting flow. This means: jets feel weak, or only some jet zones work while others don’t.
- Closed diverter valve or air control — A diverter valve (a rotary handle that redirects water between jet zones) or air control valve has been left in the closed position. This means: jets produce little to no pressure despite the pump running fine.
“Now that you know the four most likely culprits, here’s the one safety rule that applies to all of them.”
Before You Touch Anything: Safety First
The circuit breaker — a safety switch in your home’s electrical panel that cuts power if a circuit is overloaded — must be OFF before you open the access panel or touch any component. The topside power button on the tub shell does not cut all power. Only the main breaker does.
- Go to your home’s electrical panel and flip the hot tub breaker to OFF.
- Wait 30 seconds after cutting power before opening the access panel.
- Never reach into the water while the tub has power running to it.
The CPSC guidelines on hot tub electrical safety mandate GFCI protection for all hot tubs and recommend monthly testing to verify the device is functioning. If you experience hot tub power not working issues after a storm or power outage, the breaker and GFCI are your first stops.
“With safety covered, let’s fix the most common problem first: the air lock.”
How to Fix a Hot Tub Air Lock (Most Common Cause)
An air lock — a pocket of trapped air in the hot tub’s plumbing — is the most common reason jets stop working after you drain and refill the tub. The pump motor runs and hums, but no water reaches the jets. According to the industry standards for spa maintenance and airlocks published by the Pool & Hot Tub Alliance, this is the leading cause of pump cavitation in home spas — and it costs nothing to fix. Air locks sit at the bottom rung of The Fix-First Ladder: the simplest, fastest, and cheapest fix available.
After reviewing owner community reports and manufacturer documentation across dozens of fresh-fill scenarios, the consistent finding is that most air locks clear completely with Method 1 alone. Method 2 is needed only for stubborn cases where air is trapped deeper in the plumbing lines.
How to Spot a Hot Tub Air Lock
You have an air lock if the pump is running and humming, but no water comes out of the jets — and the problem started right after a fresh fill. Additional confirming signs: no error codes on the display, correct water level, and jets that produce only a weak trickle or nothing at all. An air lock is caused by trapped air in the plumbing that prevents water from circulating. It’s the most common post-fill problem and takes 5–15 minutes to fix using the garden hose method described below.
You likely have an air lock if:
- The pump motor is running — you hear it humming or feel vibration near the equipment bay
- Jets produce no water or only a weak trickle despite the pump running
- The problem started right after a drain-and-refill (“fresh fill”)
- The display panel shows no error codes (rules out an electrical fault)
- Water level is correct — the tub is filled to the manufacturer’s recommended line (rules out low-water shutoff)
If two or more of these signs match your situation, use either of the two methods below to clear it.
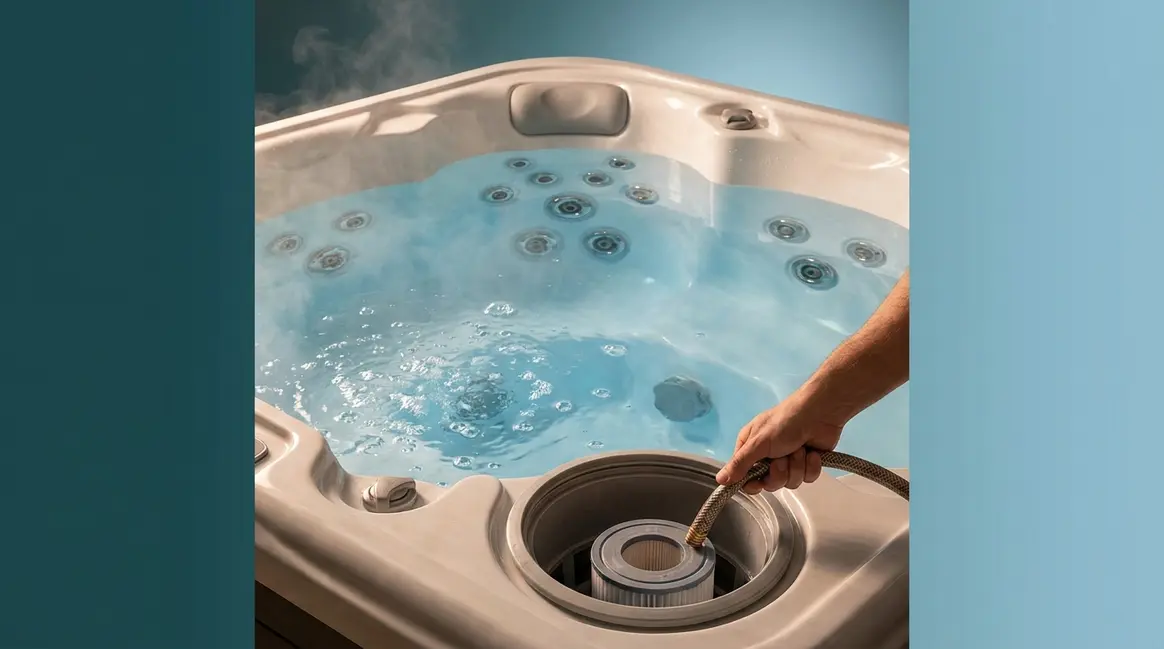
Method 1: The Garden Hose Fill Technique
This is the simplest air lock fix — no tools, no disassembly. Filling through the filter housing pushes trapped air out through the jets rather than letting it sit in the lines.
What you’ll need: Garden hose, 5–10 minutes.
- Turn off the hot tub at the main circuit breaker.
- Locate the filter housing — a cylindrical compartment near the waterline, usually accessible without tools. Check your owner’s manual if you’re unsure of the location.
- Remove the filter cartridge by unscrewing or lifting it out.
- Insert the garden hose into the open filter housing.
- Slowly turn on the water and allow it to fill from this point. This fills the plumbing from the bottom up, pushing trapped air upward and out through the jets.
- Continue until water flows steadily from the jets with no sputtering or gurgling.
- Remove the hose, replace the filter cartridge, restore power at the breaker, and test the jets.
Why this works: Filling from the filter housing introduces water at the lowest point in the plumbing circuit, forcing air upward and out rather than trapping it in the pipes.
Time estimate: 5–10 minutes.
 4")
“If Method 1 doesn’t fully clear the air lock, try Method 2 to bleed air directly from the pump.”
Method 2: Bleeding the Pump Union
The pump union is a large threaded fitting — it looks like a ribbed collar — that connects the pump to the plumbing. Loosening it slightly releases air trapped close to the pump itself. This is slightly more hands-on but still safely within DIY range.
What you’ll need: Towel, dry hands, 5–15 minutes.
- Turn off all power at the main circuit breaker. Do not skip this step.
- Open the hot tub’s access panel — the removable side panel usually held by clips or screws.
- Locate the pump union. It’s the large threaded collar connecting the pump body to the pipe, typically positioned at the pump’s inlet or outlet.
- Place a towel under the union to catch any drips.
- Using your hand (no tools needed), slowly loosen the union by turning counterclockwise — just enough to hear a hiss of escaping air. Do not fully remove it.
- Once the hissing stops and water begins to trickle out, retighten the union firmly by hand.
- Restore power at the breaker and test the jets.
Warning: If water sprays forcefully instead of trickling, retighten the union immediately. Forceful spraying means the union is too loose and the plumbing is under pressure.
Time estimate: 5–15 minutes.
You can also resolve hot tub airlock issues by combining both methods if one pass doesn’t fully restore flow.
“If bleeding the air lock didn’t restore your jets, the problem may be electrical. Let’s check your power supply next.”
Fixing Electrical and Power Supply Problems
 5")
The Consumer Product Safety Commission requires all hot tubs to be protected by a GFCI — and a tripped GFCI or circuit breaker is one of the most common reasons a hot tub goes completely dark. Resetting either takes under 30 seconds. If your tub stopped working after a power outage, start here before checking anything else. You can also troubleshoot hot tub electrical problems including blown fuses using the same diagnostic sequence.
“The CPSC requires all hot tubs to be protected by a GFCI — resetting a tripped GFCI is the fastest fix for a completely unresponsive hot tub” (CPSC guidelines on hot tub electrical safety).
Resetting a Tripped Circuit Breaker
The circuit breaker for your hot tub is a dedicated switch in your home’s main electrical panel — the gray metal box usually found in the garage, basement, or utility room.
- Go to your home’s main electrical panel.
- Look for the breaker labeled “Hot Tub” or “Spa.” A tripped breaker sits in the middle position — not fully ON and not fully OFF. It may also be slightly tilted compared to neighboring breakers.
- Push the breaker firmly all the way to the OFF position first.
- Then flip it firmly to the ON position.
- Return to the hot tub and test the jets.
Important: If the breaker trips again immediately after you reset it, stop. A breaker that trips repeatedly signals a wiring fault, a pump short, or water intrusion in the electrical system. This requires a licensed electrician — do not keep resetting it.
After a power outage: Power surges frequently trip hot tub breakers. This is the first thing to check any time the hot tub stops working after a storm or outage.
“If the breaker looks fine, the GFCI outlet may be the culprit — especially if the breaker reset didn’t restore power.”
Testing and Resetting Your GFCI Outlet
The GFCI outlet is a safety device — usually located near the hot tub, inside the equipment bay, or on an exterior wall — with two small buttons on its face labeled TEST and RESET. It looks like a standard outlet but with those two buttons in the center.
- Locate the GFCI outlet near your hot tub. Check the equipment bay, any outdoor outlets within 20 feet, or the wall nearest the tub.
- Press the TEST button. This intentionally cuts power to confirm the outlet is functioning.
- Press the RESET button firmly. You should hear a click, and the button should stay depressed (not pop back out).
- Restore power at the circuit breaker and test the jets.
If the GFCI won’t reset: The outlet is detecting a real electrical fault — water in the equipment bay, damaged wiring, or a failing pump. Do not force a reset. Call a licensed electrician.
Hot tub GFCI test button not working: If pressing TEST produces no change at all, the GFCI outlet itself is likely faulty and needs replacement. A new GFCI outlet costs $15–$30 at any hardware store.
“Power is confirmed? Let’s look at water flow problems — a dirty filter or closed valve is often the next culprit.”
Fixing Water Flow, Filter, and Valve Problems
Weak jets or jets that only work on one side of the tub almost always point to a water flow problem — not a pump failure. A dirty filter, a closed diverter valve, or a misadjusted air control valve are all free fixes that take under 15 minutes. The Department of Energy recommendations for spa pumps note that maintaining filter cycles and circulation pumps directly prevents jet flow restrictions and reduces energy consumption. You can also maintain hot tub filters and water flow with a simple monthly rinse routine to prevent most of these issues from recurring.
“A dirty filter is the leading cause of weak jet pressure — the U.S. Department of Energy recommends optimizing filter cycles to prevent flow restrictions and reduce energy consumption.”
Cleaning a Clogged Filter
The filter cartridge is a cylindrical pleated element that removes debris from the water. It’s located inside the filter housing — a cylindrical compartment near the waterline, usually accessible without tools. When it’s clogged, water can’t circulate freely, and jet pressure drops noticeably.
What you’ll need: Garden hose, optional filter cleaning solution, 15–30 minutes.
- Turn off the hot tub at the main circuit breaker.
- Locate the filter housing near the waterline and remove the filter cartridge by unscrewing or lifting it out (your owner’s manual shows the exact method for your model).
- Rinse the filter with a garden hose, spraying between each pleat at a 45-degree angle. Work from top to bottom.
- For heavy buildup — gray or brown discoloration, visible debris packed into the pleats — soak the filter in a filter cleaning solution (available at any pool supply store for $10–$20) for 8–24 hours, then rinse thoroughly.
- Reinstall the filter, restore power, and test the jets.
Replacement note: If the filter is cracked, the pleats are torn, or it’s more than 12 months old, replace it rather than clean it. A new filter cartridge typically costs $15–$50.
Hot tub filter cycle not working: If the tub’s automated filter cycle has stopped running, check the timer settings on your control panel (covered in the next section).
 6")
“Clean filter but jets still weak on one side? A diverter valve left in the wrong position is the likely cause.”
Opening Closed Diverter Valves
If only one side of your hot tub jets are working, a closed diverter valve is the most likely explanation. The diverter valve is a rotary handle — usually a T-bar or lever mounted on the tub shell near the jets — that redirects water flow between different jet zones.
How to identify a closed valve: When the handle sits perpendicular to the pipe (pointing across it), the valve is closed. When it sits parallel to the pipe (pointing along it), the valve is open.
To fix it: Turn the diverter valve handle to the parallel (open) position. Most tubs have two diverter valves controlling two separate jet zones — check both.
Some tubs have diverter valves inside the equipment bay rather than on the shell. If you don’t find handles on the tub exterior, open the access panel and look for lever-style valves on the plumbing lines near the pump.
“If the diverter valves are open but jets still lack power, check the air control valve next.”
Adjusting the Air Control Valve
The air control valve is a collar or dial on the tub’s shell — usually positioned near the top edge — that controls how much air mixes into the jet stream to create bubbles and pressure. When it’s fully closed, jets push water but with no force or aeration.
Symptom: Jets feel like they’re moving water but with almost no pressure and no bubbles.
Fix: Turn the collar counterclockwise to open it fully. This re-introduces air into the stream and restores the massaging pressure.
Why this gets missed: Many owners close the air control valve intentionally to keep water temperature higher — it’s a common energy-saving habit that becomes an accidental hot tub air control valve not working complaint when someone forgets they did it.
Dealing with Scale and Calcium Buildup
Sometimes, weak jet pressure isn’t caused by a dirty filter or a closed valve, but by invisible mineral deposits inside the plumbing. Hard water contains high levels of calcium and magnesium. When heated, these minerals precipitate out of the water and form a hard, white crust known as scale.
Scale buildup restricts the internal diameter of your hot tub’s pipes, forcing the pump to work harder while delivering less water to the jets. If you have cleaned your filter and fully opened all diverter valves but still suffer from weak flow, scale is the likely culprit. You can treat mild scale by adding a specialized spa descaler to the water and letting it circulate for a few days. For severe calcium blockages, you may need to perform a complete system flush using a plumbing line cleaner before your next drain and refill.
“Water flow confirmed normal? The next area to check is your control panel.”
Fixing an Unresponsive Hot Tub Control Panel
Why isn’t your hot tub control panel responding? Usually, it’s one of three things: a software freeze (fixed by a power cycle), a loose cable connection between the topside panel and the control box, or an active error code telling you something needs attention. Before assuming the panel is broken, try a reset first. If you need to diagnose hot tub control panel issues beyond a basic reset, the comprehensive DIY guide covers wiring checks in detail.
“A blank or frozen hot tub display is most often a software freeze — a 30-second power cycle at the breaker resets the control board and costs nothing” (onehottub.com).
The topside control panel is the waterproof button pad mounted on the hot tub shell that controls jets, heat, and lighting. Balboa — a manufacturer whose control systems power many hot tub brands, including Beachcomber and some Nordic models — is the most common control system you’ll encounter.
Performing a Control Panel Reset
A power cycle drains the control board’s capacitors and forces a full software restart. Think of it as rebooting a frozen computer.
What you’ll need: Access to your main circuit breaker, 3–5 minutes.
- Turn off the hot tub at the main circuit breaker (not just the topside panel button).
- Wait a full 30 seconds — this allows the control board’s capacitors to fully discharge and reset.
- Turn the breaker back on.
- Wait 2 minutes for the system to complete its boot sequence before pressing any buttons.
- Test the jet buttons on the topside panel.
If still unresponsive after a reset: Open the access panel and check that the ribbon cable connecting the topside panel to the control box is firmly seated in its connector. A loose ribbon cable is a common cause of panel failure, particularly in tubs more than 5 years old. Press the connector firmly until it clicks.
“If the panel lights up but shows a code you don’t recognize, use the table below to decode it.”
Reading Common Hot Tub Error Codes
Error codes are your hot tub’s way of telling you exactly what’s wrong. Here are the most common codes across Balboa and generic control systems:
| Code | What It Means | What to Do |
|---|---|---|
| FLO / FL | Water flow too low | Clean filter; check diverter valves; verify water level |
| OH | Overheating (water above safe temp) | Turn off tub; let cool 30 min; clean filter |
| HH | Sensor reading critically high | Turn off tub; call a technician |
| – – – | Temperature sensor disconnected | Check sensor wire connections at the control box |
| ICE | Freeze protection mode active | Normal in cold weather; jets may run automatically to protect pipes |
| SN / Sn | Sensor fault | Replace temperature sensor or call technician |
Brand note: Balboa-controlled tubs (Beachcomber, some Nordic) use these codes. Hot Springs hot tub control panel errors use a different code set — refer to your owner’s manual for brand-specific codes. If you’re seeing a balboa hot tub display not working message, a power cycle (above) resolves most display freezes before the codes appear.
“If the panel is working but the jets still won’t run, the pump or motor may be the issue.”
Diagnosing Pump and Motor Problems
 7")
Most owners assume a humming pump means the motor is fine. It doesn’t. After reviewing owner community reports and manufacturer service documentation, the consistent finding is that a pump can hum at full volume while delivering zero water flow — a symptom that points to either a residual air lock or a failed pump capacitor. Pump problems sit near the top of The Fix-First Ladder — they’re the most expensive rung, which is exactly why you diagnose everything else first.
The pump impeller is a spinning disc inside the pump that moves water through the jets. The pump capacitor is a cylindrical component that provides the starting boost of electricity the motor needs to spin — similar to how a car battery gives the engine its initial crank. The wet end is the water-handling half of the pump that contains the impeller, as opposed to the motor end.
Pump Is Humming But Not Moving Water
A humming hot tub pump that moves no water is almost always caused by either a residual air lock or a failed capacitor. The capacitor replacement costs around $15–$30 as a DIY fix — making it one of the most cost-effective repairs on the list.
- How to diagnose:
- First, confirm there’s no remaining air lock by repeating Method 2 (bleeding the pump union) from the air lock section above.
- If the pump hums and still moves no water after bleeding, the capacitor is the likely culprit. A failed capacitor produces a distinct hum followed by a clicking sound as the motor tries and fails to start.
- Turn off power at the breaker. Locate the pump and look for the capacitor — a cylindrical silver or black component mounted on the side of the motor housing.
- A bulging or leaking capacitor is visually obvious and confirms replacement is needed.
Capacitor replacement: Capacitors cost $15–$30 at electrical supply stores. Note the microfarad (µF) rating printed on the side before purchasing a replacement. If you’re not comfortable working near electrical components, this is a reasonable task for an appliance repair technician rather than a licensed electrician.
Checking the Pump Impeller for Clogs
A clogged impeller is less common than an air lock but more common than a failed motor. Debris — hair, leaves, sand — can jam the spinning disc and stop water flow entirely even when the motor runs.
What you’ll need: Flathead screwdriver, flashlight, towel, 20–30 minutes.
- Turn off all power at the breaker.
- Close the shut-off valves on either side of the pump (if your plumbing has them) to prevent flooding.
- Open the access panel and locate the wet end of the pump — the front half closest to the plumbing connections.
- Unscrew the wet end housing (usually 4–6 screws around the face plate).
- Use a flashlight to inspect the impeller. Look for hair, debris, or a foreign object lodged in the fins.
- Remove any debris carefully using your fingers or needle-nose pliers.
- Reassemble, restore power, and test.
If the impeller spins freely but flow is still poor: The wet end itself may be worn and require a wet end replacement — a new wet end assembly costs $80–$200 depending on brand.
Understanding Pump Cavitation
When diagnosing a humming pump, you might hear technicians use the term “pump cavitation.” Cavitation occurs when the pump tries to move water but pulls in air instead, creating a low-pressure vacuum. This vacuum causes microscopic bubbles to form and rapidly collapse against the pump impeller. Over time, these tiny implosions can pit the plastic or metal surfaces of the wet end, leading to permanent damage.
If your hot tub jets are not working and you hear a sound like gravel rattling inside the pump housing, you are likely experiencing severe cavitation. This is why clearing an air lock quickly is so important. Running a cavitating pump for extended periods will overheat the motor and destroy the impeller seals. Always turn off the breaker immediately if you suspect cavitation, and use the bleeding methods described earlier to purge the trapped air before restarting the system.
When the Pump Won’t Turn On At All
If the pump produces no sound and no vibration, the problem has moved beyond the pump itself. Common causes include a failed control board, a burned pump winding, or a disconnected power lead.
- Diagnostic steps:
- Confirm power is reaching the tub (breaker ON, GFCI reset, panel displaying normally).
- Open the access panel and visually inspect the wiring harness connecting the control box to the pump. Look for burned insulation, melted connectors, or loose terminals.
- If wiring looks intact, the control board — the main circuit board inside the equipment bay — may have failed. Control board replacement costs $200–$600 and typically requires a technician for installation.
- If a Jacuzzi hot tub circulation pump or an Intex hot tub air pump isn’t turning on at all despite confirmed power, contact the manufacturer’s service line directly — both brands have model-specific diagnostics available through their support portals.
2026 Repair Cost Matrix — Fix vs. Replace
 8")
How expensive is it to fix jets on a hot tub? The answer depends entirely on the cause — and the range is enormous. After reviewing repair data from Forbes Home and owner community cost reports, the cost difference between a free air lock fix and a pump replacement is more than $1,000. The Fix-First Ladder exists precisely to make sure you never buy a pump when a garden hose would have done the job.
Common Repair Costs in 2026
| Repair | DIY Cost | Professional Cost | Difficulty |
|---|---|---|---|
| Air lock (hose method) | $0 | $75–$150 service call | Easy |
| GFCI outlet replacement | $15–$30 | $100–$200 | Easy |
| Filter cartridge replacement | $15–$50 | $75–$150 | Easy |
| Pump capacitor replacement | $15–$30 | $100–$250 | Moderate |
| Jet insert replacement | $10–$40 per jet | $150–$300 (labor) | Easy–Moderate |
| Wet end replacement | $80–$200 | $300–$600 | Moderate |
| Full pump replacement | $200–$500 | $500–$1,000+ | Hard |
| Control board replacement | $200–$600 | $400–$900 | Hard |
| Complete jet manifold | $100–$300 | $300–$700 | Moderate |
Cost data based on owner community reports and Forbes Home repair cost data (Forbes Home, 2026). Prices vary by region, brand, and model.
Professional hot tub service averages $150–$500 per visit (Forbes Home, 2026) — which means a $15 capacitor installed by a technician becomes a $250 repair call. The DIY path is almost always worth attempting first for any item in the “Easy” or “Moderate” category above.
Fixing a 10-Year-Old Hot Tub?
According to Consumer Reports, the average lifespan of a well-maintained hot tub is 15–20 years. A 10-year-old tub is at the midpoint of its useful life — generally worth repairing unless the repair cost exceeds 50% of the tub’s current market value.
- Use this framework:
- Repair cost under $300 + tub is structurally sound: Almost always worth fixing
- Repair cost $300–$800 + tub is in good condition: Worth repairing if the shell, cabinet, and plumbing are solid
- Repair cost over $800 + multiple systems failing: Consider replacement — especially if the control board AND pump need work simultaneously
- Tub is over 15 years old + multiple failures: Replacement is usually the more economical path
A single pump replacement on a 10-year-old tub in otherwise good condition is a reasonable investment. A pump replacement plus a new control board plus a leaking shell is not.
Limitations and When to Call a Professional
Even a thorough DIY guide has boundaries. Knowing where those limits are is just as important as knowing the fixes.
Common DIY Mistakes to Avoid
Across owner community forums and manufacturer service documentation, these are the most frequently reported errors during hot tub self-repair:
- Resetting the breaker repeatedly without investigating why it tripped. A breaker that trips twice is telling you something. Forcing it back on a third time can damage wiring or cause a fire.
- Over-loosening the pump union. Turning the union more than a quarter-turn during air lock bleeding can crack the fitting. Use your hand only — never a wrench — and stop the moment air begins to hiss out.
- Skipping the 30-second wait after cutting power. Control boards hold a charge. Touching components immediately after cutting the breaker can still deliver a shock.
- Using a pressure washer on the filter cartridge. The high pressure damages the pleated media and creates micro-tears that allow debris to pass through. Always use a standard garden hose.
- Ignoring a scalloped bezel. The scalloped bezel — the decorative ring around a jet face — sometimes rotates to close the jet entirely. Before diagnosing a dead jet, try turning the bezel counterclockwise to open it fully.
Hot Tub Warranty Considerations
Before you open the equipment bay with a screwdriver in hand, take a moment to review your hot tub’s warranty status. Most new hot tubs come with a comprehensive warranty that covers the shell for five to ten years, and the plumbing, pumps, and control board for two to five years.
Attempting advanced DIY repairs—such as cutting plumbing lines, replacing the control board, or splicing pump wiring—can instantly void your manufacturer’s warranty. Simple maintenance tasks like resetting a GFCI, cleaning the filter cartridge, or bleeding an air lock are perfectly safe and expected of owners. However, if your tub is less than three years old and you suspect a failed pump capacitor or a burned-out control board, stop immediately. Call the dealership where you purchased the tub. Let the warranty cover the expensive parts and the professional labor.
When to Stop and Call a Technician
Some problems are genuinely beyond safe DIY repair. Call a licensed hot tub technician or electrician if:
- The circuit breaker trips immediately every time you reset it
- You see burned, melted, or corroded wiring inside the equipment bay
- You smell burning plastic or rubber when the tub runs
- The GFCI outlet won’t stay reset after verifying no water intrusion
- The control board shows error code HH or a sensor fault you cannot clear
- The pump produces a grinding noise (indicates bearing failure — a full motor replacement)
- You are unsure about any step involving the electrical panel or control box
Professional service averages $150–$500 per visit (Forbes Home, 2026), but that cost is far lower than the cost of a DIY electrical error. Some repairs genuinely require professional tools and licensing — this is not a failure, it’s good judgment.
Frequently Asked Questions
Cost to Fix Jets on a Hot Tub?
Most hot tub jet fixes cost between $0 and $150 as DIY repairs. An air lock costs nothing to fix. A new filter cartridge runs $15–$50. A GFCI outlet replacement costs $15–$30. More involved repairs — pump capacitor ($15–$30), wet end replacement ($80–$200), or full pump swap ($200–$500) — escalate from there. If you hire a professional, expect a service call fee of $150–$500 on top of parts (Forbes Home, 2026). Tackling the free fixes first prevents unnecessary professional costs.
How do you fix spa jets not working?
Start at the simplest fix and work up the ladder. First, check for an air lock by filling through the filter housing with a garden hose. Next, reset the circuit breaker and GFCI outlet. Then clean or replace the filter cartridge. Check that all diverter valves and the air control valve are fully open. If jets are still unresponsive, inspect the pump for a humming-but-no-flow condition, which often points to a failed capacitor. Most spa jets not working scenarios resolve at one of the first three steps.
How do you fix the jets in a hot tub?
Turn the scalloped bezel — the ring around each jet face — counterclockwise to confirm each jet is open, then work through the Fix-First Ladder. Individual jets that don’t work while others do are often simply closed at the bezel or blocked by a closed diverter valve. If all jets are dead simultaneously, the cause is almost always systemic — an air lock, electrical fault, or pump issue. Follow the numbered steps in each section above to isolate and fix the specific cause.
Fixing a 10-Year-Old Hot Tub?
Yes, in most cases — a 10-year-old hot tub is at the midpoint of its expected lifespan. Consumer Reports notes that a well-maintained hot tub lasts 15–20 years. A single repair costing under $300 on a structurally sound tub is almost always worth completing. The calculation changes when repair costs exceed 50% of the tub’s current market value, or when multiple major systems — pump, control board, and shell — need work simultaneously. A pump replacement alone on an otherwise healthy 10-year-old tub is a sound investment.
Average Hot Tub Lifespan?
A well-maintained hot tub lasts 15–20 years on average, according to Consumer Reports. Budget models and inflatable tubs typically last 5–7 years. Mid-range acrylic tubs from established brands (Jacuzzi, Hot Springs, Beachcomber) commonly reach 15+ years with regular filter cleaning, water chemistry maintenance, and annual professional inspection. The biggest lifespan killers are neglected water chemistry (which degrades seals and jets) and deferred maintenance on the pump and heater. A tub that gets consistent care routinely outlasts the 15-year benchmark.
Can low water levels cause jets to stop working?
Yes, low water levels can cause your hot tub jets to stop working by triggering the pump’s safety shutoff. Most modern hot tubs have sensors that detect when the water level drops below the skimmer line. To protect the pump from drawing in air and cavitating, the system will automatically disable the jets and heater. Always ensure your water level is at least halfway up the skimmer opening before diagnosing other mechanical or electrical issues.
Why are my hot tub jets surging on and off?
Hot tub jets that surge on and off are typically experiencing a flow restriction or a dirty filter. When the filter cartridge is clogged with oils and debris, the pump struggles to pull enough water through the system. This creates a vacuum effect that causes the pump to surge as it repeatedly catches and loses its prime. Removing and thoroughly cleaning the filter cartridge usually resolves this surging behavior immediately.
What to Do When the Jets Won’t Cooperate
Most hot tub jets not working situations resolve somewhere in the first three rungs of The Fix-First Ladder: an air lock, a tripped breaker, or a dirty filter. Applying a hot tub jets not working fix yourself is entirely possible with patience and the right sequence. After evaluating owner community reports and manufacturer service documentation, the pattern is consistent — the majority of non-working jet calls that reach a technician turn out to be free fixes the owner could have handled themselves. That’s exactly the gap this guide was built to close.
If you’ve worked through every section and the jets still won’t run, the problem is almost certainly in the pump or control board — and at that point, a professional service call is the right next step. You now have enough diagnostic knowledge to describe the exact symptom to the technician, which saves time and reduces the guesswork that inflates service bills.
Start with the air lock check. Reset the breaker. Clean the filter. In most cases, one of those three steps is where your answer lives. The Fix-First Ladder works because it’s built around where the actual problems are — not where they’re most dramatic. For a complete walkthrough of how to repair your hot tub beyond jets, the comprehensive DIY guide covers every major system. Ready to get started? Grab your screwdriver, head out to the tub, and begin with the simple air lock check to get your jets flowing again.